Mold House: Practical Guide to Safe Remediation
Step-by-step mold remediation guide for homeowners addressing mold house safely, with practical DIY tips and prevention strategies to protect indoor air quality.

Mold in a house is a common indoor contaminant that can signal moisture problems and affect air quality. This guide provides a practical path from inspection to prevention, balancing DIY steps with when to call professionals for safety and effectiveness. It is designed for homeowners and renters seeking practical, low-hassle actions.
What is mold in a house and why it matters
Mold in a house is a type of fungus that grows on organic materials when moisture is present. It can appear as black, green, white, or brown patches on walls, ceilings, and hidden spots behind cabinets. Even small colonies can produce spores that travel through the air, triggering allergic reactions, asthma flare-ups, or irritation for sensitive individuals. According to Mold Removal Lab, mold in homes often signals a moisture problem that should be addressed promptly to prevent structural damage and indoor air quality decline. The key to stopping its spread is first understanding where moisture comes from and how environments support mold growth. Common sources include leaky roofs, plumbing leaks, condensation on windows, and poor ventilation in damp basements or bathrooms. Early detection reduces cleanup time and avoids expensive remediation later. In addition to visible growth, musty odors can indicate hidden mold behind walls or under flooring. When you spot signs, create a simple map of affected areas and note where you see moisture, stains, or peeling paint. This mapping becomes the first step in a targeted remediation plan that minimizes disruption and preserves building materials.
How mold grows in home environments
Mold requires three elements: moisture, a food source (such as wood, fabric, or drywall), and a suitable temperature. In most houses, moisture provides the trigger. Leaks, high humidity, or poor drainage can keep surfaces damp long enough for spores to colonize. Mold doesn't need sunlight; in fact, many species thrive in low-light, warm, and humid corners. Once a colony forms, it sends out tiny spores that travel through the air and settle on new surfaces, continuing the cycle. Visible growth often appears as fuzzy patches, slimy spots, or powdery residues, but some species look like discoloration rather than obvious mold. Materials like drywall, wallpaper, carpet, and wood can harbor mold if they stay damp for extended periods. It’s important to differentiate mold from mildew, which is typically cosmetic and easier to remove from non-porous surfaces; mold tends to penetrate porous materials and may require removal. Maintaining consistent airflow, addressing leaks promptly, and reducing humidity are practical ways to suppress growth. Using a moisture meter can help you monitor problem areas, while regular inspections after heavy rains or plumbing work reduce the risk of sudden outbreaks.
Health and safety considerations when addressing mold
Exposure to mold can affect air quality and health, particularly for children, older adults, and those with allergies or asthma. Before you begin, wear appropriate PPE: a respirator (not just a dust mask), disposable gloves, and eye protection. Work in a well-ventilated area and avoid disturbing large mold patches, which can release spores. If you have a suspected or known allergic or respiratory condition, consider postponing DIY cleanup and consult a professional. Always isolate the affected area with plastic sheeting to prevent spores from spreading to other rooms. Keep pets and children away during cleanup, and dispose of contaminated materials in sealed bags. After cleaning, thoroughly wash reusable tools and wash hands and face to minimize cross-contamination. If large areas are affected (for example, more than a few square feet) or if there is visible water damage, seek professional remediation; extensive mold growth or hidden infestations may require specialized equipment and training. Health concerns also extend to indoor air quality over time, so plan follow-up inspections to confirm a dry, mold-free environment.
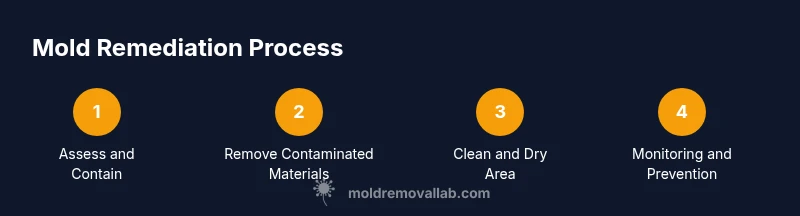
Immediate actions you can take before professional remediation
First, identify the moisture source and stop it if possible—fix leaks, improve drainage, or reduce indoor humidity. Next, contain the area to prevent spores from spreading; close doors, seal gaps, and lay plastic sheeting with tape. Then, carefully remove and bag porous materials contaminated by mold (like drywall or insulation) and dispose of them outside the living space. For non-porous surfaces, scrub with a detergent solution and a stiff brush, then rinse and dry completely. Use a HEPA-filter vacuum to clean hard surfaces and nearby floors, being careful not to aerosolize spores. Dry the area thoroughly with fans or dehumidifiers, ensuring airflow reaches all nooks and corners. Document moisture conditions and mold extent with photos for reference. Finally, monitor progress over the next days and avoid reintroducing moisture until the area stays dry.
Long-term prevention and maintenance to keep mold at bay
Preventing mold is easier than remediation, so make moisture control a routine habit. Repair roof leaks promptly, insulate pipes, and ensure bathrooms have adequate ventilation, using exhaust fans or opening windows during and after showers. Regularly inspect areas prone to dampness, such as basements, laundry rooms, and under sinks, and address minor staining or condensation early. Set up a simple maintenance calendar to remind you to check humidity levels, run dehumidifiers in damp seasons, and re-seal grout and caulking as needed. Keep surfaces clean and dry, especially in warmer months when mold can spread quickly. If you rent, discuss mold prevention responsibilities with your landlord; if you own, consider an annual professional inspection as part of home maintenance. Finally, document improvements and monitor humidity again after heavy rain events to ensure conditions stay unfavorable to mold growth.
Tools & Materials
- NIOSH-approved respirator(Ensure proper fit and eye safety coverage)
- Disposable gloves(Nitrile or latex, avoid rubber that tears easily)
- Goggles or eye protection(Protect eyes from splashes and spores)
- Plastic sheeting (6 mil) and tape(To seal off areas and protect contents)
- HEPA vacuum or vacuum with HEPA filter(For dust and spore containment)
- Detergent or mild cleaner(Use on non-porous surfaces)
- Scrub brushes and rags(For scrubbing and wiping surfaces)
- Trash bags (heavy-duty)(Seal and dispose of contaminated materials)
- Moisture meter or hygrometer (optional)(Helps track drying progress)
- Portable dehumidifier or fans(Promotes drying and airflow)
- Flashlight or headlamp(Reveals hidden mold in dark corners)
Steps
Estimated time: 2-6 hours depending on area and moisture source
- 1
Survey and document mold-affected areas
Walk through the space to identify visible mold and signs of moisture. Photograph and map affected zones before starting any work so you can track changes and verify remediation success.
Tip: Take wide shots and close-ups to capture both scale and texture. - 2
Protect yourself and seal the area
Put on PPE, ventilate the space if possible, and seal the area with plastic sheeting to prevent spores from spreading to clean areas.
Tip: Work from clean to dirty zones to reduce cross-contamination. - 3
Stop the moisture source
Address leaks, condensation, or humidity sources to prevent ongoing mold growth. If leaks are ongoing, don’t start cleanup until a fix is in place.
Tip: Document the moisture fix with notes and receipts. - 4
Remove and bag porous contaminated materials
Carefully remove porous materials like drywall or insulation that are mold-infested and place them in sealed bags for disposal.
Tip: Do not reuse contaminated materials; seal immediately. - 5
Clean non-porous surfaces and items
Scrub hard, non-porous surfaces with detergent solution and rinse; follow with thorough drying. Use a HEPA vacuum for dust and spores on surrounding areas.
Tip: Avoid soaking materials; moisture fuels regrowth. - 6
Dry the area completely
Run dehumidifiers and fans to dry all surfaces and hidden nooks. Confirm dryness before removing containment and reopening the space.
Tip: Aim for a completely dry condition before final inspection. - 7
Plan for prevention and monitoring
Install ongoing moisture controls, perform periodic inspections, and document progress to catch early signs of mold before they spread.
Tip: Create a simple reminder system for seasonal checks.
FAQ
What are the most common signs of mold in a house?
Visible patches, musty odors, water stains, and warped surfaces signal mold growth. If you notice any of these signs, inspect the area further and consider professional testing if the problem is extensive.
Common signs include patches on walls and a musty smell. If you notice these, inspect further and consider testing if the area is large.
Can I remove mold myself or should I hire a professional?
Small, isolated areas may be doable with basic cleaning and moisture control. Larger infestations, hidden mold, or mold present in HVAC systems typically require professionals.
Small areas can be cleaned yourself, but larger or hidden mold should be handled by pros.
How long does remediation typically take?
Timeline depends on area size and moisture control. Small jobs may complete in hours; larger infestations can take days, especially if structural work is needed.
Time varies, but it can range from a few hours to several days depending on extent.
Is there a health risk to pets?
Mold exposure can affect pets, causing coughing, sneezing, or skin irritation. Keep animals away during cleanup and ensure the area is dry before pets re-enter.
Pets can be affected by mold; keep them away during cleanup and ensure drying completes before re-entry.
What moisture sources cause mold in houses?
Leaks, condensation, poor ventilation, and damp basements are common culprits. Fixing these sources is essential to prevent recurrence.
Leaks and poor ventilation are common mold triggers; fix moisture sources to prevent regrowth.
When should I test my home for mold?
Test when you suspect hidden growth, after remediation, or if dampness remains despite cleanup. Testing helps verify the area is mold-free.
Test if you suspect hidden growth or after cleanup to confirm the space is mold-free.
The Essentials
- Identify moisture sources before cleanup.
- Protect yourself with proper PPE and containment.
- Contain, clean, and thoroughly dry affected areas.
- Prevent mold with ongoing moisture control and inspections.