Mold on Plastic: Safe Removal and Prevention Guide
Practical, safe methods to remove mold on plastic surfaces, protect your family, and prevent regrowth with proven cleaners, ventilation, and maintenance routines.

Remove mold on plastic surfaces safely by cleaning, scrubbing, and drying thoroughly. Prioritize ventilation and PPE. For full, detailed steps and safety tips, see our complete guide—click to read now.
Mold on Plastic: What It Is and Why It Matters
Plastic is a common surface in kitchens, bathrooms, toys, and electronics enclosures. Mold on plastic occurs when moisture and warmth allow mold spores to settle on surfaces that are not completely sealed. On non-porous plastics, mold might appear as green, black, or white films, yet the spores can hide in seams, under labels, or inside crevices. According to Mold Removal Lab, mold on plastic surfaces can develop when moisture accumulates due to leaks, high humidity, or condensation. The phrase 'mold plastic' is often used by homeowners to describe this problem, and it signals a risk that requires timely action. This guide sticks to practical, science-informed steps that homeowners and renters can perform safely. Regardless of where the mold is found, addressing moisture is the first priority. In many households, plastic items like storage bins, shower caddies, toys, or appliance housings can harbor mold just out of sight. By understanding how mold establishes on plastic, you can break the cycle and prevent regrowth through control of humidity, cleaning routines, and routine inspections.
How Mold on Plastic Starts: Conditions and Pathways
Mold on plastic typically begins when moisture is present for extended periods and temperatures that support fungal growth align with limited air flow. Condensation from cold surfaces, leaks in plumbing or roofs, and high indoor humidity create ideal conditions for mold to take hold on plastic items. Plastic surfaces that are rarely cleaned, or that trap dust and skin oils, offer nutrients that encourage spores to multiply. Based on Mold Removal Lab Analysis, 2026, persistent moisture is a key trigger, and even small amounts of standing water near plastic items can sustain growth in hidden seams, labels, and crevices. Understanding these pathways helps you target problem areas—think stash zones like under sinks, behind appliances, and in stored bins where humidity can linger.
Health and Household Risks of Mold on Plastic
Mold growth on plastic can pose health risks, especially for children, the elderly, and people with allergies or asthma. Spores released from mold can irritate the eyes, nose, throat, and lungs, and some individuals may experience coughing, sneezing, or skin irritation after exposure. In homes, prolonged exposure to mold on plastic may contribute to indoor air quality concerns, particularly in damp basements, bathrooms, or garages. The Mold Removal Lab team emphasizes that reducing exposure is the first line of defense: isolate the contaminated items when possible and clean contaminants promptly. While many plastics are nonporous, mold can still hide in micro-cracks and seams, so comprehensive cleaning is essential for safe use of the items afterward.
Safe Materials and PPE for Cleaning Plastic Mold
Before you begin, assemble PPE to protect yourself from mold exposure: disposable N95 respirator, safety goggles, and non-linting gloves. Ensure good ventilation by opening windows or using a fan directed to the outside. Select cleaning agents that are safe for plastics and effective against mildew: mild detergent, hydrogen peroxide (3%), white vinegar, or alcohol-based cleaners can work for many plastics. Avoid mixing cleaners, which can release dangerous fumes. Test any cleaner on a small, inconspicuous area of the plastic first to check for discoloration or damage. Keep pets and children out of the work area during cleaning. Always discard disposable rags and tapes after use to prevent cross-contamination.
Cleaning Approaches: Quick Natural vs Chemical Methods
Natural options like mild detergent with warm water or white vinegar can remove surface mold and deodorize plastic with minimal risk of damage. Hydrogen peroxide is a more aggressive but still plastic-friendly option for tougher stains; apply, let sit briefly, then scrub and rinse. For stubborn growth or mold rooted in seams, a diluted bleach solution may be considered, but only if the plastic is bleach-safe and you follow strict ventilation and protective guidelines. Bleach can degrade certain plastics and create harmful fumes, so read product labels and test first. Always finish with thorough drying to deter regrowth.
Post-Cleanup Considerations: Drying, Odor, and Sealants
Drying is essential after cleaning; use a clean towel or air-dry in a well-ventilated space. Mold can reappear if moisture remains, so consider using a dehumidifier or moisture absorber to maintain low humidity in the area. If odors persist, sanitize the space again and consider replacing particularly porous or damaged plastic items. If mold returns within a few weeks, the issue may stem from an ongoing moisture source (leak, poor ventilation, or hidden mold behind panels) that requires professional assessment. Remember, the goal is to remove visible growth and prevent recurrences by controlling moisture.
Prevention and Maintenance for Plastic Surfaces
To reduce the chance of mold returning on plastic, implement a routine: fix leaks promptly, improve ventilation in moisture-prone areas, and wipe down plastic items after exposure to water. Regular cleaning with an appropriate plastic-safe cleaner, followed by complete drying, helps maintain hygiene and extend the life of plastic goods. Store items off the floor, keep storage areas dry, and monitor humidity levels with a reliable gauge. Routine inspection of crevices, seams, and stickers or labels will catch moisture buildup early. The Mold Removal Lab analysis highlights that consistent maintenance is the most effective defense against mold on plastic.
Authoritative Sources and Practical References
For readers seeking official guidance, consult trusted sources on mold and indoor air quality. EPA’s mold page provides general information on mold growth and prevention, while OSHA and CDC/NIO SH guidance cover safe handling and exposure considerations. Practical mold remediation also benefits from local building codes and health department recommendations. For more details, see the following sources: EPA Mold (https://www.epa.gov/mold), OSHA Mold (https://www.osha.gov/mold), and CDC/NIOSH Indoor Environment mold resources (https://www.cdc.gov/niosh/topics/indoorenv/mold.html). These references support a practical, safety-first approach to mold cleanup on plastic surfaces.
Key Takeaways and Next Steps
- Identify moisture sources and address them quickly to prevent mold on plastic. - Always wear PPE and work in a ventilated area. - Prefer plastic-safe cleaners and drying after cleaning to avoid regrowth. - Avoid mixing cleaners and always test a small area first. - Implement humidity control to keep mold risk low over time.
Tools & Materials
- Disposable gloves (nitrile)(Powder-free, latex-free for skin sensitivity)
- N95 respirator(Fit-tested if possible)
- Safety goggles(Wraparound type preferred)
- Microfiber cloths or non-abrasive sponge(Lint-free, washable)
- Soft-bristle brush(For crevices without scratching)
- Spray bottle(For controlled application)
- Plastic-safe cleaner (detergent-based)(Mild cleaning solution)
- White vinegar (5% acetic acid)(Natural option for mild mold)
- Hydrogen peroxide (3%)(Disinfectant option for tougher mold)
- Isopropyl alcohol (70%)(Fast-drying antiseptic option)
- Baking soda(Deodorizing and gentle abrasive)
- Dehumidifier or moisture absorber(Keep RH low in cleaning area)
- Trash bags(Seal contaminated materials)
Steps
Estimated time: 60-90 minutes
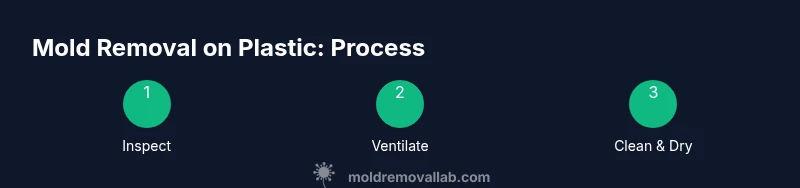
- 1
Inspect and identify mold on plastic
Carefully inspect all sides of the plastic item, including edges, seams, and under labels where mold may hide. Note any discoloration or musty odor. A visual check helps you plan the cleaning approach and determine whether the item is salvageable.
Tip: Take photos of the mold areas to guide re-inspection and to document results. - 2
Ventilate and prepare the area
Open windows and run a fan to direct air outside. Remove children and pets and place a protective covering on nearby surfaces to prevent cross-contamination. PPE should be worn before handling any mold-affected items.
Tip: Set up a dedicated workspace away from food preparation areas. - 3
Choose a cleaning solution
Select a plastic-safe cleaner such as mild detergent, 3% hydrogen peroxide, or white vinegar. Do a small patch test first to ensure the cleaner does not damage the plastic surface or remove color.
Tip: Avoid bleach on most plastics unless the label explicitly says it is safe. - 4
Apply cleaner and scrub
Spray or apply cleaner to the moldy area and scrub with a non-abrasive cloth or soft brush. Focus on seams and crevices where mold tends to accumulate. Do not saturate the item.
Tip: Work from the outside edge toward the center to prevent spreading spores. - 5
Rinse and dry thoroughly
Rinse with clean water or wipe with a damp cloth. Dry all surfaces completely using a dry towel and allow additional air drying in a well-ventilated space. Use a dehumidifier if available.
Tip: Do not store the item until it is fully dry to prevent regrowth. - 6
Re-inspect and decide on next steps
After drying, re-check for any remaining mold. If you still see growth, consider repeating the cleaning step or replacing the item if contamination is extensive or hidden behind barriers.
Tip: If mold returns quickly, there may be a persistent moisture source that needs professional assessment.
FAQ
Can mold on plastic be harmful to health?
Yes. Mold on plastic can irritate the respiratory tract, especially for sensitive individuals. Prolonged exposure may worsen allergies or asthma. Reducing exposure and cleaning promptly helps reduce risk.
Yes. Mold on plastic can irritate the lungs and worsen allergies or asthma in sensitive people. Clean promptly and ventilate well.
Is mold on plastic always visible, or can it hide behind seams?
Mold can hide in seams, under labels, and inside crevices even when the surface looks clean. Thorough inspection and cleaning should include these hidden areas.
Mold can hide in seams and crevices, so check those areas during inspection.
What cleaning products are safe for plastic surfaces?
Mild detergents, white vinegar, and hydrogen peroxide are common plastic-safe options. Always test a small area first and avoid chlorine bleach unless the plastic is labeled safe.
Use mild cleaners like detergent, vinegar, or hydrogen peroxide, and test first.
Should I use bleach to remove mold from plastic?
Bleach can damage many plastics and release strong fumes. Only use if the product label explicitly says it’s safe for the material and ensure proper ventilation.
Bleach isn't always safe for plastic; check the label and ventilate well if you use it.
How long does it take to remove mold from plastic?
Most routine cleanups take about an hour or two, depending on the extent of growth and the number of items involved. Larger problems may require extra time or repeated treatment.
Most cleanups take about an hour or two, depending on growth extent.
When should I replace plastic items rather than cleaning them?
If mold penetrates porous areas, causes persistent odor, or returns after cleaning, replacing the item is often more effective and safer.
If mold keeps coming back or the item is structurally damaged, replace it.
Watch Video
The Essentials
- Identify moisture sources early and address them.
- Wear PPE and ensure proper ventilation during cleanup.
- Choose plastic-safe cleaners and dry items completely.
- Avoid mixing cleaners and test on a hidden area first.
- Maintain humidity control to prevent mold regrowth.