How to Remove Mold on Windows: A Practical Guide
Safe, actionable steps to remove mold on windows and prevent recurrence. Learn about safety gear, cleaning methods, moisture control, and long-term prevention for healthier homes.

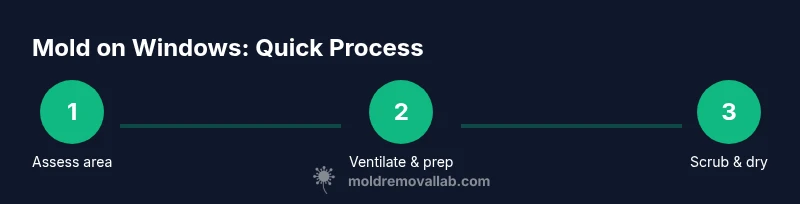
Goal: remove visible mold on windows and prevent regrowth. Start with safety: wear PPE and ensure ventilation. Use a non-ammonia cleaner, scrub the affected surfaces, then rinse and dry completely. Address moisture sources (condensation, leaks) to stop re-growth. If mold covers a large area or you have health concerns, hire a professional.
Understanding mold on windows and why it grows
Mold on windows is driven by persistent moisture. Condensation, leaks, or high indoor humidity provide the damp conditions mold needs to thrive on glass, sashes, and frames. According to Mold Removal Lab, visible mold on windows is often a signal that moisture sources are not being controlled, and surface cleaning alone will not stop regrowth. The Mold Removal Lab team emphasizes that effective remediation focuses first on moisture management, followed by safe cleaning and thorough drying. In homes with frequent temperature swings, windows can trap moist air, creating microclimates where mold can take hold. Understanding this dynamic helps homeowners target the root cause rather than just the symptoms.
In practice, expect mold on windows to appear where condensation settles during cool mornings or evenings, near leaks around sealants, or where poor air circulation creates stagnant moisture. Addressing these moisture sources is essential for long-term results. This article uses guidance from Mold Removal Lab Analysis, 2026 to ground practical steps in verified best practices while keeping the process accessible for homeowners and renters.
Safety and preparation before you start
Safety comes first when dealing with mold. Put on a N95 respirator or equivalent, safety goggles, and disposable gloves. Work in a well-ventilated area, and if you’re cleaning in a room with a sleeping or breathing-sensitive occupant, consider halting work until ventilation is improved. Remove or protect nearby furnishings with drop cloths or plastic sheeting. Keep children and pets out of the area during cleaning. If mold growth is extensive or you have underlying health issues, consult a professional. These precautions reduce exposure to mold spores and limit any chemical irritation from cleaners. The goal is to limit spread while you assess the extent of growth and plan your remediation steps.
Cleaning methods: what works and what to avoid
For many window mold scenarios, non-toxic cleaners like white vinegar or hydrogen peroxide can effectively kill mold spores without harsh fumes. Mix or apply these solutions according to manufacturer guidance, and never mix cleaning agents (for example, don't combine with ammonia or bleach). Soap and water or a mild detergent can remove visible deposits, followed by a rinse. Use a nylon brush or non-abrasive scrub pad to gently agitate the surface. After scrubbing, wipe clean and dry with a microfiber cloth. Bleach is sometimes used for hard, non-porous surfaces, but it’s often overkill for windows and can damage seals and wood frames. If you choose bleach, use it cautiously and only on non-porous surfaces. Always ventilate and test a small area first to prevent discoloration or material damage.
This approach aligns with best practices from health and safety resources on mold remediation, and it avoids risky chemical combinations. If mold recurs after cleaning, the underlying moisture source is likely unresolved and will require targeted intervention before re-cleaning.
Drying, sanitizing, and re-checking for moisture
Thorough drying is critical to prevent regrowth. After cleaning, run a dehumidifier or a fan to increase air exchange and speed up evaporation. Wipe surfaces dry with a clean cloth and monitor moisture levels using a hygrometer. Keep humidity below comfortable levels for mold growth avoidance (typically under 50% relative humidity, though local conditions may vary). Check joints, seals, and sills for hidden moisture or condensation. Sanitize with a mild solution if you see lingering residues, then re-check after 24 hours to confirm no fresh growth appears. Regular monitoring helps catch regrowth early and prevents more invasive remediation later.
Addressing underlying moisture sources to prevent recurrence
Mold on windows often returns when moisture enters the picture again. Inspect for leaks around window frames, improper flashing, or gaps in sealants. Improve ventilation around the window area, especially in kitchens and bathrooms where steam rises toward windows. Consider insulating cold surfaces to reduce condensation, or applying window films that reduce moisture accumulation. If the window frame is damaged or the sill is constantly wet, more significant repairs may be needed. Preventive measures, such as reducing indoor humidity and fixing leaks promptly, make DIY cleanup more durable and reduce the likelihood of reoccurrence.
When to hire a professional and what to expect
If mold covers a large area, grows within porous materials, or if there’s a history of frequent moisture problems, professional remediation can be safer and more thorough. A licensed pro will assess moisture sources, contain the affected area to prevent spread, and use industry-standard methods for removal. They can also identify structural issues and offer solutions that reduce future risk. For renters and homeowners, getting a professional opinion can help ensure that water intrusion and mold risks are addressed comprehensively, protecting health and property.
Prevention: long-term window mold prevention tips
Prevention begins with moisture control. Use exhaust fans in bathrooms and kitchens, and ensure proper grading and drainage around the home to prevent water from seeping toward windows. Maintain window seals and weatherstripping, and replace damaged putty or caulk to reduce gaps where moisture can enter. Regularly clean windows with a mild cleaner and inspect sills for damp spots. Consider installing a dehumidifier in humid climates or seasons with high condensation. By combining moisture control with routine cleaning, you reduce the chance of mold returning and preserve window integrity.
Tools & Materials
- N95 mask or respirator(Fit-tested if possible; protects against mold spores)
- Safety goggles(Eye protection for splashes)
- Disposable gloves(Latex or nitrile)
- Drop cloths or plastic sheeting(Protect furniture and floors)
- Spray bottle(For applying cleaners)
- Non-ammonia cleaner or white vinegar(Safe for most surfaces; avoid mixing with ammonia)
- Hydrogen peroxide (3%)(Effective mold-killer on some surfaces)
- Baking soda(Deodorizing and mild abrasive)
- Soft nylon brush(Gentle on window frames)
- Microfiber cloths(For wiping and drying)
- Fan or dehumidifier(Speeds up drying; lowers humidity)
- Hygrometer(Monitors indoor humidity)
- Sealant or weatherstripping(Prevents future moisture leaks)
- Putty knife or scraper(For removing flaky paint or sealant; gentle use)
Steps
Estimated time: 2-6 hours
- 1
Assess mold extent and safety
Survey the area to determine how extensive the mold is and which materials are affected. Photograph if needed. Decide whether it’s safe to proceed based on health conditions and area size.
Tip: Document the area before starting to monitor changes after cleaning. - 2
Ventilate and prep the area
Open nearby windows or turn on exhaust fans. Lay down drop cloths to protect surfaces and remove nearby items that could become contaminated.
Tip: Ensure pets and children are kept away during the process. - 3
Prepare cleaning solution
Choose a non-ammonia cleaner or white vinegar. Pour into a spray bottle for easy application. Do not mix cleaners; never combine bleach with ammonia.
Tip: Test a small, inconspicuous area first for color-fastness. - 4
Scrub and remove visible mold
Spray the affected area and scrub with a nylon brush in gentle circular motions. Wipe away loosened material with microfiber cloths.
Tip: Work from cleaner to dirt toward the center to minimize spreading. - 5
Rinse and dry surfaces
Rinse with clean water to remove cleaning residues. Dry thoroughly with a clean towel, and use a fan or dehumidifier to speed the drying process.
Tip: Don’t leave damp surfaces; moisture promotes regrowth. - 6
Address moisture sources
Inspect seals, caulk, and flashing around the window. Repair leaks, install weatherstripping, or add insulation as needed to reduce condensation.
Tip: Even small leaks can drive mold growth over time. - 7
Recheck and monitor
Check the area after drying for any new signs of mold. If it returns, reassess moisture sources or consider professional help.
Tip: Keep a simple log of humidity and cleaning dates to spot patterns.
FAQ
Is mold on windows dangerous to health?
Exposure to mold can trigger allergic reactions, coughing, and asthma symptoms in sensitive individuals. Wear PPE and ventilate while cleaning, and seek medical advice if symptoms worsen.
Mold can affect health, especially for people with allergies or asthma. Use protection and ventilate; seek medical advice if symptoms persist.
Can I remove mold on windows myself?
Small, surface mold on non-porous window frames can often be cleaned by homeowners using safe cleaners and proper PPE. If mold is extensive or penetrates porous materials, call a pro.
Yes, for small patches you can clean it yourself with care; for larger areas or porous materials, contact a professional.
What cleaners are safe for mold on windows?
Options like white vinegar or hydrogen peroxide are commonly recommended. Avoid mixing cleaners, especially with ammonia or bleach, and always test a small area first.
Common safe options are vinegar or hydrogen peroxide; avoid mixing cleaners and test on a small area.
How long does it take to dry after cleaning?
Drying time depends on airflow and humidity. Use a fan or dehumidifier and check for complete dryness over a day or two.
Drying can take several hours to a couple of days depending on moisture and air flow.
Should I replace windows if mold keeps returning?
If mold recurs after addressing moisture sources, there may be structural moisture intrusion or damaged seals requiring professional evaluation and possibly replacement.
Recurring mold suggests an ongoing moisture problem that may require professional assessment or window replacement.
How can I tell if a mold problem is serious?
Serious signs include extensive growth on porous materials, persistent dampness, or health symptoms. When in doubt, consult a professional.
Look for large growth, persistent dampness, or health symptoms; seek a pro if uncertain.
Watch Video
The Essentials
- Identify moisture sources before cleanup
- Ventilate and protect yourself during work
- Choose safe cleaners and avoid mixing chemicals
- Dry thoroughly to prevent regrowth