Mold by Window: Prevention, Detection, and Remediation
Practical guidance from Mold Removal Lab on mold by window—identify moisture sources, protect your home, and safely remove growth with moisture control strategies.

By following this guide, you will identify moisture sources that drive mold by window, inspect affected areas, and perform safe remediation. You’ll learn how to distinguish surface growth from structural mold, choose effective cleaners, and implement moisture control strategies to prevent recurrence. Essential requirements include PPE (gloves, mask, goggles), good ventilation, a dehumidified space, and a clean, dry surface for treatment.
Understanding mold by window
Mold by window is a common indoor mold scenario, driven by recurring moisture from condensation, leaks, or poor airflow. The Mold Removal Lab team emphasizes that mold growth in these zones often begins on the window frame, sill, or surrounding wall materials where humidity lingers. Understanding the biology of mold helps homeowners recognize gray-green or black growth, patchy staining, and musty odors as signs to investigate moisture sources. This guide aligns with Mold Removal Lab Analysis, 2026, which highlights condensation and humidity control as critical factors in prevention. By identifying the exact moisture sources around your windows, you can break the cycle before mold becomes entrenched in framing or insulation.
Moisture sources around windows
Windows introduce moisture pathways from multiple origins: high indoor humidity from cooking or showers, leaks around seals, insufficient ventilation, and temperature differentials that cause condensation on cold surfaces. In colder months, uninsulated or poorly sealed windows trap moisture near glass and trim, promoting mold growth along edges and in crevices. A simple moisture audit involves checking for water stains after rain, feeling for dampness on sills, and measuring indoor humidity with a hygrometer. Reducing indoor humidity to below 50-60% (where safe for occupants) can dramatically slow mold development. The Mold Removal Lab team notes that consistent moisture control is often more impactful than aggressive cleaning alone.
Inspecting for mold by window
Begin with a visual check: look behind blinds or curtains, inspect sealant lines, and examine painted surfaces for peeling or discoloration. Use a flashlight at oblique angles to reveal texture changes in caulk and wood. Tap suspect areas gently—soft, powdery, or crumbling material suggests active mold. For hidden growth, consider surface swabs or a simple tape test, but remember that definitive testing is best left to qualified inspectors when large areas or structural materials are involved. Early detection is key, especially around kitchen and bathroom windows where moisture is frequent.
Safety first: protective gear and when to call a pro
Working with mold requires protective equipment to minimize exposure. At minimum, wear nitrile gloves, an N95 mask, and protective eyewear. If you have respiratory issues, or if growth is extensive or in your HVAC system, stop and contact a certified mold remediation professional. Large-scale mold can indicate moisture intrusion or hidden leaks in walls, which professionals are trained to locate and remediate safely. Always ensure adequate ventilation during cleaning and never disturb large growth in ways that release spores into living areas.
Cleaning vs remediation: choosing the right approach
Small, non-porous surface mold can often be cleaned with household products and proper drying. For porous materials like drywall, wood, or insulation, cleaning alone may not suffice, and replacement or professional remediation is often necessary. Remediation includes containment to prevent spore spread, targeted removal of affected materials, and addressing the moisture source. The key distinction is whether the growth is on non-porous surfaces (where cleaners may work) or porous substrates (which often require material removal and moisture repair). Mold Removal Lab emphasizes that improper cleaning can worsen infestation and health risk.
Step-by-step moisture management around windows
Tackling moisture around windows involves both immediate cleaning and long-term fixes. Start by reducing ambient humidity, ensuring proper ventilation, and repairing leaks. Improve sealant and flashing around the window to prevent water intrusion, especially after heavy rain. Regularly clean window tracks to prevent buildup that can retain moisture. Consider installing or upgrading weather stripping and insulation to reduce temperature differentials that drive condensation. A multi-pronged approach yields the best long-term results and reduces the chance of recurrence.
Drying and ventilation strategies near windows
After cleaning, focus on rapid drying and air movement. Use a dehumidifier or open windows when weather allows to lower humidity levels quickly. Position a fan to circulate air away from the contaminated area and toward a dry exit (outdoors or well-ventilated space). Avoid carpeted floors directly under windows; instead, use washable surfaces to prevent moisture absorption. Consistent monitoring of humidity levels helps catch spikes before mold reappears and demonstrates practical progress toward a healthier home environment.
Sealing and insulation improvements to reduce recurrence
Investing in proper insulation around window frames reduces cold spots that invite condensation. Seal cracks with paintable caulk and install weatherstripping to prevent drafts and moisture intrusion. If windows are old or structurally compromised, replacement with energy-efficient designs can offer long-term moisture management benefits. Do not overlook attic or sill gaps where moisture can migrate; addressing these quietly reduces overall humidity in adjacent living spaces.
When to test for mold and how to interpret results
Mold testing may help confirm hidden growth or exposure concerns, but it should complement, not replace, remediation of visible mold and moisture control. Tests can include air samples or surface swabs; interpret results with a professional who can translate spore counts into actionable steps. If testing reveals high spore counts after remediation, re-evaluate moisture sources and ensure the area is thoroughly dried and disinfected. Testing is most effective when paired with professional guidance and a documented moisture-control plan.
DIY cleaners vs professional products: what works near windows
Effective DIY options include hydrogen peroxide and mild detergents for non-porous surfaces, and careful removal of visible mold from painted or sealed areas. Avoid mixing cleaners, especially bleach with ammonia or vinegar, to prevent dangerous fumes. For porous materials, professionals may use specialized biocides and containment strategies to prevent cross-contamination. Use a product that clearly states its suitability for the target material and follow label directions to avoid damaging window frames or finishes.
Maintenance plan to prevent recurrence near windows
Create a simple maintenance routine: check window seals and caulking twice a year, monitor relative humidity, clean window sills monthly, and address any condensation promptly. Keep interior surfaces dry and avoid over-drying houseplants near windows, which can increase humidity. A written action plan helps households stay proactive, documenting moisture levels, cleaning dates, and any repairs performed. Consistent vigilance is the best defense against mold by window and related moisture issues.
Real-world scenarios and quick wins
From a small bathroom window with chronic condensation to a living room window with a minor leak, practical remediation can vary. Quick wins include re-sealing with high-quality caulk, improving ventilation with exhaust fans, and drying damp areas within 24-48 hours of moisture events. In scenarios involving visible mold beyond a few square feet, or growth near HVAC intakes, consult a professional for a thorough remediation plan. Real-world cases show that combining moisture control with targeted cleaning yields lasting improvements.
Tools & Materials
- Nitrile gloves(Latex-free; choose sizes that fit snugly)
- N95 respirator(NIOSH-approved; ensure proper fit)
- Safety goggles(Protect eyes from splashes)
- Disposable coveralls(Optional for larger or repeated projects)
- Spray bottle (for cleaners)(Label for hydrogen peroxide or cleaners)
- Microfiber cloths(Lint-free; use clean cloths for each area)
- Stiff-bristled brush(For scrubbing textured surfaces)
- Plastic scraper / putty knife(Gently lift loose material)
- Drop cloths or plastic sheeting(Contain mess and protect floors)
- Mild detergent(Gentle cleaner for initial wipe-down)
- Hydrogen peroxide 3%(Spray-on mold killer; test on inconspicuous area first)
- Bleach (optional, for non-porous surfaces)(Dilute 1:10; never mix with ammonia)
- White vinegar (optional)(Mild, can supplement cleaning on non-porous surfaces)
- Fan or dehumidifier(Improve air flow and humidity control)
- Sponge(For wiping surfaces and soaking up moisture)
- Thermometer/Hygrometer(Track temperature and humidity over time)
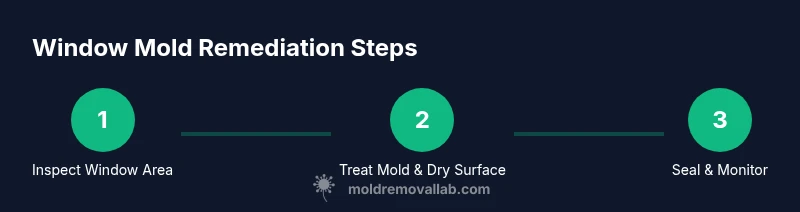
Steps
Estimated time: 2-6 hours
- 1
Identify and document problem areas
Survey all windows and adjacent walls for visible mold, staining, or musty odors. Note areas of condensation, leaks, or poor sealing. Taking photos helps track progress and identify moisture patterns over time.
Tip: Start with the worst-appearing area; it often points to the underlying moisture source. - 2
Prepare the area and put on PPE
Lay down drop cloths to protect floors and drain any standing water. Put on gloves, a respirator, and eye protection before touching moldy surfaces.
Tip: Ventilate the space well; open doors or use an exhaust fan to move air toward an outside outlet. - 3
Initial dry wipe and surface cleaning
Wipe non-porous surfaces with a mild detergent to remove surface dirt and reduce debris. Use a dry microfiber cloth to remove loose spores before applying a mold-killing solution.
Tip: Do not scrub aggressively on painted wood; you may damage the finish and embed spores. - 4
Apply mold-killing solution
Spray hydrogen peroxide 3% on moldy areas and let it sit for 10-15 minutes. For non-porous surfaces, you may follow with a bleach dilution if needed, ensuring proper ventilation.
Tip: Do a spot test on inconspicuous areas to verify no surface damage occurs. - 5
Scrub and rinse surfaces
Gently scrub with a stiff brush where appropriate, then wipe with a clean cloth. Rinse with a damp cloth and allow the area to dry completely.
Tip: Do not leave moisture lingering; humidity in the area should drop quickly after cleaning. - 6
Address the moisture source
Inspect and repair seals, caulk, and flashing around the window. Check for leaks in the frame and consider weather-stripping replacements to reduce condensation.
Tip: Sometimes the root cause is a hidden leak behind wall finishes; if you suspect this, stop and call a pro. - 7
Improve ventilation and humidity control
Run a dehumidifier or increase air movement to hasten drying. Ensure exhaust fans vent outside and keep interior humidity below target levels.
Tip: Place a hygrometer in the space to monitor humidity and adjust accordingly. - 8
Seal and restore finishes
Re-caulk and seal the window perimeter after the area dries. Repaint or refinish as needed to prevent persistent moisture retention.
Tip: Use paint with mold-resistant properties for long-term protection. - 9
Monitor and re-inspect
Check the area after several days and again after heavy rains. Look for new signs of moisture or growth and address promptly.
Tip: Keep a simple maintenance log to track condensation and repairs.
FAQ
What causes mold growth by windows?
Condensation, leaks, and poor ventilation around windows create a moist microenvironment that supports mold growth. Addressing these moisture sources is key to remediation and prevention.
Mold around windows is usually caused by moisture from condensation, leaks, or limited airflow, so focus on moisture control.
Is mold by windows dangerous to my health?
Mold exposure can irritate airways, trigger allergies, or worsen asthma in some people. If growth is extensive or if you have health concerns, consult a professional.
Molds can irritate airways and allergies; if you’re concerned, consider professional evaluation.
Can I remove black mold myself?
Small, discrete growth on non-porous surfaces may be cleaned with proper PPE and cleaners. Large or porous-area mold should be remediated by a pro to prevent spread and ensure safety.
For extensive black mold or porous materials, it’s best to hire a professional.
How long does remediation take around windows?
Time depends on area size and moisture sources; small cleanups can take a few hours, while larger jobs may require several days and moisture-repair work.
Remediation time varies with area size and moisture fixes; expect hours to days for bigger jobs.
Do I need professional testing after remediation?
Testing can confirm removal success, especially in complex cases or where occupants have health concerns. Use accredited labs and combine results with moisture control follow-up.
Testing can help confirm success, especially for sensitive occupants; combine results with ongoing moisture monitoring.
What maintenance steps prevent mold return?
Keep humidity low, fix leaks promptly, seal window perimeters, and clean regularly. Document repairs and monitor seasonally for condensation patterns.
Maintain low humidity, fix leaks fast, seal edges, and monitor seasons for condensation.
Watch Video
The Essentials
- Identify moisture sources around windows to prevent mold growth
- Choose appropriate cleaning vs remediation based on material porosity
- Improve ventilation and window sealing to reduce recurrence
- Monitor humidity and inspect regularly for early signs