Black Mold Window: Remediation and Prevention
Learn practical, step-by-step methods to safely remove black mold window growth, fix moisture sources, and prevent recurrence in homes. Includes safety tips, DIY steps for small areas, and guidance on when to call a pro.

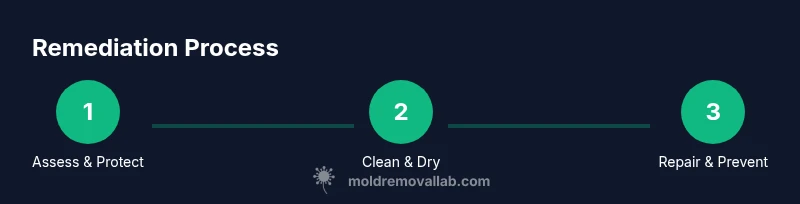
The goal is to safely remove black mold around a window and prevent re-growth by controlling moisture. For small, non-porous areas, you can clean with detergent and a non-ammonia cleaner, then dry thoroughly. If mold covers more than 10 square feet, or if growth is behind walls or in HVAC, hire a qualified mold remediation professional.
What "black mold window" means
The term black mold window describes visible mold growth on window frames, sills, glazing, or nearby walls. In many homes, this growth appears after condensation, leaks, or high humidity create persistent moisture. According to Mold Removal Lab, the phrase is often used when dark, damp patches are found around windows, signaling a moisture problem that needs attention. The key idea behind this issue is that mold thrives where water is present, and windows are a common moisture hotspot due to seasonal changes and air leaks. In practice, identifying whether a mold sample is truly toxic requires testing and professional assessment, but visible growth around a window is a clear warning sign you should address promptly.
Health considerations and safe handling
Exposure to mold around windows can cause irritation to the eyes, nose, and throat, and may aggravate allergies or asthma in sensitive individuals. While many household molds are common and manageable, some species—often labeled as black mold—can produce mycotoxins under certain conditions. The Mold Removal Lab team emphasizes that safety comes first: if you suspect exposure or if anyone in the home has chronic symptoms, reduce exposure and begin moisture control before cleaning. Always wear gloves, a particle mask or respirator, and eye protection when inspecting or cleaning mold, and keep children and pets away from the area during remediation.
Common moisture culprits around windows
Mold growth around windows is typically driven by moisture. Condensation on cold glass, leaks from improper flashing, rain infiltration through damaged seals, and insufficient ventilation all contribute. Indoor humidity above 60% for extended periods dramatically increases risk, especially in bathrooms, kitchens, and rooms with poor air exchange. Cleaning the visible mold is only part of the solution; effective prevention requires addressing the source of moisture, improving airflow, and sealing off drafts that bring in humid air. By understanding these factors, homeowners can target the root causes of a persistent black mold window situation.
Safe DIY remediation for small areas
For small, non-porous mold growth on window frames or glass, a careful DIY approach is often sufficient. Start with protective gear and containment to minimize spread. Use a detergent-based cleaner or a mildew remover labeled safe for the surface, scrub with a nylon brush, and rinse with clean water. Thoroughly dry the area to prevent regrowth, and monitor for several days. If the mold reappears or if you notice staining on porous materials like wood or drywall nearby, consider removing and replacing the affected material and consulting a professional. Keep in mind that porous substrates absorb moisture and mold more easily, making DIY remediation less reliable in those spots.
When to call a pro and what to expect
If mold covers a large area, if there is hidden growth behind walls, or if you detect a persistent moisture problem, a professional remediation service is warranted. Pros can perform containment, advanced cleaning, and moisture source repair with proper equipment and protocols. Expect an assessment, moisture measurements, and a plan that may include repairing flashing, replacing soaked insulation, or replacing sections of window trim. The Mold Removal Lab team notes that professional remediation reduces the risk of re-growth and ensures thorough drying and proper disposal of contaminated materials.
Prevention strategies to keep windows mold-free
Prevention is better than remediation. Maintain indoor humidity between 30% and 50% with dehumidifiers or improved ventilation, especially in kitchens and bathrooms. Inspect and repair window seals and flashing to stop leaks, and install or upgrade exhaust fans to move humid air out of the house. Regularly clean window tracks and sills to remove standing moisture, and consider using mold-resistant paints or sealants on wood frames. Consistent moisture control and routine monitoring are the best defenses against a recurring black mold window problem.
Tools & Materials
- Personal protective equipment (PPE): gloves, eye protection, NIOSH-approved respirator(Avoid latex if sensitive; a P100 or P2 respirator provides better filtration)
- Detergent or mold-cleaning solution labeled for non-porous surfaces(Follow label directions and avoid ammonia-based cleaners on porous materials)
- Nylon scrub brush and disposable cloths(Use non-abrasive brushes to avoid scratching glass or painted surfaces)
- Plastic sheeting and painter's tape(Contain the area to prevent spread of spores during cleaning)
- Trash bags (heavy-duty) and a designated disposal container(Seal contaminated materials before removal to prevent spread)
- Dehumidifier or a reliable source of ventilation(Target humidity levels around 40-50% during and after cleanup)
- Measuring tools (moisture meter optional)(Useful for confirming drying progress and moisture reduction)
Steps
Estimated time: 2-6 hours (depends on area size, moisture source, and material porosity)
- 1
Prepare and protect
Put on PPE, set up containment with plastic sheeting, and close off the area to prevent spores from spreading. Gather cleaning supplies and ensure pets and children are kept away. This step reduces exposure and keeps the work space controlled.
Tip: Do a quick air sweep before starting to remove loose spores from the area. - 2
Isolate moisture source
Identify and fix the moisture source first—leaky seals, faulty flashing, or a blocked gutter can re-wet the area after cleaning. Repairing the root cause prevents future mold growth.
Tip: Temporary measures are not enough; you must address the underlying leak or condensation issue. - 3
Clean non-porous surfaces
Use a detergent solution on glass, metal, and painted surfaces. Scrub with a nylon brush, rinse with clean water, and dry thoroughly with disposable towels. Avoid moisture lingering around the sill after cleaning.
Tip: Do not mix cleaners with bleach or ammonia; this can produce harmful fumes. - 4
Assess porous materials
If wood, drywall, or insulation around the window shows mold penetration, you may need to seal off, remove, or replace affected portions. Porous materials that have absorbed moisture often harbor hidden mold.
Tip: Porous substrates usually require removal where visible mold persists after cleaning. - 5
Dry and monitor
Use a dehumidifier or enhanced ventilation to dry the area completely. Monitor humidity and inspect the area daily for a week to ensure mold does not return.
Tip: Continue to run a dehumidifier for 24-72 hours after drying if the space remains humid. - 6
Dispose and sanitize tools
Place used rags, brushes, and contaminated disposable items in sealed bags. Clean tools with soap and water, then store away from living spaces to prevent cross-contamination.
Tip: Always wash hands and any exposed skin after handling mold-contaminated materials.
FAQ
Is black mold dangerous to breathe when it's on windows?
Breathing mold spores can irritate eyes, nose, and throat, especially for sensitive individuals. If you notice symptoms, leave the area and seek medical advice. Wear appropriate PPE during cleanup to reduce exposure.
Breathing mold spores can irritate the airways. If you feel symptoms, stop cleaning and consult a professional.
Can I safely clean black mold from wood window frames myself?
Small, non-porous areas on metal or painted wood can be cleaned with detergent solutions following safety guidelines. Unpainted or porous wood often requires removal and replacement. If in doubt, consult a professional.
You can clean small, non-porous spots, but porous wood may need professional help.
What causes mold around windows, and how can I prevent it?
Condensation, leaks, and high humidity are common causes. Prevention includes fixing leaks, improving ventilation, using dehumidifiers, and sealing drafts around the window.
Leaks and humidity around windows cause mold; fix leaks and improve ventilation to prevent it.
How long does it take to dry after remediation?
Drying times vary with area size and humidity. Use a dehumidifier and keep ventilation up for at least 24-72 hours after cleaning to reduce residual moisture.
Drying usually takes a day or two with proper moisture control.
When should I call a mold remediation professional for a window issue?
If mold covers a large area, recurs after cleaning, or you cannot access hidden growth, a licensed remediation contractor should assess and treat the site.
Call a professional if growth is extensive or keeps coming back.
Watch Video
The Essentials
- Identify moisture sources around windows before cleaning.
- Use PPE and containment to minimize exposure.
- Differentiate between non-porous and porous substrates for cleaning strategy.
- Address prevention: humidity control and sealing to stop recurrence.