Mold on drywall: Safe removal, remediation, and prevention
Learn to safely remove mold on drywall, prevent recurrence, and restore a healthy home. This practical guide covers moisture control, containment, cleaning, drywall replacement, and prevention strategies for homeowners and renters.

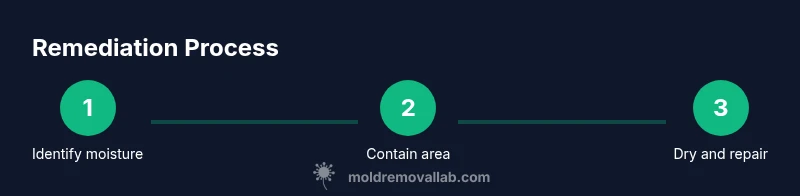
To safely remove and prevent mold on drywall, identify and fix the moisture source, isolate the area, and dry it thoroughly before patching. Begin with non-porous cleanup, wear PPE, and remove any severely soaked drywall. Replace damaged sections if needed, and install moisture-control measures to prevent future growth. Check for hidden moisture and ensure proper ventilation.
Understanding mold on drywall
Mold on drywall is a common consequence of moisture problems in homes, and it can develop quickly once water intrusion or persistent humidity creates the right conditions. Drywall is especially susceptible because the paper layer acts like a sponge, enabling mold spores to take hold on both the surface and within the gypsum core when moisture remains present. Uniformly stained patches may begin as spots and expand into larger colonies, often accompanied by a musty odor. Prolonged moisture exposure increases the risk of structural damage and health concerns. Because drywall is porous, cleaning mold off the surface without addressing the underlying moisture rarely yields lasting results. In many cases, you’ll need to replace affected sections to prevent regrowth and maintain indoor air quality. Understanding the mold lifecycle helps homeowners plan a safer, more effective remediation strategy.
Health and safety considerations
Working with mold requires proper protective gear and ventilation. Wear a disposable coverall or long-sleeve shirt, nitrile gloves, and a respirator rated for mold (at least N95 or P100). Use eye protection to avoid particles, and keep children and pets away from the work area. Ventilate with exhaust fans pointing outdoors and use a HEPA-filter vacuum to capture dust during cleanup. If you have chronic respiratory issues or the growth is extensive, stop and consult a professional. Some mold species may release toxins or spores that pose greater health risks, especially in damp basements or behind walls. Prioritizing safety reduces exposure and protects household members during the remediation process.
Assessing the extent and moisture source
Before any remediation, identify the moisture source: a leaky pipe, roof leak, condensation from poor ventilation, or plumbing failure. Inspect the area carefully and note all affected materials. Use a moisture meter to measure relative humidity and wall moisture; if readings remain high after drying, the problem is not resolved. Document water damage and take photographs for records. Addressing the underlying cause is essential to prevent recurrence. If the mold spread is visible through multiple walls or hidden behind cabinetry, professional evaluation becomes more important to prevent exposure and miss-detection.
Containment and initial cleanup approach
Contain the contaminated zone to prevent cross-contamination by sealing doors and vents with plastic sheeting. Use tape to create a clean boundary and run a portable dehumidifier and fan to dry the space. For non-porous materials, wipe with a detergent solution, then disinfect with an appropriate EPA-registered product following label directions. Collect waste in heavy-duty plastic bags and remove from the living space promptly to reduce exposure. Proper containment minimizes the spread of mold spores to adjacent rooms and protects occupants during cleanup.
DIY vs professional remediation considerations
For small, contained patches (less than a few square feet) in accessible spaces, homeowners may tackle cleanup with the right PPE and a methodical approach. Larger areas, growth on porous materials, or mold behind walls usually require professional remediation by licensed contractors who can perform containment, structural checks, and post-remediation clearance. Always check local codes and insurance implications. When in doubt about hidden growth, air quality concerns, or structural damage, involve a certified mold professional to ensure a complete and safe resolution.
Preventing future mold growth after remediation
After remediation, improve ventilation and reduce humidity to keep mold from returning. Run dehumidifiers to maintain indoor humidity below 50-60%. Use mold-resistant drywall and paints in damp areas, and fix leaks promptly. Clean regularly to prevent dust buildup, and consider an inline exhaust vent for bathrooms and laundry rooms. A proactive maintenance routine helps sustain a mold-free environment and protects your investment in the home.
Documentation and monitoring progress
Keep a remediation log with dates, photos, and moisture readings showing when the area was dry. Schedule follow-up checks over the next few weeks to confirm the space remains mold-free. If you notice new stains, odors, or itching symptoms, reassess the area and consider a professional evaluation. Documentation supports warranty claims, insurance, and future preventive actions, making it easier to demonstrate compliance with best practices.
Tools & Materials
- Nitrile gloves(Disposable, chemical-resistant)
- Respiratory protection (P100 or N95)(Ensure proper fit; use with beards covered)
- Safety goggles(Eye protection against splashes and spores)
- Protective coveralls(Long sleeves, closed shoes; disposable preferred)
- Plastic sheeting (6 mil or thicker)(For containment and barriers)
- Painter's tape(To seal plastic and create a boundary)
- HEPA vacuum(For dust collection and cleanup)
- Detergent or soap(General cleaning solution)
- EPA-registered mold cleaner or disinfectant(Follow label directions)
- Scraper or putty knife(Remove loose material and edges)
- Utility knife(Cut drywall cleanly along studs)
- Wire brush or scrub pad(Scrub stubborn mold growth on non-porous surfaces)
- Moisture meter(Optional for verifying dryness)
- Dehumidifier(Maintain low humidity during drying)
- Replacement drywall sheets(For patched areas)
- Joint compound, tape, and fasteners(Seal patches and reinforce edges)
- Mold-resistant primer/paint(Limit future mold growth)
- Heavy-duty trash bags(For contaminated waste)
Steps
Estimated time: 3-6 hours
- 1
Identify moisture source
Inspect the room to locate leaks or condensation sources. Check plumbing, roof lines, and drainage around the area. Document all potential moisture sources before starting cleanup so you can address the root cause.
Tip: Address outside leaks first to prevent reintroduction of moisture during cleanup. - 2
Contain the area
Seal the affected zone with plastic sheeting, creating a boundary to stop spores from migrating to other spaces. Use tape to secure edges and doors to keep fumes and particles inside.
Tip: Keep the containment door closed; only open briefly for activities in the zone. - 3
Ventilate and begin drying
Set up a combination of fans directed outwards and a dehumidifier to remove moisture. Run for 24-48 hours or until surface and material moisture tests show dryness; avoid operating fans in occupied living spaces.
Tip: Position exhausts to outdoors and keep indoor air fresh with gentle cross-ventilation. - 4
Remove damaged drywall
Cut away visibly moldy drywall with a utility knife, keeping cuts straight along studs. Place removed material in a sealed bag to prevent spore spread and replace with new drywall.
Tip: Avoid pulling drywall beyond the mold boundary; only remove structurally compromised areas. - 5
Clean and disinfect exposed surfaces
Scrub non-porous surfaces with detergent solution, then apply an EPA-approved cleaner. On porous areas, a detergent wash followed by disinfection is recommended; avoid bleach on porous drywall.
Tip: Allow surfaces to dry completely between cleaning and disinfection steps. - 6
Dry out framing and area
Continue dehumidification and air circulation until studs and framing measure dry to standard moisture levels. Recheck with the moisture meter if available.
Tip: Do not proceed to patching until moisture is consistently low. - 7
Repair and seal
Install replacement drywall, apply joint compound, and tape seams. Prime with mold-resistant primer before painting with mold-resistant paint for better long-term performance.
Tip: Ensure proper curing time for joint compound before finishing paint. - 8
Inspect and monitor
After finishing, re-check the area for several weeks to confirm there is no new moisture or mold growth. If issues reappear, reassess the moisture source and consider professional help.
Tip: Keep humidity below 60% and run ventilation in damp rooms.
FAQ
What causes mold on drywall?
Mold on drywall typically arises from moisture sources such as leaks, condensation, or high humidity. Without reducing moisture, mold can return even after cleaning. Mold can affect indoor air quality and trigger allergies or asthma symptoms.
Moisture causes mold on drywall, and reducing that moisture is key to stopping it. If you see it, address leaks and humidity first.
Can I remove mold on drywall myself?
For small, contained patches in reachable areas, DIY cleanup with proper PPE is often feasible. Larger growth, porous materials with penetration, or mold behind walls should be handled by a licensed professional to ensure safety and thorough remediation.
DIY cleanup is possible for small spots, but big growth or hidden mold should be handled by a pro.
How long does remediation take?
Remediation time varies with extent—typical dry-out, cleanup, and patching can take from several hours to a few days, plus additional follow-up checks to confirm mold-free conditions.
Remediation can take from a few hours to a couple of days, depending on how much mold is involved.
Do I need to replace drywall if mold is present?
If mold penetrates the drywall’s paper backing or the core is damaged, replacement is usually necessary. Surface mold on paint or non-porous surfaces may be cleaned, but underlying damage often requires drywall replacement.
If mold goes into the drywall, you’ll likely need to replace it; surface mold on painted surfaces can sometimes be cleaned.
What safety precautions should I take?
Wear PPE, keep kids and pets away, and ensure proper ventilation. Avoid disturbing mold spores to minimize airborne spread. If you suffer from allergies or asthma, seek professional help.
Wear protective gear, ventilate the area, and avoid disturbing mold if you have allergies or asthma.
How can I prevent future mold growth after remediation?
Maintain indoor humidity below 50-60%, fix leaks promptly, improve ventilation in damp areas, and consider mold-resistant materials for high-moisture spaces.
Keep humidity low, fix leaks fast, and use mold-resistant materials to prevent return.
Should I hire a mold testing service?
Testing can confirm mold species and extent, but is not always necessary if you’ve seen visible mold and addressed moisture. Testing is useful when symptoms persist despite remediation or for lease/insurance documentation.
Testing helps confirm extent and type when remediation is uncertain or for documentation.
The Essentials
- Identify moisture source and fix it.
- Contain area to prevent cross-contamination.
- Dry thoroughly before patching or painting.
- Use mold-resistant materials in repairs.
- Monitor humidity and leaks to prevent recurrence.