Repair Mold on Drywall: A Practical Step-by-Step Guide
Learn a practical, safe approach to repairing mold on drywall: stop moisture, remove affected panels, dry thoroughly, and seal with mold-resistant materials.

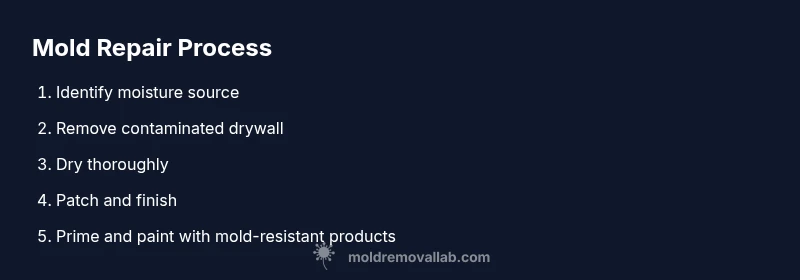
Identify moisture source, stop intrusion, remove moldy drywall, dry the area, and patch with mold-resistant materials. Wear PPE, seal the workspace, and test moisture before painting. Emphasize non-bleach cleaners and proper disposal for future maintenance.
What mold on drywall looks like and why it matters
Mold on drywall often appears as dark spots or fuzzy growth that can range from black to greenish hues. It thrives in damp environments and signals an ongoing moisture problem rather than a one-off spill. The visual cue is usually paired with a musty odor, which can indicate hidden moisture behind walls or under flooring. In a home, drywall mold is more than a cosmetic issue—it can compromise indoor air quality and trigger allergic reactions or respiratory symptoms for occupants.
According to Mold Removal Lab, early detection saves you time and money by limiting the affected area and reducing the risk of spread. Small patches may be remediation candidates, but larger, deeply embedded mold often requires drywall replacement. The key is to verify that the source of moisture is addressed before attempting any patching. If the source remains unresolved, you’ll likely experience recurring mold regardless of the repair effort. Start by identifying the moisture source (leaks, high humidity, condensation) and documenting where you see mold for future reference. This will inform your drying strategy and determine whether you need to call a professional.
In practice, mold growth on drywall is not a sign that your home is unsafe; it is a signal that moisture management needs attention. Address the root cause, such as fixing leaks or improving ventilation, before patching or painting. Keeping humidity levels under control—ideally 30%–50% in most homes—helps prevent future outbreaks. While some DIY repairs are feasible for small areas, larger infestations often require professional-grade equipment and expertise. The Mold Removal Lab team emphasizes a cautious, methodical approach to avoid cross-contamination and ensure a lasting repair.
Safety and moisture control before you start
Safety comes first when repairing mold on drywall. Mold exposure can irritate eyes, skin, and lungs, so wear appropriate PPE: an ASTM-rated N95 respirator or better, safety goggles, and chemical-resistant gloves. Work in a well-ventilated area, using fans to push air toward exterior openings and away from you. If the affected area is significant (more than 10 square feet) or if you have preexisting respiratory conditions, consider stopping the project and contacting a licensed remediator.
Controlling moisture is the foundation of a successful repair. Before any cutting or removal, locate and fix the moisture source—leaky plumbing, roof intrusion, or high indoor humidity. Use a moisture meter to confirm the area is dry before proceeding. After the source is addressed, dry the space with dehumidifiers and high-output fans to achieve below–60% relative humidity in the affected zone. This step reduces spore activity and makes cleaning more effective.
Keep pets and children away from the work area. Seal off doors with plastic sheeting and tape to minimize cross-contamination. Place a bagging setup near the repair zone so that removed drywall can be contained and disposed of safely. Document moisture readings and drying progress; this information helps you gauge when it’s safe to finish the repair and repaint.
When to replace drywall vs. clean and treat
Mold remediation hinges on the extent of contamination. If mold has penetrated the gypsum core or the area is structurally compromised, replacement is typically necessary. Visible mold growth on the surface that can be scrubbed away with no residual staining may be considered for cleaning and treating, but this is only suitable for very small, well-contained patches. For saturated or crumbling drywall, removal and replacement is the safer long-term option. When replacing, cut out at least a 6–12 inch margin around the mold to ensure all affected material is removed, then dispose of it in sealed bags to prevent spores from escaping.
In addition to removing contaminated material, you should seal surrounding studs and joists with an antifungal primer to deter future mold growth. After replacement, ensure you address the moisture problem that caused the original mold. Without controlling moisture, new drywall will likely develop mold again. If you’re uncertain about the extent of contamination, or if the mold covers more than one room, a professional assessment is wise. The Mold Removal Lab team notes that careful assessment helps you avoid underestimating the scope and minimizes repeat repairs.
Remember that mold can hide inside wall cavities. If you suspect hidden mold behind plaster, wallpaper, or behind cabinets, a moisture meter and air sampling from a certified lab can provide clarity. While DIY methods work for small, surface-level problems, larger infestations often justify professional intervention, especially where electrical or structural components are involved.
How to choose cleaning agents and prep materials
Choosing the right cleaners is essential to avoid damaging the drywall while effectively removing mold. For non-porous surfaces or painted surfaces with only surface-level mold, mild detergents with warm water or a white vinegar solution can be effective. Do not rely solely on bleach for porous drywall, as it may not reach embedded spores and could cause discoloration or damage. If the area has porous drywall or extensive contamination, safer and more thorough approaches involve using antifungal cleaners, followed by a mold-resistant primer and paint.
Before applying any cleaner, test a small, inconspicuous patch to ensure it does not degrade the surface. Use a spray bottle for even distribution and a clean cloth or sponge to scrub gently. For stubborn mold, you may need to reapply and allow the area to dry between applications. When you finish cleaning, rinse with clean water and dry completely. Tools like a stiff-bristled brush, microfiber cloths, and a HEPA vacuum for spores can help keep the workspace clean and prevent cross-contamination.
After cleaning, use a mold-resistant primer designed for bathrooms or damp environments. This step helps seal against future airborne spores and prepares the surface for painting. If the wall is replaced, use drywall primer before applying joint compound and paint to ensure an even finish. The Mold Removal Lab approach prioritizes moisture control and material durability for long-lasting results.
Common mold types on drywall and remediation approaches
Mold on drywall can take several forms, including black mold (Stachybotrys), blue-green algae, and common household molds such as Aspergillus. The remediation approach depends on the mold type and the extent of contamination. Surface molds can often be addressed with cleaning and antimicrobial treatments, followed by patchwork and repainting. However, if mold has penetrated the gypsum core or extended behind tiles or paneling, replacement is usually necessary.
Black mold is particularly concerning due to potential health risks. If you notice a persistent musty odor, visible colonies, or discoloration behind walls, treat it as a serious issue and consider professional assessment. Always remove and replace mold-infested drywall, and ensure that all contaminated materials are properly sealed for disposal. For preventative measures, address moisture sources, improve ventilation, and consider installing a continuous dehumidification solution in damp areas like basements and bathrooms. The Mold Removal Lab guidance emphasizes a cautious, thorough approach when dealing with mold varieties that are harder to eradicate or present health concerns.
Preventing mold recurrence after repair
Prevention is the key to preserving drywall and indoor air quality. After completing the physical repair, implement moisture control strategies such as fixing leaks promptly, installing vapor barriers where appropriate, and maintaining indoor humidity levels in the recommended range. Improve ventilation in bathrooms and kitchens by using exhaust fans or upgrading ventilation systems to move humid air outdoors. Regular inspections of potential problem areas—bathrooms, basements, and crawl spaces—help you catch issues early. Consider mold-resistant drywall in high-moisture zones, and apply mold-resistant paints and primers to slow future growth.
Keep surfaces clean and dry, and be mindful of condensation on windows and pipes. Promptly cleaning spills and drying out damp fabrics or carpets reduces spore availability. For ongoing protection, use a low-toxicity biocide or antifungal cleaner on susceptible areas and replace any compromised insulation or vapor barriers when necessary. The Mold Removal Lab team stresses that consistent maintenance and prompt response to moisture events dramatically increase the longevity of drywall repairs.
The step-by-step remediation plan in brief (summary for quick reference)
- Locate moisture source and assess scope. 2) Stop moisture intrusion with repairs. 3) Isolate area and prepare for removal. 4) Remove contaminated drywall and dispose of material securely. 5) Clean surrounding framing and surfaces with antifungal agents. 6) Dry the space completely using fans and dehumidifiers. 7) Patch drywall with new material, tape joints, and apply joint compound. 8) Prime with mold-resistant primer and paint with mold-resistant paint. 9) Recheck moisture levels and establish ongoing prevention measures. The Mold Removal Lab guidance emphasizes documenting readings and keeping the area dry to prevent recurrence.
Tools & Materials
- PPE: N95 respirator, safety goggles, chemical-resistant gloves(Fit-tested recommended; reduces inhalation and skin exposure)
- Plastic sheeting and painter's tape(Seal off the work area to contain spores)
- HEPA vacuum and microfiber cloths(For safe cleanup and debris containment)
- Plastic bags for disposal(Seal and label for disposal of contaminated materials)
- Utility knife or drywall saw(For cutting out moldy drywall with minimal wall damage)
- New drywall panels (standard 1/2 inch)(Choose mold-resistant drywall when possible)
- Joint compound and drywall tape(For patching and finishing seams)
- Putty knife and sanding block(Smooth joints and remove ridges)
- Mold-resistant primer(Seals surfaces before painting)
- Mold-resistant interior paint(Helps prevent future growth)
- Dehumidifier and high-flow fans(Critical for thorough drying)
- Antifungal cleaner or EPA-registered mold remediator(Used after cleaning to slow regrowth)
- Moisture meter(Useful for confirming dryness)
Steps
Estimated time: 2-3 days for removal, drying, and patching; plus ongoing moisture management for weeks
- 1
Identify moisture source and scope
Assess where moisture is coming from and how far the mold has spread. Use a moisture meter to establish baseline readings and mark affected areas. This guides your removal plan and minimizes wasted effort.
Tip: Document findings with photos and notes before disruption begins. - 2
Stop the moisture intrusion
Repair leaks, improve ventilation, and address humidity sources. If the problem is ongoing, address it before any removal to prevent new mold growth.
Tip: Run dehumidifier at high capacity for 24–72 hours after repairs. - 3
Prepare the work area
Seal off the space with plastic, cover floors, and remove nearby items. Set up a clean trash area for disposal and ensure you won’t contaminate other rooms.
Tip: Keep a dedicated pair of shoes or booties for the work zone. - 4
Remove moldy drywall
Cut out the affected drywall with a margin of at least 6–12 inches around the mold. Place debris in sealable bags and dispose of properly.
Tip: Do not pry; cut straight lines to prevent spreading spores. - 5
Clean and treat surrounding surfaces
Scrub studs and adjacent surfaces with an antifungal cleaner or EPA-registered remediator. Vacuum spores with a HEPA-equipped vacuum and wipe down.
Tip: Wear PPE during cleaning to reduce exposure to spores. - 6
Dry the area thoroughly
Run a dehumidifier and fans. Aim for less than 60% relative humidity and ensure the entire cavity is dry before proceeding.
Tip: Check readings with a moisture meter if available. - 7
Patch and finish the drywall
Install new drywall, tape joints, apply joint compound, and sand smooth. Recheck for moisture before priming.
Tip: Use multiple thin coats of joint compound for a smoother finish. - 8
Prime and paint with mold-resistant products
Apply mold-resistant primer, then finish with mold-resistant interior paint. This creates a durable barrier against future growth.
Tip: Allow ample drying time between coats. - 9
Inspect and monitor
Review moisture levels weekly for the first month and after heavy rain. Address any signs of lingering moisture immediately.
Tip: Keep a repair log to track humidity and mold indicators.
FAQ
Is drywall mold dangerous?
Mold on drywall can affect air quality and trigger allergies or asthma in some people. The level of danger depends on the mold type, area affected, and exposure duration. Treat mold promptly and ensure moisture is controlled to reduce risks.
Mold on drywall can affect air quality and trigger allergies. The risk depends on the mold type and exposure, so address moisture and remove contaminated material promptly.
Hire a pro or DIY?
Small, surface-only mold might be manageable as a DIY project with proper PPE and containment. Large areas, mold behind walls, or uncertain scope benefits from a licensed professional who can ensure safe remediation and moisture control.
For larger infestations or hidden mold, a licensed professional is usually the safer choice.
Can I use bleach to fix drywall mold?
Bleach can kill surface mold on non-porous surfaces but is less effective on porous drywall and can be harmful to indoor air when used improperly. Use recommended antifungal cleaners and appropriate primers for porous surfaces.
Bleach is often not the best solution for drywall; antifungal cleaners and proper primers work better.
What about mold behind walls?
Hidden mold requires removing wall sections to assess the extent. A moisture test and sometimes camera inspection help locate concealed growth. Do not rely on surface cleaning alone.
Hidden mold needs removal of wall sections and moisture verification; don’t rely on surface cleaning only.
How long does it take to dry after remediation?
Drying depends on humidity levels, space size, and airflow. In many cases, 24–72 hours of drying with dehumidification is typical before patching.
Expect drying to take a day or two with proper dehumidification.
How can I prevent mold in the future?
Maintain humidity levels, fix leaks promptly, improve ventilation, and use mold-resistant materials in damp areas. Regular inspections help catch problems early.
Keep humidity low, fix leaks fast, and ventilate damp spaces to prevent mold.
Watch Video
The Essentials
- Identify and fix the moisture source first.
- Contain and safely remove moldy drywall.
- Dry thoroughly before patching to prevent regrowth.
- Use mold-resistant primers and paints for lasting protection.
- Document moisture readings and maintenance for ongoing prevention.