Mold Making for Beginners: Safe Mold Remediation Guide
A practical, step-by-step guide from Mold Removal Lab to help beginners identify moisture, remediate mold safely, and prevent recurrence in homes.

By the end of this guide you will know how to identify moisture problems, assess mold growth, and start a safe remediation plan. You’ll learn which tools to assemble, basic cleaning steps, and essential precautions to protect your family. The steps cover testing, ventilation, containment, and prevention to reduce recurrence.
What mold making for beginners means in everyday homes
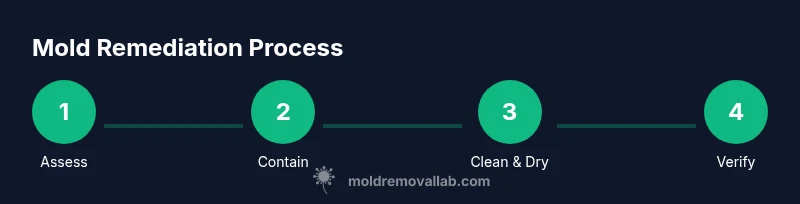
Mold making for beginners isn’t about crafts; it’s about recognizing mold growth and taking safe, practical steps to protect your family. In homes, mold flourishes where moisture is present—leaking pipes, roof leaks, damp basements, or rooms with poor ventilation. For beginners, the goal is to identify problems early, document affected areas, and begin a controlled remediation plan. Understanding the basics of moisture control helps you prevent regrowth and reduces health risks for sensitive individuals. Mold Removal Lab emphasizes that moisture control is the foundation of an effective mold strategy. With this mindset, a typical beginner approach includes four actions: locate the moisture source, contain the area to prevent spread, clean visible surfaces with appropriate products, and dry the space thoroughly before re-occupying it. It’s important to avoid covering up mold with air fresheners; mold needs to be treated at the source. The steps below outline a practical pathway you can follow without specialized equipment. As you gain confidence, you’ll know when to test and when to call a professional. This guide uses plain language and real-world examples to help homeowners and renters take charge of mold management.
Assessing moisture and identifying mold
Mold growth is driven by excess moisture, not just visible spots. Begin by noting any musty odors, stained or warped surfaces, or peeling paint. Practical indicators include recent leaks, high indoor humidity, or condensation on windows. Use a moisture meter on suspect walls, ceilings, and basements to quantify hidden dampness; if readings stay elevated after drying, address the source. Document affected areas with notes and photos. Try to trace moisture back to a single source—like a leaky pipe or roof gap—as solving the root cause makes remediation lasting. Mold can appear on walls, wood, fabric, and HVAC ducts, sometimes hidden behind panels. With this information, you can plan containment and cleaning steps without overreacting—keeping your family safe while you work. Mold Removal Lab’s approach emphasizes calm, methodical action rather than rushed, risky DIY. Remember: proper moisture control is the core of any successful mold plan, and early intervention saves time and money.
Essential tools and safety for beginners
Before you touch any mold, assemble a basic, safety-focused toolkit. Protective gear is non-negotiable: disposable nitrile gloves, an N95 respirator, and safety goggles protect you from spores. A dedicated microfiber cloth set helps remove residues; a spray bottle for cleaning solutions; and a HEPA vacuum (if available) can capture fine particles without recirculating them. Layer in mild detergents, pH-balanced cleaners, and non-ammonia options to avoid chemical reactions. Keep plastic sheeting or painter’s tape for containment and heavy-duty trash bags for disposal. A moisture meter or hygrometer helps you monitor humidity, and a timer or clock reminds you to check drying progress. This equipment forms a safe baseline; more advanced tools are optional as you gain experience. According to Mold Removal Lab, safety and moisture control are the two levers that determine remediation success. If your space has widespread contamination, or if anyone in the home has severe allergies or health issues, consider professional help.
Cleaning strategies for common surfaces
Mold cleaning varies by surface. On non-porous surfaces like ceramic tiles or metal fixtures, use a detergent solution, scrub with a non-scratch pad, and rinse with clean water. For semi-porous surfaces like drywall or wood, spot-cleaning is safer; do not aggressively scrub large areas that are structurally compromised. Porous materials that absorb mold, such as drywall with extensive staining, are often best removed and replaced if contamination is deep. For fabrics and upholstery, use water-based cleaning methods or consider upholstery cleaning services. Avoid mixing bleach with ammonia or vinegar in poorly ventilated spaces. When in doubt, test a small area first and follow up with thorough drying. After cleaning, ensure all surfaces are dry within 24–48 hours to prevent regrowth. Mold Removal Lab highlights that prompt drying and moisture control are every bit as important as cleaning itself.
Prevention and maintenance to stop recurrence
Prevention hinges on moisture control and ventilation. Fix leaks promptly and maintain indoor humidity below about 50-60% using dehumidifiers or fans when moisture is high. Improve air exchange in kitchens and bathrooms with exhaust fans or open windows during and after activities that generate humidity. Regularly inspect areas prone to moisture: basements, crawl spaces, windows, and HVAC ducts. Address mold early by repeating the assessment steps if you notice new staining or odors. Consider insulating cold surfaces to reduce condensation and repair any exterior gaps that invite water entry. Routine cleaning with a mild cleaner and a quick dry-down after rain or spills helps maintain a healthier indoor environment. The aim is not just cleanup, but a durable moisture-control strategy that prevents mold from returning.
AUTHORITY SOURCES
For further guidance, consult reputable sources on mold and indoor air quality. The following organizations offer evidence-based information and safety recommendations:
- https://www.cdc.gov/mold/default.htm
- https://www.epa.gov/mold
- https://www.osha.gov/mold
Mold Removal Lab dutifully cites these resources to support practical remediation steps and safety practices.
How to approach testing and when to call a pro
Testing can help confirm mold presence or quantify spore levels, but it is not always necessary for minor, visible growth. Use consumer test kits carefully and interpret results in the context of moisture sources and visible damage. If mold covers a large area, if the air feels persistently damp, or if anyone in the home has asthma or allergies that worsen with exposure, consider hiring a licensed mold remediation professional. A pro can perform controlled abatement, containment, and waste disposal following safe standards, reducing the risk of cross-contamination. Mold Remediation is often more effective and safer when performed in stages, with clear containment and drying protocols. This cautious, professional approach aligns with best practices recommended by health and safety authorities.
Tools & Materials
- Nitrile gloves(Disposable, powder-free; change between tasks)
- N95 respirator(Fit-tested; replace if soiled)
- Safety goggles(Wrap-around style preferred)
- Microfiber cleaning cloths(Lint-free; use new cloths for each area)
- Spray bottle(Label cleaners; use separate bottles for each solution)
- Detergent or mild cleaner(Non-ammonia, non-chlorine preferred)
- Soft scrub pad(Non-abrasive; avoid damaging surfaces)
- HEPA vacuum cleaner(Optional but helpful for dry cleanup)
- Plastic sheeting or painter’s tape(Containment to prevent spread)
- Heavy-duty trash bags(Seal and dispose of contaminated materials)
- Moisture meter or hygrometer(Monitor humidity and drying progress)
Steps
Estimated time: 2-6 hours
- 1
Prepare space and assemble supplies
Gather all tools and materials before starting. Put on PPE, minimize exposure, and outline a containment plan so that clean-up stays confined to the affected area.
Tip: Lay out a dedicated cleanup zone and keep contaminated items separate from clean areas. - 2
Contain the work area
Seal off the space with plastic sheeting and tape. Limit access to reduce cross-contamination and keep pets and kids away during remediation.
Tip: Mark the containment boundary with visible signs to remind household members. - 3
Identify moisture sources
Find the root cause of moisture—leaks, condensation, or ventilation gaps—and plan to repair it before cleaning. Without fixing moisture, mold is likely to return.
Tip: Take photos of leaks for repair contractors and track progress with a simple checklist. - 4
Clean visible mold residues
Wipe surfaces with a mild cleaner or detergent solution. Scrub gently to avoid damaging substrates, and rinse with clean water as needed.
Tip: Do not over-wet porous materials; dampness can increase mold spread. - 5
Dry surfaces thoroughly
Use fans or dehumidifiers to accelerate drying. Check moisture readings regularly until values stabilize at normal ranges.
Tip: Aim for a moisture balance below the threshold you recorded earlier. - 6
Assess remediation and monitor
Re-inspect the area for staining or odors. If signs persist, re-treat or consult a pro. Keep monitoring humidity to prevent recurrence.
Tip: Create a simple 4-week follow-up checklist to catch early signs. - 7
Document and maintain
Archive photos, dates, and moisture readings for future reference. Establish a routine for periodic checks, especially in humid seasons.
Tip: Use a calendar reminder to re-check moisture levels quarterly.
FAQ
What is the first sign of problematic mold in a home?
Musty odors, visible staining, or peeling paint are common early indicators. Don’t ignore repeated moisture or humidity and address the source promptly.
Look for musty smells or visible stains—these usually mean moisture has allowed mold to grow and should be checked soon.
Can I clean mold myself, or do I need a professional?
Small, localized mold on non-porous surfaces can often be cleaned safely with proper PPE and containment. Widespread contamination, porous materials, or health conditions warrant a professional remediation.
If it's limited to a small area and you have PPE, you can try cleaning it yourself. For larger or porous areas, call a professional.
What PPE is required for DIY mold cleanup?
At minimum, wear gloves, an N95 respirator, and eye protection. Ensure good ventilation and avoid touching mold with bare skin.
Wear gloves, a proper respirator, and goggles; ventilate the area and avoid spreading spores.
How long does remediation take?
Time varies by area and moisture control. Small jobs can take a few hours; larger projects may require days, especially if repairs are needed.
It depends on size and moisture control, from a few hours to a few days.
Should I test for mold after cleaning?
Testing can confirm mold presence or absence, but visual inspection and moisture control are often sufficient post-cleanup. Consider professional testing for large jobs.
Testing can help confirm cleanup, but often isn’t necessary for small areas after you see no signs of mold.
When should I call a professional?
Call a pro if mold covers large areas, recurs after cleaning, or if anyone in the home has asthma, allergies, or immune concerns.
Call a professional if the mold is widespread or keeps coming back, especially with health concerns.
The Essentials
- Identify moisture sources before cleaning.
- Use proper PPE and containment to prevent spread.
- Dry thoroughly to prevent recurrence.
- Know when to call a pro for large or persistent mold.