Mold Killer: A Practical Guide to Safe Mold Remediation
Learn how to choose and use a mold killer safely, prevent regrowth, and protect indoor air quality with practical steps, PPE guidance, and expert tips from Mold Removal Lab.

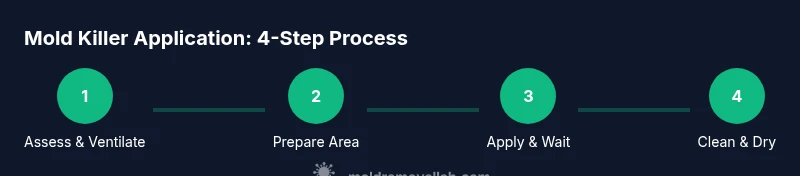
This guide explains how to safely choose and use a mold killer to treat minor mold growth and prevent recurrence. You’ll learn how to assess the situation, pick an appropriate product, apply it safely, and verify removal. Follow this Mold Removal Lab guide to reduce risks and improve indoor air quality.
What is a mold killer and when to use it
According to Mold Removal Lab, a mold killer is a ready-to-use chemical designed to disrupt mold cells and reduce surface growth. It is most effective for small, contained outbreaks on nonporous or semi-porous surfaces where moisture has been controlled. It is not a universal solution for large infestations or deeply embedded mold behind walls. In those cases, addressing moisture sources and professional assessment may be required. For homeowners and renters, a mold killer can help when you notice isolated spots on tiles, metal, glass, or sealed wood, provided you follow label directions and wear appropriate PPE. Always start by assessing the extent of growth and the underlying moisture issue before applying a product. This ensures you’re using a mold killer as part of a broader remediation plan rather than as a quick fix.
Key takeaway: use a mold killer for small, visible outbreaks and always pair treatment with moisture control and ventilation.
How mold killers work
Mold killers function by disrupting the cellular structure of mold and, in many formulations, by oxidizing or denaturing the coating of mold cells. Most products require a dwell time to be effective, during which the solution stays wet on the surface. Surfactants help the product spread evenly and penetrate light surface growth. After the dwell time, the treated area should be scrubbed lightly to remove loose spores and then wiped dry. It’s important to know that not all mold species are equally susceptible to every product. Porous materials, like drywall or fabric, may need different approaches or professional remediation if growth is extensive. Always read the label to confirm surface compatibility and recommended use.
Tip: pre-clean with mild soap and water to remove surface grime before applying any mold killer for better contact with the mold cells.
Safety considerations and PPE
Safety first: wear PPE to protect skin, eyes, and lungs. Use chemical-resistant gloves, splash goggles or safety glasses, and a properly fitted respirator or an N95 mask when ventilation is limited. Ensure the area is well-ventilated by opening windows or using a fan that exhausts outdoors. Never mix cleaners; do not use ammonia and bleach together, as this can release toxic gases. Keep pets and children away during treatment. Work in small areas to maintain control and avoid spreading spores to other rooms. If you feel dizzy or experience coughing or throat irritation, stop and ventilate the space.
Note: Always follow the product’s label for concentration, dwell time, and compatibility with materials.
Pro tip: label or tape off the treatment zone to prevent accidental contact and track progress using a moisture meter after drying.
Choosing the right mold killer
There are several categories of mold killers, including labeled biocides, quaternary ammonium compounds, and products based on hydrogen peroxide or hypochlorite (bleach) formulations. For delicate surfaces like wood finishes or laminate, choose a milder product designed for that material. Read the label carefully to confirm surface compatibility, required dwell times, and any ventilation requirements. If you suspect hidden mold behind walls or in insulation, a professional evaluation may be warranted, as improper application can spread spores or damage materials. Consider a product that includes a clear dry-time guideline and disposal instructions for used wipes and contaminated materials.
Recommendation: prioritize products with clear application steps, confirmed surface compatibility, and safety statements for indoor air quality.
Application steps: a practical guide
Apply a mold killer only to the affected area after pre-cleaning. Spray or apply the product evenly to cover the mold-affected surface without oversaturation. Allow the prescribed dwell time so the chemical can act on the mold cells. Gently scrub with a soft-bristle brush to lift growth, then wipe away with disposable towels. If the surface requires rinsing per the label, rinse with clean water and wipe dry. Finally, seal the treated area with proper ventilation and monitor for any signs of regrowth over the next few days. Store remaining product according to label directions and dispose of contaminated materials properly.
Pro tip: work from the outer edge toward the center to prevent spreading spores to surrounding clean areas.
Step-by-step example for a small patch
Example: A 1–2 square foot tile corner with visible mold. 1) Ventilate the space and don PPE. 2) Clean the area with mild soap and water. 3) Apply the mold killer to the affected tile and grout, following label dwell times. 4) Scrub gently and wipe clean. 5) Dry the area completely and recheck in 24 hours for any regrowth.
Caution: avoid porous materials if the mold covers a large area; those require professional assessment and remediation.
Alternatives to chemical mold killers
Some homeowners consider natural or less aggressive options such as white vinegar, hydrogen peroxide, or baking soda solutions. These can be helpful for mild, surface-level growth but may not be effective on all species or porous materials. Always test on a small area first and ensure that the chosen approach is compatible with the surface to avoid damage. For significant mold or uncertain conditions, chemical products or professional remediation may be necessary. Keep in mind that “natural” does not automatically mean safe for indoor air quality without ventilation.
Practical note: use these options only for light contamination and always complete moisture control to prevent recurrence.
Common mistakes and how to avoid them
Common mistakes include applying mold killer to severely damp areas without addressing the moisture source, using excessive product, scrubbing too hard (which can damage surfaces and spread spores), and neglecting to dry and ventilate after treatment. Another frequent error is treating mold without testing for hidden moisture behind walls, ceilings, or insulation. Always ensure moisture sources are corrected and dry conditions are reestablished before deeming a remediation complete. Finally, never reuse disposable wipes or rags; dispose of them safely.
Avoidance tip: wait until treated areas are completely dry before reoccupying the space.
Prevention after treatment
Prevention focuses on moisture control and regular inspections. Maintain adequate ventilation in bathrooms, kitchens, basements, and laundry rooms. Repair any leaks promptly and consider using dehumidifiers or fans to reduce humidity exposure in damp spaces. Regularly inspect areas prone to mold growth, such as around windows, pipes, and ventilation ducts. Keeping surfaces clean and dry is the most effective long-term strategy for reducing mold growth and preventing future outbreaks. Remember, consistent maintenance is the best defense against mold recurrence.
Addressing mold in porous materials
Porous materials like drywall, drywall paper, insulation, and upholstered fabrics tend to absorb moisture and harbor mold deeper than surface films. In many cases, these materials must be removed and replaced if mold growth has penetrated beyond cosmetic layers. If you suspect extensive growth within walls or insulation, do not attempt a DIY fix; consult a professional remediation service. Always isolate the affected area, reduce moisture sources, and ensure proper disposal of contaminated materials.
Key warning: porous substrates with visible mold growth often require removal and professional handling to prevent spore dispersion and health risks.
Environmental and health considerations
Mold remediation can involve exposure to chemical fumes and particulate matter. Ensure adequate ventilation, use appropriate PPE, and keep occupants away during treatment. Some products release volatile organic compounds (VOCs); run fans or open windows after treatment to dissipate odors and reduce exposure. Always follow label instructions for disposal and cleanup of contaminated materials. If you have preexisting health conditions, respiratory issues, or concerns about mold exposure, consult a healthcare professional.
Important note: use mold killers only as directed and avoid overuse, which can create additional hazards.
Authority sources
For further guidance, consult authoritative sources on mold remediation and indoor air quality. The Environmental Protection Agency (EPA) provides mold remediation and prevention guidelines for homes: https://www.epa.gov/mold/mold-remediation-home. The Centers for Disease Control and Prevention (CDC) discusses dampness, mold exposure, and health risks: https://www.cdc.gov/mold/dampness/index.html. The Occupational Safety and Health Administration (OSHA) offers general safety considerations when working with household chemicals: https://www.osha.gov/mold
Mold Removal Lab analysis emphasizes that moisture control is a core element of successful remediation and that products should be used as part of a broader moisture management plan. Based on Mold Removal Lab analysis, focusing on moisture control and surface preparation improves outcomes and reduces the chance of regrowth.
Authority sources (continued)
Additional reputable references include university extension pages and public health departments that discuss mold characteristics, safe cleanup practices, and environmental controls. Always verify product labels and ensure your remediation plan aligns with local regulations and property type.
Tools & Materials
- Nitrile gloves (chemical resistant)(Long cuffs preferred for splash protection)
- Goggles or safety glasses(Wrap-around style recommended)
- Respirator or N95 mask(Ensure proper fit; replace when soiled)
- Plastic sheeting or painter's tape(To isolate area)
- Disposable wipes or rags(For cleanup and disposal)
- Spray bottle or application cloth(Label-specific dilution guidance)
- Soft-bristle brush(For light scrubbing without surface damage)
- Mold killer product (per label)(Select one that matches surface and mold type)
- Detergent or mild soap(Pre-clean to remove grime)
- Bucket and water(For rinsing and washing tools)
- Moisture meter or hygrometer(Useful to check dry conditions)
- Trash bags (heavy-duty)(Seal and dispose of contaminated waste)
Steps
Estimated time: 60-90 minutes
- 1
Assess area and ventilate
Begin by inspecting the affected area to determine extent and moisture sources. Open windows or use a fan to promote air exchange, especially if using chemical products. Identify nearby surfaces that could be affected by splashes or airborne spores.
Tip: Limit the area to contain spores and avoid cross-contamination. - 2
Put on PPE
Don your gloves, goggles, and respirator before handling any mold killer. Ensure a good seal on the respirator and avoid touching your face while working. PPE protects you from exposure to mold and cleaning agents.
Tip: Double-check the fit of your respirator and replace any damaged PPE. - 3
Contain the work zone
Use plastic sheeting to seal off the work area and prevent spores from moving to adjacent rooms. Tape edges securely and clearly label the space as “Under remediation—do not enter.”
Tip: Seal the perimeter with tape to create a controlled environment. - 4
Pre-clean the surface
Wipe the surface with mild soap and water to remove grime. This improves the effectiveness of the mold killer by exposing more mold cells.
Tip: Rinse and dry the cloth frequently to avoid smearing mold. - 5
Apply mold killer as directed
Spray or apply the product evenly over the mold-affected area according to the label. Do not oversaturate porous materials; avoid runoff onto clean areas.
Tip: Follow the label’s dwell time for maximum effectiveness. - 6
Allow dwell time
Let the product sit on the surface for the recommended period to inactivate mold cells. Do not wipe dry too soon, as this reduces effectiveness.
Tip: Set a timer to ensure you don’t skip the required dwell time. - 7
Scrub lightly and wipe
Use a soft-bristle brush to lift visible growth, then wipe with disposable towels. Avoid aggressive scrubbing that could damage surfaces and release spores.
Tip: Wipe from the outer edge toward the center to minimize spreading. - 8
Rinse if required and dry
If the label requires rinsing, use clean water and pat dry with towels. Ensure the area is thoroughly dried to deter regrowth.
Tip: A dehumidifier can speed up drying in damp spaces. - 9
Dispose of waste safely
Seal used wipes, brushes, and contaminated materials in heavy bags before disposing. Wash hands and any reusable tools with soap and water after completion.
Tip: Do not reuse contaminated materials on other areas.
FAQ
What is a mold killer and when should I use it?
A mold killer is a chemical product designed to disrupt mold cells and surface growth. Use it for small, contained mold outbreaks on nonporous surfaces, after cleaning to remove grime and moisture sources. For larger infestations or hidden mold, professional remediation is recommended.
A mold killer helps with small, contained mold growth after proper cleaning and moisture control; large or hidden mold requires professional help.
Can I use household bleach as a mold killer?
Bleach can be effective on nonporous surfaces but may not reach porous materials or underlying moisture problems. Always follow the label and never mix with ammonia or other cleaners. For porous materials, consider products specifically designed for mold remediation.
Bleach can help on nonporous surfaces, but don't mix with other cleaners and avoid using it on porous materials without guidance.
Is a mold killer safe around children and pets?
Use mold killers in well-ventilated areas and keep children and pets away during application and for the recommended dwell time. After drying, ensure treated surfaces are clean and free of residue before normal use.
Keep kids and pets out during treatment and ensure good ventilation; surfaces should be dry and residue-free before returning to normal use.
How long does it take for a mold killer to work?
Mold killers require a dwell time specified on the product label for effectiveness. Do not wipe away the product before the dwell time elapses; long enough contact is essential for inactivating mold cells.
Let the product sit for the time specified on the label to ensure effectiveness.
Can I use mold killer on drywall or wood?
Certain mold killers are formulated for nonporous or semi-porous surfaces. Porous materials like drywall may require different treatments or removal. Always check the label for surface compatibility.
Some products work on nonporous surfaces; drywall may require special handling or replacement.
When should I call a professional?
If mold covers a large area, recurs after treatment, or appears behind walls/insulation, professional remediation is advised. They can identify moisture sources and perform thorough removal and containment.
Call a professional if mold is extensive or keeps returning after DIY treatment.
Watch Video
The Essentials
- Choose a mold killer that matches surface type and mold growth.
- Ventilate and wear PPE to minimize exposure.
- Follow label directions for dwell time and disposal.
- Address moisture sources to prevent recurrence.
- For porous materials or large infestations, seek professional remediation.