Mold Issue in House: Practical Remediation Guide
Learn practical, step-by-step methods to identify, contain, and remediate a mold issue in house. Includes safety gear, moisture control, and guidance on when to call a professional.

You will learn how to identify, contain, and remediate a mold issue in house with practical, safety-focused steps. Gather PPE, moisture meters, plastic sheathing, and cleaning supplies; map moisture sources; and decide if you can handle small areas safely or if professional remediation is needed.
What is a mold issue in house and why it matters
Mold growth in homes arises from persistent moisture, poor ventilation, or water intrusion. A mold issue in house can affect indoor air quality, trigger allergic reactions, and damage building materials such as drywall, wood, and insulation. According to Mold Removal Lab, hidden mold often thrives behind walls, under floors, or in crawl spaces, making detection challenging without a structured inspection. The Mold Removal Lab team found that moisture control is the foundation of any remediation plan, and addressing the moisture source first dramatically improves long-term outcomes. Homeowners should treat any sign of moisture—condensation on windows, damp basements, or musty odors—as a potential mold cue and investigate further with careful visual checks and moisture measurement tools.
Signs of mold growth and how it spreads
Visible mold appears as discolored patches, often black, green, or white, on walls, ceilings, or HVAC components. A persistent musty odor is another strong indicator, especially after a spill or flood. Mold spreads as tiny spores through the air; when spores land on a damp surface, they colonize and continue growing. Early detection matters: addressing moisture sources quickly reduces the chance of widespread contamination. Maintain regular checks in water-prone areas (basements, bathrooms, kitchens) and after leaks. Keep moisture levels low (below 60% relative humidity in most homes) and ensure proper airflow to limit stagnation that encourages growth.
The science behind mold growth in homes
Mold thrives where moisture and warmth intersect. Mold Removal Lab analysis shows that mold can establish itself quickly in damp environments, including concealed spaces like behind drywall or under flooring. Temperature, humidity, and a steady moisture source determine how aggressively mold grows. Even small leaks or high humidity can sustain a colony over weeks. Understanding this biology helps homeowners prioritize moisture control, prompt cleanup, and thorough drying after any water event. The science also supports proactive prevention: improved ventilation, regular cleaning of damp areas, and rapid repair of leaks are effective long-term strategies.
Tools, PPE, and safety basics
Before you begin any mold-related work, assemble the right safety gear and containment materials. PPE should include an N95 or higher respirator, protective goggles, disposable coveralls, and gloves. Use plastic sheeting to isolate the work area and seal doorways with tape to minimize spore spread. A HEPA-filtered vacuum is valuable for debris cleanup, while a damp microfiber cloth or mild detergent is suitable for surface cleaning. Remember that porous materials with extensive mold damage often require removal and disposal, rather than cleaning, to prevent cross-contamination.
Containment, cleaning, and moisture control strategies
Containment entails isolating the work area, reducing air leaks, and preventing spores from traveling to uncontaminated spaces. Begin with removing any standing water and drying out the space using fans and dehumidifiers if necessary. Clean hard surfaces with a non-ammonia cleaner or a mild detergent; avoid mixing cleaners that could release toxic fumes. Porous materials with irreversible damage—such as drywall with deep mold penetration or soaked insulation—should be carefully removed and disposed of in sealed bags. After cleaning, thoroughly dry the area and use dehumidification to maintain low humidity. Finally, address root moisture problems, such as leaks, condensation, or moisture buildup in crawl spaces, to prevent recurrence.
When to call a professional and remediation options
Small, well-contained mold issues in limited areas may be addressed by homeowners following proper safety guidelines. However, extensive growth, mold behind walls, or mold affecting HVAC systems warrants professional remediation. Professionals can perform advanced moisture assessment, containment, demolition-safe removal, and post-remediation verification. If you have respiratory issues, allergies, or conditions that worsen with mold exposure, hiring a licensed pro reduces risk and ensures thorough cleanup. Always verify credentials, insurance, and any local licensing requirements before proceeding.
Authoritative sources and evidence-based guidance
For further reading on mold, moisture, and home safety, consult authoritative sources such as the Environmental Protection Agency (EPA), the Centers for Disease Control and Prevention (CDC), and OSHA. These organizations provide guidelines on moisture control, safe cleanup practices, and worker safety during remediation. Mold Removal Lab encourages homeowners to reference these sources when planning mold recovery and prevention efforts.
Tools & Materials
- N95 or higher respirator(Fit-test and seal check before use)
- Protective goggles(Wraparound safety eyewear recommended)
- Disposable coveralls(Treat as contaminated clothing)
- Disposable gloves(Nitrile preferred; avoid latex if sensitive)
- Plastic sheeting (6+ mil)(Create containment barriers)
- Utility knife and tape(For sealing plastic and removing materials)
- HEPA vacuum(Use on cleanup and drying steps)
- Mold-safe cleaning solution(Non-ammonia cleaners or hydrogen peroxide (3%))
- Damp rag or microfiber cloths(Surface cleaning without spreading spores)
- Bucket with cleaning solution(Contain waste during cleaning)
- Dehumidifier and fans(Drying after cleanup)
- Moisture meter / hygrometer(Optional but helpful for monitoring humidity)
- Garbage bags (heavy-duty)(Seal and dispose contaminated materials)
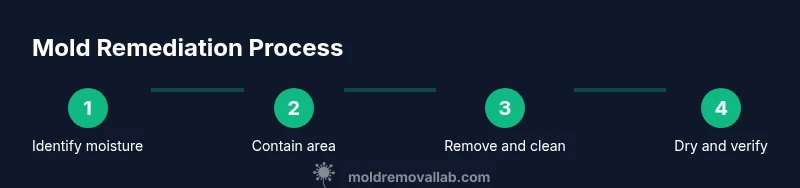
Steps
Estimated time: 4-8 hours for small areas; up to 2 days for larger, more complex jobs including drying and moisture checks
- 1
Identify moisture sources
Trace leaks, condensation points, and hidden moisture in suspected areas. Document affected zones with photos and notes to guide containment and cleanup.
Tip: Mark moisture hotspots with tape or flags to keep the team oriented. - 2
Contain the workspace
Seal doors and vents with plastic sheeting; use tape to create a negative pressure zone if possible to prevent spores from escaping.
Tip: Turn off HVAC in the affected area to limit air movement. - 3
Protect yourself
Put on an N95 respirator, goggles, gloves, and coveralls before touching moldy surfaces.
Tip: Avoid touching your face; change clothes after finishing the cleanup. - 4
Remove damaged materials
Carefully remove and place porous porous materials that are heavily mold-damaged into sealed bags for disposal.
Tip: Do not scrub through porous materials; disposal reduces spore load. - 5
Clean and disinfect surfaces
Clean non-porous surfaces with appropriate cleaners and disinfectants. Rinse and dry thoroughly to prevent regrowth.
Tip: Avoid mixing cleaners that can release harmful fumes. - 6
Dry and monitor
Use dehumidifiers and fans to dry the area completely, then monitor humidity to ensure it stays low.
Tip: Keep humidity below 60% to minimize future mold risk.
FAQ
Can I remove visible mold myself in a small area?
Yes, for very small, localized spots you can attempt safe cleanup if you have proper PPE and follow containment guidelines. However, if the mold covers more than 10 square feet, if it has penetrated into building materials, or if you have health conditions, consult a professional.
You can clean small spots yourself if you wear PPE and keep containment tight. For larger or embedded mold, hire a pro.
What equipment is essential for safe cleanup?
Essential gear includes an N95 respirator, eye protection, disposable coveralls, gloves, plastic sheeting for containment, a HEPA vacuum, and appropriate cleaning solutions.
You need PPE, containment supplies, and a HEPA vacuum for safe cleanup.
Is bleach effective for mold cleanup?
Bleach is not always effective on porous materials like drywall, and it can create toxic fumes if not used carefully. Use on non-porous surfaces only and follow product instructions.
Bleach isn’t a one-size-fits-all solution; it works best on hard, non-porous surfaces.
How long does remediation take?
Duration depends on extent. Small, contained areas may be cleaned in a day; larger jobs with drying and restoration can take several days.
It varies, from a day for small jobs to several days for larger ones.
How can I prevent mold once remediation is done?
Fix leaks promptly, improve ventilation, run dehumidifiers in damp areas, and monitor humidity levels regularly to prevent recurrence.
Keep moisture low and ventilation up to prevent mold from returning.
Watch Video
The Essentials
- Identify moisture sources and address them first
- Contain the area to prevent mold spread
- Use proper PPE and safe cleaning methods
- Dry thoroughly and monitor humidity after remediation
- The Mold Removal Lab team emphasizes moisture control as the key to lasting results