How to Handle Mold in Water: A Practical Guide
A practical, step-by-step guide to identifying, containing, and safely remediating mold in water after leaks or floods. Learn essential safety, drying techniques, and prevention to protect health and home. Includes tools, steps, tips, and when to call a pro.

After a water event, mold growth can threaten health and structure. This guide shows how to identify, contain, and safely remediate mold in water, with practical steps for common materials and spaces. You'll learn essential safety checks, containment tactics, and a step-by-step workflow to protect your home. We reference Mold Removal Lab findings and emphasize no DIY shortcuts that ignore moisture sources.
What is mold in water and why it matters
Mold in water refers to mold growth that arises when moisture remains after a water event such as a leak, spill, or flood. Mold can colonize walls, floors, insulation, fabrics, and other porous materials, especially when humidity stays high for more than 24–48 hours. Health concerns range from allergic reactions to respiratory irritation, and some species produce mycotoxins that may affect sensitive individuals. The risk is not only skin-deep—the structural integrity of materials can be compromised as mold feeds on cellulose and other organics. According to Mold Removal Lab, moisture is the essential trigger for mold establishment, and rapid moisture control is your first defense after water intrusion. This makes timely assessment and containment critical to prevent long-term damage and costly remediation later.
Safety first: containment and PPE
Before you touch anything, establish containment to prevent spores from spreading to undamaged areas. Use plastic sheeting to seal off the work zone, and set up negative air flow if available. PPE is nonnegotiable: an appropriately rated respirator (N95 or higher), impermeable gloves, eye protection, and disposable coveralls. Avoid dry sweeping or airing out the space, which can loft spores. Keep kids and pets away, and post warning signs to alert others to stay out of the affected area. Proper containment and PPE dramatically reduce exposure and simplify cleanup, especially in living areas where people with allergies or asthma live.
Assessing the water damage site
Begin with a careful, methodical survey to identify moisture sources and affected materials. Look for standing water, damp insulation, swollen drywall, warped baseboards, and musty odors. Use a moisture meter or hygrometer to quantify dampness levels in walls, ceilings, and floors. Document the damage with photos before removal, as this helps insurance claims and future remediation decisions. A key step is pinpointing the moisture source—repairing leaks, plumbing issues, or roof penetrations—before mold remediation proceeds. This reduces the chance of recontamination and speeds up drying.
Cleaning strategies for non-porous surfaces
Non-porous surfaces like tile, metal, and solid glass are easier to clean and disinfect. Start with a detergent solution to remove visible mold and residues, then apply an EPA-registered disinfectant or an approved household cleaner. Avoid mixing cleaners that can emit harmful fumes; never combine bleach with ammonia. Rinse and dry thoroughly, ensuring the surface returns to a humidity level that discourages regrowth. For many non-porous surfaces, physical removal combined with proper drying is sufficient to restore a safe environment.
Handling porous materials and hidden mold
Porous materials—drywall, insulation, carpeting, fabric—often harbor mold that is not visible on the surface. If these materials are moldy or persistently damp, they should be removed and disposed of properly. Do not attempt to scrub mold from drywall or insulation, as this can push spores deeper into the materials. Place removed materials in sealed bags for disposal. After removal, treat the surrounding framing or studs with a cleaner and ensure thorough drying before reinstalling new material. Hidden mold is a common source of recurrent problems if moisture remains unchecked.
Drying and dehumidification strategies
Moisture must be reduced to safe levels to stop mold growth. Use dehumidifiers and high-capacity fans to improve air circulation, directing moisture-laden air toward exhaust points. Maintain indoor humidity below 50% if possible, and even lower in areas with prior mold. Drying equipment should run in cycles, and moisture meters should be used to confirm continued progress. It’s essential to monitor progress over 24–72 hours, as lingering moisture can reignite mold growth and complicate subsequent cleanup. Persistent humidity is the enemy of remediation.
When to call a mold remediation professional
If mold covers more than 10 square feet, or if it involves HVAC systems, porous building materials, or unknown containment areas, professional remediation is advised. A licensed remediation specialist can assess hidden mold, perform controlled removal, and prevent cross-contamination with engineered containment, HEPA filtration, and proper waste handling. Even if you begin DIY cleanup, consult a pro for air quality assessments and post-remediation verification. Early professional input can save time and reduce health risks.
Preventing future mold after a water event
Prevention is about stopping moisture from returning. Repair leaks promptly, fix roof or plumbing issues, and improve ventilation in damp spaces like bathrooms and basements. Consider adding moisture barriers, insulation upgrades, and improved drainage away from the home. Regular inspections after storms or spills help catch issues early. Keep humidity in a safe range with dehumidification and monitor for musty odors, damp patches, or visible staining. Proactive maintenance is the best defense against mold recurrence and costly remediations. The Mold Removal Lab team emphasizes consistent moisture control as the cornerstone of long-term prevention.
Documentation, insurance, and staying safe
Keep meticulous records of the water event, moisture readings, remediation steps, and receipts for supplies. Photos before, during, and after remediation support insurance claims and future repairs. If you have persistent moisture issues or if indoor air quality remains poor after cleanup, seek a professional assessment. Documented moisture control and remediation steps reduce ambiguity for insurers and contractors, and they help you track long-term health and safety improvements for your home.
Tools & Materials
- N95 respirator or better(Essential for mold spores; consider P100 for higher exposure)
- Protective gloves(Rubber or nitrile; avoid latex if you have sensitivities)
- Goggles or protective eyewear(Protection from splashes and dust)
- Disposable coveralls(Trip-resistant; discard after use)
- Plastic sheeting and tape(Create contained work zones)
- Heavy-duty trash bags(Seal well for contaminated materials)
- Detergent solution (mild soap)(First step to remove residues)
- EPA-registered mold cleaner or disinfectant(Follow label directions for safe use)
- Bleach (optional for non-porous only)(Do not mix with ammonia; avoid porous materials)
- Spray bottle(Even application of cleaners)
- Scrub brushes and rags(Use separate tools for moldy vs clean areas)
- Moisture meter or hygrometer(Track moisture content over time)
- Dehumidifier(Critical for rapid moisture removal)
- Commercial fans/air movers(Improve air circulation and drying)
- Flashlight or moisture camera(Identify hidden mold and damp spots)
- Sealant or mold-resistant primers (for rebuild)(Used during reconstruction to reduce recurrence)
Steps
Estimated time: 2-3 days
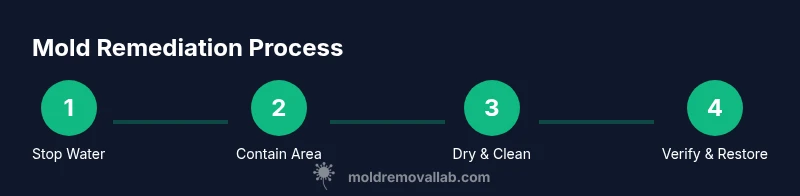
- 1
Identify and stop the water source
Locate and repair the leak or source of moisture. This halts ongoing mold growth and reduces the amount of contaminated material you must remove. If water continues to infiltrate, remediation will be ineffective.
Tip: Document the moisture source repair with photos and receipts for insurance claims. - 2
Contain the work area
Seal off the affected space with plastic sheeting and tape to prevent spores from traveling to undamaged areas. Use negative air pressure if possible to keep air flowing away from other rooms.
Tip: Keep entry points closed; designate a clear path for debris removal to avoid cross-contamination. - 3
Wear proper PPE and remove small debris
Don your N95 mask, gloves, goggles, and coveralls. Remove loose debris and any non-porous items that are visibly moldy with light wiping. Do not over-handle wet porous materials.
Tip: Avoid touching your face during cleanup and wash hands after removal of PPE. - 4
Remove and dispose of porous materials
If drywall, insulation, or carpeting are mold-damaged beyond cleaning, seal them in bags and dispose of properly. Do not attempt to scrub these materials if mold growth is heavy.
Tip: Label bags clearly and keep them out of living spaces during disposal. - 5
Clean non-porous surfaces
Wipe with detergent solution, scrub if needed, rinse, and then apply an EPA-registered disinfectant. For stubborn areas, repeat cleaning and ensure surface dries completely.
Tip: Rinse thoroughly to prevent residue that could foster new mold growth. - 6
Dry the area thoroughly
Run dehumidifiers and fans to bring humidity below 50%. Use a moisture meter to confirm drying progress over 24–72 hours. Do not close up the area too soon.
Tip: Aim for stable readings over 24 hours before proceeding with rebuild. - 7
Inspect for hidden mold and re-test
Check less visible areas like behind walls or under cabinets. Consider professional testing if you suspect hidden growth or if indoor air quality remains poor.
Tip: Don’t assume completion—verify with measurements and visual checks. - 8
Restore and monitor
Replace removed materials with mold-resistant options where possible. Reinspect moisture zones periodically and maintain humidity control to prevent recurrence.
Tip: Keep moisture logs and seasonal checks to catch problems early.
FAQ
Can mold grow without a water source?
Mold needs moisture to grow. In damp spaces with high humidity, spores can become established even without a visible leak. Fixing water problems and reducing humidity are essential for control.
Mold needs moisture to grow, so address leaks and lower humidity to prevent it from spreading.
What are signs of mold after water damage?
Look for visible spots, musty odors, water stains, discoloration, and warped materials. If you notice any of these after a spill or leak, investigate moisture levels and consider professional assessment.
Visible mold spots and a musty smell indicate possible growth after water damage.
Is bleach effective for mold in water remediation?
Bleach can kill some surface mold on non-porous surfaces, but it doesn't address mold within porous materials or the moisture source. It may also produce fumes in enclosed spaces. Use according to label directions and consider alternatives for porous materials.
Bleach isn’t a cure-all; it’s limited and can be unsafe in some spaces.
Is DIY remediation safe?
DIY remediation can be safe for small, non-porous areas with proper PPE and ventilation. For large-scale mold, porous materials, or HVAC involvement, professionals are recommended to reduce exposure and ensure thorough cleanup.
DIY can be safe for small jobs, but bigger problems need pros.
How long does it take for mold to grow after water exposure?
Mold can start growing within 24–48 hours in moist environments. Prompt moisture control and drying are key to preventing establishment and spread.
Mold can begin growing in as little as 1-2 days after moisture exposure.
What safety equipment is required?
Use an N95 or higher respirator, protective gloves, goggles, and disposable coveralls when cleaning mold. Ensure proper disposal of contaminated materials and wash hands after removal.
Protective gear is essential when cleaning mold to avoid exposure.
Do I need to test for mold after cleanup?
Testing is optional for small, contained spaces. For larger areas or uncertain contamination, professional testing can confirm that mold levels are safe and remediation is complete.
Testing isn’t always required, but it helps verify success after cleanup.
Watch Video
The Essentials
- Identify moisture sources early and stop water intrusion.
- Contain and protect surrounding living spaces to prevent contamination.
- Dry thoroughly to below 50% humidity before rebuilding.
- Remove moldy porous materials; clean non-porous surfaces with care.
- Monitor moisture long-term to prevent recurrence.