Mold Growth: Identification, Risks, and Remediation for Homes
A comprehensive, practical guide from Mold Removal Lab on mold growth—identification, health risks, DIY remediation, and when to hire professionals to restore a safe home environment.

Learn how to identify mold growth, assess its extent, and start a safe remediation plan in your home. This guide covers common sources, rapid containment, and practical steps you can take today to reduce moisture, prevent spread, and protect health. By following these steps you can decide between DIY methods and when to call a professional, and you will understand typical timelines and safety considerations.
What mold growth is and why it matters
Mold growth in homes happens when moisture is present long enough for mold spores to colonize surfaces. Mold can appear as black, green, white, or gray patches and is often accompanied by a musty odor. While some mold species are relatively harmless in small amounts, many can trigger allergies, irritate eyes, nose, or lungs, and in damp, poorly ventilated spaces, health risks rise. Understanding how mold growth starts helps you address the root causes rather than simply cleaning visible patches. According to Mold Removal Lab, identifying moisture sources is the first step in stopping growth at the source. In many homes, fixing leaks, improving ventilation, and reducing indoor humidity can dramatically reduce mold growth over time. Even mold that isn’t immediately visible behind walls can contribute to health concerns if moisture remains unchecked, making proactive detection essential for a safe living environment.
Common sources and indicators
Mold growth thrives where moisture lingers. Common sources include roof leaks, plumbing leaks, condensate on windows, and high indoor humidity. Indicators range from visible patches and staining to bubbling paint, warped surfaces, and a persistent musty odor. Hidden mold behind drywall, under flooring, or in crawl spaces is common in older homes or after water damage. Early indicators are often subtle: a damp feeling in a room after rain, chronic condensation on windows, or peeling wallpaper around plumbing lines. Regular inspections of vulnerable areas—basements, bathrooms, kitchens, and around HVAC ducts—can help catch growth before it spreads. If you notice any combination of moisture, odor, and discoloration, investigate further and document locations for targeted remediation.
Health risks of mold growth
Mold growth can affect people differently. Some individuals experience allergic reactions or irritation from exposure, including sneezing, runny nose, red eyes, and coughing. People with asthma, chronic lung conditions, or immune suppression may experience more severe symptoms. Long-term exposure in damp environments has been linked to respiratory issues, headaches, and fatigue in susceptible populations. In most homes, reducing moisture and improving air flow substantially lowers risk. Mold Removal Lab analysis shows that addressing humidity and water intrusion promptly correlates with fewer health complaints among residents. By controlling moisture, you reduce the opportunity for growth and the associated health impacts for your household.
Detecting mold growth: DIY checks and when to test
Begin with a visual survey of rooms prone to moisture—bathrooms, basements, kitchens, and laundry areas. Look for signs such as discolored patches, fuzzy or dated-looking surfaces, or a persistent musty smell. Use a simple moisture meter to gauge humidity on walls, under sinks, and behind appliances. If you detect dampness behind walls, under flooring, or in areas beyond visual reach, consider hiring a professional to perform infrared scanning or air sampling. Keep a log of affected areas, dates of moisture events, and remediation efforts to track progress. When in doubt about the severity, a professional assessment can determine if contamination is localized or widespread and help prevent recurrence.
Practical steps to remediate mold growth safely
Remediation starts with containment to prevent spores from spreading. Close doors, seal off the space with plastic sheeting, and minimize activity that stirs dust. Wear appropriate PPE: an N95 respirator, gloves, and eye protection, plus protective clothing. Fix the moisture source first—repair leaks and improve ventilation to reduce humidity. Clean visible mold with a detergent solution, scrub until the area is visibly clean, then dry completely to inhibit regrowth. Porous materials with extensive mold damage may need disposal and replacement. After cleanup, monitor humidity and maintain a dry environment to prevent recurrence. Remember that larger infestations or mold growth behind walls often require professional remediation with HEPA containment and specialized equipment.
DIY cleanup vs professional remediation
Small, isolated mold patches on non-porous surfaces with low moisture levels can sometimes be cleaned safely by homeowners following proper PPE and containment. However, large areas, mold growth on porous materials, or growth linked to ongoing water problems are best handled by professionals who have specialized equipment and training. If the area exceeds a few square feet, or if visible growth returns after cleaning, seek professional remediation. Professionals can perform mold removal with containment, HEPA filtration, and post-remediation verification to ensure the problem is resolved and not simply hidden.
Preventing future mold growth: moisture control and maintenance
Prevention centers on moisture management. Maintain indoor humidity below 50–60% using dehumidifiers or air conditioning, and improve ventilation in moisture-prone spaces. Regularly inspect plumbing, roofs, and windows for leaks, and promptly repair any damage. Address condensation by improving insulation and ensuring air flow between walls and living spaces. Clean and dry damp areas within 24–48 hours after any spill or water intrusion to prevent mold development. A proactive maintenance routine reduces the chances of future mold growth and helps preserve indoor air quality for your family.
Getting help and next steps
If you’re unsure about the extent of mold growth or if you’ve encountered recurring moisture problems, start with a professional assessment. A qualified mold remediation technician can determine the scope, provide containment strategies, and offer a safe cleanup plan. For ongoing prevention, establish a moisture-control routine, keep humidity in check, and perform regular inspections, especially after storms or plumbing work. The Mold Removal Lab team recommends documenting all findings and remediation steps so you can monitor progress over time and adjust as needed. With careful planning and timely action, you can restore a healthy home environment.
Tools & Materials
- N95 respirator(Ensure proper fit and filtration)
- Nitrile gloves(Chemical-resistant; use disposable gloves)
- Safety goggles(Splash protection; avoid direct contact with eyes)
- Protective clothing(Long sleeves; disposable coveralls optional)
- Detergent or mold-cleaning solution(Choose a cleaner suitable for non-porous surfaces)
- Scrub brush or sponge(Stiff brush for grout and textured surfaces)
- Plastic sheeting for containment(Cover doors and seal off the area)
- Disposable bags and tape(For disposal of contaminated materials)
- Mold-safe disposal container(Optional for organizing waste)
- HEPA vacuum (portable)(Optional; used by professionals for cleanup)
- Moisture meter or hygrometer(Helpful for monitoring drying progress)
Steps
Estimated time: 2-6 hours
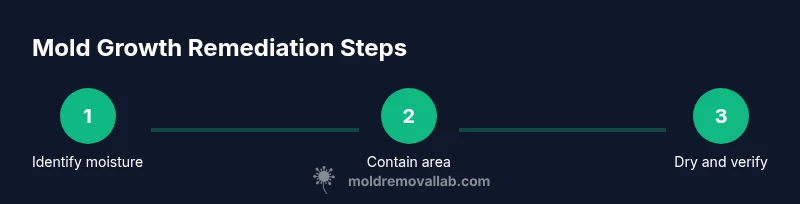
- 1
Identify moisture sources
Inspect for leaks, condensation, and any sources of ongoing moisture. Document locations and note the conditions that lead to dampness. Understanding the cause helps target repair work and prevent future growth.
Tip: Take photos before cleaning to track changes and progress. - 2
Contain the work area
Close off the affected space and seal with plastic sheeting to prevent spores from dispersing to other rooms. Limit activities that stir up dust inside the area to minimize airborne particles.
Tip: Turn off central air handling or set to recirculate to avoid cross-contamination. - 3
Prepare PPE and workspace
Don the N95 respirator, gloves, goggles, and protective clothing. Lay out cleaning tools and disposal bags outside the containment zone to avoid cross-contamination.
Tip: Double-check respirator fit for maximum protection. - 4
Clean visible mold
Scrub non-porous surfaces with a detergent solution until clean, then wipe dry. Porous materials with extensive mold damage should be removed and disposed of appropriately.
Tip: Avoid saturating surfaces; moisture promotes further growth. - 5
Dry and monitor
Dry the area completely using fans or dehumidifiers. Check humidity levels and re-clean if new growth appears. Documentation helps verify that moisture issues are resolved.
Tip: Aim for indoor humidity below 50% after remediation. - 6
Verify and plan follow-up
Perform a final check for hidden moisture, and consider a professional assessment if growth recurs. Schedule follow-up visits to ensure remediation is lasting.
Tip: Keep a maintenance schedule and respond quickly to any signs of moisture.
FAQ
What is mold growth and how does it start in homes?
Mold growth occurs when moisture supports mold spore colonization on surfaces. It can appear as patches of various colors and often accompanies a musty odor. Moist environments, leaks, or poor ventilation are common triggers.
Mold growth starts when moisture allows mold to thrive on surfaces; look for patches or a musty smell and fix moisture sources.
Can I remove mold growth myself?
Small, isolated patches on non-porous surfaces can sometimes be cleaned by homeowners using proper PPE and containment. Larger areas, mold behind walls, or growth on porous materials should be handled by professionals.
Small spots can be cleaned with the right gear, but big or hidden mold is best left to pros.
How do I know when to call a professional?
Call a professional if the mold covers a large area, recurs after cleaning, or involves porous materials and structural components. A professional can safely contain, remove, and verify the remediation.
If the mold is widespread or keeps coming back, a pro should assess it.
Should I test for mold after cleanup?
Post-remediation testing is often recommended to confirm the environment is free of mold growth and moisture problems have been resolved. Use accredited labs or qualified inspectors for accurate results.
Testing after cleanup helps confirm the problem is resolved.
What practical steps prevent mold from returning?
Maintain humidity below 50–60%, fix leaks promptly, improve ventilation in damp areas, and inspect for moisture after weather events. Regular checks help catch issues before mold can reestablish.
Keep humidity down, fix leaks quickly, and inspect regularly to prevent mold return.
Is mold dangerous to everyone?
Mold exposure can affect individuals differently. Some people experience allergic-like symptoms or irritation, especially with sensitive individuals or those with respiratory conditions. If symptoms persist, seek medical advice and address the moisture problem in your home.
Mold can affect some people more than others; if symptoms persist, seek help.
Watch Video
The Essentials
- Identify moisture sources first to stop mold growth at the root.
- Contain the area and protect yourself before cleaning.
- Dry thoroughly to prevent regrowth and monitor humidity.
- Choose DIY cleanup for small, non-porous patches; call a pro for large or hidden growth.
- Prevent reoccurrence with ongoing moisture management and regular inspections.