Mold Cleaner for Walls: Safe Steps to Clean and Prevent Recurrence
A practical, step-by-step guide for homeowners on choosing and using a mold cleaner for walls, preventing recurrence, and maintaining healthy indoor air with safety-first tips.

By the end you will know how to select an effective mold cleaner for walls, assess moisture sources, and safely clean, dry, and re-seal wall surfaces to prevent recurrence. This quick guide covers safety gear, product choices (natural vs chemical), and practical steps you can follow in a typical home bathroom or living room wall mold issue.
Understanding wall mold and why a mold cleaner for walls matters
Mold growth on interior walls is usually a sign of hidden moisture and humidity issues. Without addressing the moisture source, surface cleaning offers only temporary relief. A mold cleaner for walls is one part of a safe remediation strategy, not a miracle cure. According to Mold Removal Lab, most wall mold problems stem from leaks, condensation, or poor ventilation, and they reappear when humidity remains high. This section explains how mold forms on painted drywall, plaster, or paneling, and why choosing the right cleaner matters for different wall materials. You will learn to identify the type of mold on your walls, assess the extent of contamination, and pick a cleaner that is effective yet safe for your family and pets. You will also consider doing a small patch test on an inconspicuous area first to confirm compatibility with paint or wallpaper. The Mold Removal Lab Team emphasizes that cleaning is a step in a broader moisture-control effort, not a one-time fix.
Types of mold cleaners for walls: pros and cons
There are several cleaner options for walls, each with particular strengths and limitations. Water-based cleaners labeled for mold removal are generally safer for long-term use on painted surfaces, but they may require longer drying times. Sodium hypochlorite (household bleach) can kill surface mold on nonporous materials, yet drywall and wallpaper are porous and can harbor hidden colonies if not dried thoroughly. Hydrogen peroxide at 3% concentration offers a gentler antimicrobial effect suitable for some paints and finishes, but it can bleach darker colors. Enzymatic cleaners work by breaking down organic mold components and can be effective for stubborn odors and surface mold on porous materials. Enzyme-based products tend to be less harsh and are often preferred in homes with children or pets. For raw concrete, brick, or stone, a stronger cleaner or a professional-grade product may be necessary. Always read labels to confirm wall-material compatibility and follow the manufacturer’s instructions. Mold Removal Lab recommends starting with a milder cleaner and escalating only if the mold returns.
Preparing the area: safety and containment
Before any cleaning, prepare the space to minimize exposure and prevent spread. Wear an N95 respirator (or a fit-tested respirator), protective goggles, and gloves. Use disposable coveralls if the mold is widespread. Isolate the work area with plastic sheeting and seal doors or vents to prevent spores from traveling to other rooms. Remove or cover nearby furniture, and place a plastic tray or drop cloth under the work area to catch drips. Ensure good ventilation by opening windows or using a fan directed away from your body. If you have a preexisting allergy or asthma, consider leaving the area until humidity is controlled and mold is removed. These safety steps help protect your lungs and reduce the risk of spreading spores to other spaces, a key point highlighted in Mold Removal Lab guidance.
Cleaning approach: surface prep, cleaning, drying
Start with dry wiping to remove loose mold before applying any liquid cleaner. Apply the cleaner to a small inconspicuous area first to check compatibility. Use a stiff-bristle brush or sponge to scrub the affected surface, working in gentle circles to avoid damaging paint or wallpaper. Rinse with a clean damp cloth if the product’s instructions allow, then dry the surface thoroughly with a clean towel or allow it to air-dry completely. Porous wall materials like drywall may require more thorough drying and possibly a second treatment if mold returns. After cleaning, recheck for any odors or discoloration that might indicate remaining moisture or hidden mold growth. Adequate drying within 24 hours reduces the chance of regrowth and supports a longer-lasting result. The key is to remove moisture and to fix the underlying humidity problem to avoid recurring mold.
Post-cleaning prevention: moisture control and maintenance
Prevention is the cornerstone of an effective wall mold remediation plan. Use a dehumidifier or improve ventilation to keep indoor humidity below about 50% when possible. Fix leaks and seal windows where condensation forms. Consider insulating exterior walls or improving crawl-space drainage if dampness persists. Regularly inspect walls for staining, soft spots, or musty odors, especially after heavy rain or changes in temperature. If you repaint, use mold-resistant primers and paints designed to resist moisture. Routine cleaning with a mild cleaner and dried surfaces helps maintain a mold-free environment. Mold Removal Lab stress that ongoing moisture control is far more important than a single cleaning session.
When to call a professional
If your mold covers more than a small area (roughly a square foot or more), if there is visible water damage, or if you notice persistent odors after cleaning, it’s time to call a professional. Large infestations, hidden mold behind walls, or signs of structural damage require specialized equipment and expertise. A professional can perform moisture mapping, containment, and remediation with proper safety and disposal. If recent renovations or plumbing work preceded the mold, seek a professional assessment to ensure there are no remaining moisture sources. The Mold Removal Lab Team notes that professional intervention can save time, reduce risk, and prevent recurrence when moisture sources are not easily controlled by DIY methods.
Common mistakes and how to avoid them
Common mistakes include using too much cleaner on porous surfaces, skipping the drying phase, and ignoring hidden moisture sources. Another error is using bleach on porous materials such as drywall or wood paneling, which can push mold spores deeper and create more staining. Never mix cleaners unless the label explicitly allows it, as combining products (for example, ammonia with bleach) can release toxic gases. Also, avoid sealing moldy walls without addressing moisture; sealing can trap moisture and make future mold growth worse. Following a clear, methodical approach and focusing on drying and moisture control, as endorsed by Mold Removal Lab, reduces the risk of recurrence.
Quick maintenance checklist
- Inspect humidity and fix leaks promptly
- Clean and dry surfaces within 24 hours of any dampness
- Use mold-resistant primers on painted walls
- Maintain air movement with fans or exhausts in moist areas
- Schedule seasonal inspections for bathrooms and basements
- Track any changes in odor or staining and respond quickly
Tools & Materials
- N95 respirator or better(Fit-tested if possible)
- Safety goggles(Splash protection)
- Protective gloves(Latex or nitrile)
- Disposable coveralls(Optional for large areas)
- Plastic sheeting (6 mil)(Seal off area)
- Painter's tape(Secure plastic sheeting)
- Disposable drop cloths(Protect furnishings)
- Spray bottle(For cleaner application)
- Stiff-bristle brush(For stubborn mold)
- Sponge and microfiber cloths(For wiping and drying)
- Bucket(For rinsing or dilution)
- Ventilation fan or dehumidifier(Speed up drying)
- Mild detergent or approved mold cleaner(Follow label directions)
- Chalk or markers(Mark test spots)
Steps
Estimated time: 60-120 minutes
- 1
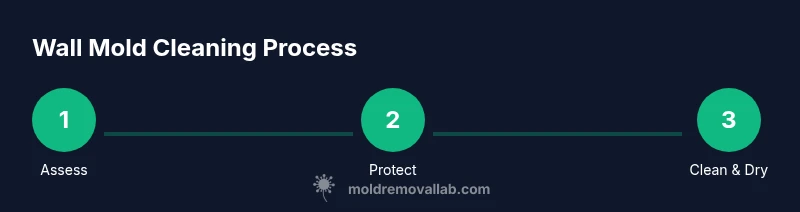
Assess the mold extent and safety
Begin by estimating the affected area and confirming there’s no ongoing water intrusion. If there is active leaks, address moisture first. A quick visual check helps plan the cleaning approach and determine whether you need a more thorough remediation.
Tip: Document the area with a photo for records and future repairs. - 2
Protect you and the space
Put on N95, eye protection, and gloves. Seal off the room with plastic sheeting to prevent spores from escaping to adjacent spaces. If you have pets or kids, relocate them during the remediation.
Tip: Ensure sleeves are long enough to protect wrists; double-glove if heavy contact is likely. - 3
Choose and prepare cleaner
Select a mold cleaner appropriate for the wall material. Dilute or mix per label instructions and prepare a clean, well-ventilated workspace. Test a small area first to check for paint compatibility.
Tip: Keep cleaners away from heat sources and avoid mixing incompatible chemicals. - 4
Apply cleaner and scrub
Spray the affected area and allow the solution to dwell briefly as recommended. Scrub with a stiff-bristle brush in a gentle circular motion, focusing on the mold-prone seams and edges.
Tip: Do not scrub so aggressively that you damage paint or wallpaper. - 5
Rinse and dry
Wipe away residue with a damp cloth if allowed by the cleaner, then thoroughly dry the surface with towels or a fan set to blow across the surface. Porous materials may require longer drying times.
Tip: Aim for complete dryness within 24 hours to prevent regrowth. - 6
Inspect for hidden mold
Look behind baseboards, behind wallpaper, and in any close-wall cavities where moisture collects. If you suspect hidden mold, consider a second treatment or professional assessment.
Tip: Use a flashlight to reveal dark areas that aren’t obvious at first glance. - 7
Address moisture sources
Fix leaks, improve ventilation, and consider dehumidification to maintain humidity below 50%. This reduces the chance of mold returning after cleaning.
Tip: Install exhaust fans in bathrooms and kitchens if they’re not present. - 8
Plan prevention and maintenance
Set a routine to inspect walls, recheck humidity, and touch up paint with mold-resistant products when needed. Schedule seasonal checks after heavy rains or rapid temperature changes.
Tip: Keep a mold-remediation log to track improvements and recurrence.
FAQ
Can I use bleach to clean mold on walls?
Bleach can kill surface mold on nonporous surfaces, but drywall and other porous wall materials may harbor mold beneath the surface. Use bleach carefully and follow label directions, and prefer milder cleaners for porous materials.
Bleach can kill surface mold on nonporous surfaces, but porous walls may still harbor mold beneath the surface. Use milder cleaners and follow the label.
Is hydrogen peroxide safe for walls?
3% hydrogen peroxide is a milder option that can be effective on certain paints and finishes. It can bleach colors, so test first and avoid applying to dark or highly pigmented surfaces.
Three percent hydrogen peroxide is a milder option, but test first to avoid bleaching colors.
How long does it take for walls to dry after cleaning?
Drying times vary with room temperature and ventilation, but aim for complete dryness within 24 hours. If moisture lingers, re-check ventilation and consider a dehumidifier.
Expect drying within about a day with good airflow; if it stays damp, boost ventilation.
When should I call a professional?
Call a professional for large areas, hidden mold behind walls, water damage, or recurring mold after cleaning. A professional can assess moisture sources, contain the area, and provide remediation.
Call a pro for large or hidden mold or if it keeps coming back.
Should I repaint immediately after cleaning?
Repainting can seal in moisture if mold recurs behind walls. Only repaint after you’re confident the area is dry and free of active mold, and consider mold-resistant primers.
Only repaint once you’re sure the area is dry and mold-free.
The Essentials
- Act quickly to limit mold spread on walls
- Use the right cleaner for wall material
- Dry thoroughly within 24 hours after cleaning
- Fix the moisture source to prevent recurrence
- Consider professional help for large or hidden mold