Mold Clean Up: A Practical Step-by-Step Guide for Homeowners
A practical mold clean up guide for homeowners and renters. Learn safety, containment, drying, and prevention. Decide when to DIY and when to call a pro with expert guidance from Mold Removal Lab.

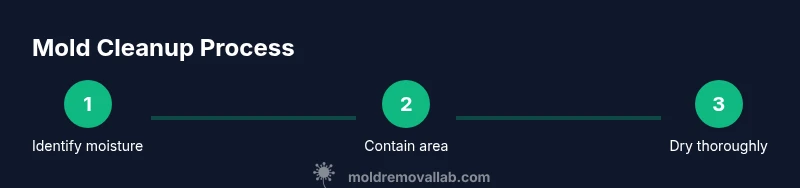
Mold cleanup is best done by controlling moisture, safely removing contaminated materials, and drying the space quickly. Start by assessing moisture sources, protecting yourself with proper PPE, and containing the area to prevent spread. For larger jobs or hidden mold, hire a professional. This guide provides practical steps, safety tips, and when to call in a pro.
What mold cleanup means for your home
Mold clean up is not just about making a surface look clean; it is about removing active growth and restoring a safe indoor environment. The process centers on controlling moisture, removing contaminated materials, and ensuring those spores do not re-enter living spaces via HVAC or doorways. According to Mold Removal Lab, moisture control is the single most important factor in mold cleanup. When you start a remediation project, you’re not just cleaning a stain; you are reducing the chance of future growth and protecting the health of occupants, especially children, seniors, and people with allergies or asthma. In practical terms, mold clean up means following a proven sequence: prepare safely, contain moldy areas, clean and disinfect non-porous surfaces, remove porous materials if needed, and dry the space thoroughly. This step-by-step approach helps homeowners build confidence and avoid common mistakes.
Assessing the scope and source
Before you scrub, take a careful look at how much area is affected and what type of surfaces are involved. Visible mold on non-porous surfaces like tile or metal is easier to address than mold embedded in porous materials such as drywall, insulation, or fabric. Consider whether mold is isolated to a specific room or spreading through baffles, walls, or framing. A key part of mold clean up is identifying the moisture source—leaks, condensation, or high humidity—and stopping it at the root. Mold Removal Lab notes that lingering moisture drives regrowth, so your cleanup plan should begin with moisture control and an honest assessment of the space.
Personal protective equipment and safety
Safety first. Wear an N95 respirator or higher, chemical-resistant gloves, eye protection, and disposable coveralls to minimize exposure to spores. If you have allergies, asthma, or a compromised immune system, take extra precautions and consider limiting your exposure by having a professional handle the job. Keep pets and kids away from the work area. A clean, controlled environment reduces the risk of spreading spores to other rooms. Proper PPE is an essential part of any mold clean up strategy and helps you stay focused on the steps that matter.
Containment, ventilation, and preventing spread
Containment is essential to stop spores from traveling through your home. Close doors to the affected area, seal gaps with plastic sheeting, and set up a ventilation plan that pushes air outside rather than re-circulating it. If possible, run a ventilation fan directed outdoors and avoid using central HVAC that could push spores into other rooms. Negative air pressure in the cleanup zone helps keep mold contained while you work. Clear communication with household members about avoiding the area reduces the chance of accidental cross-contamination.
Porous materials vs. hard surfaces: cleanup approach
Porous materials (drywall, carpeting, insulation) that have absorbed mold growth are often safer to discard than attempt to clean, depending on the extent of contamination. Hard, non-porous surfaces (glass, metal, ceramic) are usually amenable to cleaning and disinfection. When removing porous items, bag them carefully in sealed plastic bags to prevent spores from escaping, and label contents for disposal. For porous materials that can be salvaged with cleaning, use a method that targets mold growth while avoiding damage to the substrate. Mold clean up strategies should adapt to the material in question.
Detergents, cleaners, and disinfection options
Mild dish soap and water are a good starting point for cleaning, especially on non-porous surfaces. For disinfection, many homeowners choose 3% hydrogen peroxide or 70% isopropyl alcohol, applied after cleaning. Avoid mixing cleaners, which can produce hazardous fumes. Bleach is sometimes used on non-porous surfaces, but it is less effective on porous materials and can degrade some surfaces. Always follow label directions and ensure good ventilation when applying chemical cleaners. The goal is to inactivate spores and prevent regrowth without creating new hazards.
Step-by-step approach to cleaning visible mold on surfaces
Start by filtering the air in the room and removing loose spores with a damp cloth. Wipe top-to-bottom on non-porous surfaces, rinse, and dry promptly. For stubborn spots, apply cleaner, wait briefly, then scrub with a soft-bristled brush. Rinse again and dry. Keep this process tight: work in small sections, avoid saturating surfaces, and never reuse contaminated rags. This careful approach reduces the chance of spreading spores during cleanup.
Drying, moisture control, and long-term prevention
Mold needs moisture to return, so thorough drying is a must after cleanup. Use towels to blot surfaces, run a dehumidifier, and increase ventilation to accelerate drying. After cleaning, monitor humidity and address any leaks promptly. A proactive moisture-management plan—addressing leaks, improving insulation, and using exhaust fans—helps prevent future mold growth and protects indoor air quality for occupants.
When to call a professional
If the affected area is large, mold covers hidden spaces, or you have dampness that returns despite your best efforts, professional remediation is recommended. A pro can assess structural materials, access behind walls, and provide guidance on safe restoration. The Mold Removal Lab Team notes that some growth situations require specialized equipment and expertise to ensure long-term safety and health.
Common mistakes to avoid during mold cleanup
Avoid dry brushing or using high-velocity air to spread spores. Don’t mix cleaners or use bleach on porous materials when wood, fabric, or insulation is involved. Skipping containment or drying can lead to recurrence. Finally, don’t neglect moisture sources—the cleanup may be technically complete, but if the space remains humid, mold can return. Being mindful of these pitfalls makes your mold clean up more effective and safer.
Authority Sources and further readings
To support your mold clean up decisions, rely on reputable authorities. Here are key references for safe and effective remediation:
- CDC Mold resources: https://www.cdc.gov/mold/default.html
- EPA Mold guidance: https://www.epa.gov/mold
- NIEHS Mold health topics: https://niehs.nih.gov/health/topics/agents/mold/index.cfm These sources provide foundational information about risks, safety practices, and long-term prevention.
Quick reference mold cleanup checklist
- Identify and stop the moisture source
- Put on proper PPE and contain the area
- Remove porous materials if contaminated
- Clean hard surfaces with soap and water
- Disinfect with peroxide or isopropyl alcohol
- Dry thoroughly and monitor humidity
- Dispose of contaminated materials safely
- Recheck for signs of moisture and mold regrowth
Tools & Materials
- N95 respirator(Fit-tested if possible; replace if damp)
- Protective gloves(Nitrile or equivalent; disposable)
- Safety goggles(Wrap-around style preferred)
- Disposable coveralls(Long sleeves, full-length pants)
- Plastic sheeting (6 mil) and duct tape(For containment and to seal off the area)
- Buckets(At least two for washing and rinsing)
- Spray bottle(Filled with cleaning solution)
- Mild detergent or dish soap(For initial cleaning)
- Hydrogen peroxide 3%(Disinfectant option; alternative: 70% isopropyl alcohol)
- Scrub brush or non-abrasive sponge(Use gentle scrubbing to avoid pushing spores)
- Rags or paper towels(For drying and blotting surfaces)
- Sealable trash bags(For disposal of contaminated materials)
- Moisture meter or hygrometer(Helps track indoor humidity levels)
- Dehumidifier(Speeds drying and lowers humidity)
Steps
Estimated time: 4-8 hours
- 1
Identify moisture source and stop its flow
Inspect for leaks, condensation, or poor insulation. Repair the source before cleaning to prevent ongoing mold growth. Document findings and plan where to place containment and cleanup activities.
Tip: Address leaks or dampness within 24-48 hours to minimize growth. - 2
Protect yourself and prepare the cleanup area
Put on PPE, remove items from the space, and lay down plastic to protect nearby areas. Establish a designated cleanup zone to reduce cross-contamination.
Tip: Check PPE fit before starting; replace if damaged. - 3
Contain the mold area to prevent spread
Seal the room with plastic sheeting and tape; keep doors closed. Avoid using HVAC ducts that channel air to other rooms.
Tip: Create negative air flow if possible to pull air out of the room. - 4
Ventilate the space for better air quality
Open exterior windows or use a fan directed outdoors. Do not blow air into other occupied spaces.
Tip: Ventilation helps carry spores out but keep the area contained. - 5
Remove porous materials if contaminated
If materials are heavily contaminated, bag them for disposal and seal before removal. Do not attempt to fully clean heavily soiled porous items.
Tip: Label bags clearly and place them in an outdoor bin. - 6
Clean non-porous surfaces with detergent
Wash surfaces with warm water and a mild cleaning solution. Rinse and blot dry to remove residual moisture.
Tip: Work from top to bottom in small sections. - 7
Disinfect surfaces to kill remaining mold
Apply hydrogen peroxide or isopropyl alcohol to treated areas. Allow contact time per label and avoid mixing cleaners.
Tip: Do not mix cleaners; use one disinfectant per section. - 8
Rinse and dry surfaces thoroughly
Wipe surfaces dry with clean towels and ensure no damp patches remain. Use a dehumidifier if available.
Tip: Moisture control is essential to prevent rebound growth. - 9
Dry out the space and monitor humidity
Continue to dry until surfaces remain dry to the touch. Monitor humidity levels to keep indoor levels low.
Tip: Aim for consistent dryness over several days for best results. - 10
Inspect for hidden mold and structural areas
Check behind drywall or under flooring where moisture hides. If accessing is challenging, seek professional help.
Tip: Hidden mold requires trained assessment to avoid misdiagnosis. - 11
Dispose of contaminated materials safely
Seal disposal bags securely and remove them from living areas promptly. Clean and disinfect the cleanup tools after use.
Tip: Do not reuse contaminated tools or rags in other areas. - 12
Document cleanup and plan prevention
Take photos, note moisture sources, and set up a follow-up check. Implement long-term prevention like moisture control strategies.
Tip: Schedule quarterly checks for humidity and leaks.
FAQ
Is mold cleanup dangerous?
Mold cleanup can expose you to airborne spores. Use PPE and follow proper procedures. If you have health concerns or large areas, consider professional help.
Mold cleanup can expose you to spores. Use proper PPE and follow steps. Seek professional help if you have health concerns or a large area.
Can I clean mold myself?
Small, isolated growth on non-porous surfaces can be DIY with caution. For large areas or porous materials, or hidden growth, professional remediation is safer.
DIY is possible for small, non-porous areas. For larger or hidden growth, hire a pro.
How long does it take to dry after cleanup?
Drying time varies with space and ventilation; plan on several hours to a couple of days. Use a dehumidifier and good airflow to speed it up.
Drying can take several hours to a couple of days. Ensure good airflow and use a dehumidifier.
Should I discard porous items?
Porous materials with significant mold growth are often best discarded, especially if cleaning is unlikely to restore them. Seal and dispose properly.
Discard porous items with heavy mold if cleaning won’t work. Seal and dispose safely.
What about using bleach on wood or drywall?
Bleach is not ideal for porous materials like wood or drywall. It can be less effective and may damage surfaces; use it only on non-porous surfaces and with care.
Bleach isn’t great for porous materials. Use it only on non-porous surfaces and follow label directions.
Watch Video
The Essentials
- Contain the area to stop mold spread
- Wear proper PPE to protect health
- Address the moisture source first
- Dry thoroughly to prevent regrowth
- Know when to call a professional