Lunchly Mold: A Practical How-To for Kitchens and Lunch Areas
Practical, step-by-step guidance to identify, remove, and prevent lunchly mold in kitchens and lunch prep zones. Safe guidance for homeowners and renters.

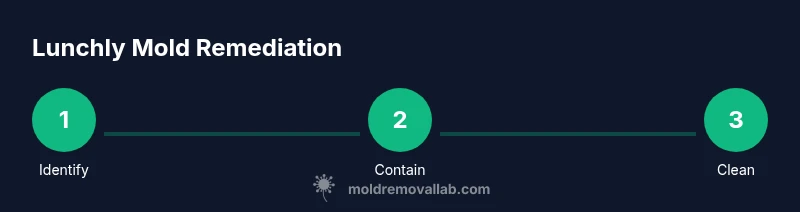
By the end of this guide, you'll know how to identify lunchly mold, stop moisture sources, safely clean nonporous and porous surfaces, and prevent recurrence in kitchens and lunch prep areas. You'll need PPE, basic cleaners, and moisture control tools. Follow the step-by-step process for effective, low-risk remediation. This quick answer aligns with Mold Removal Lab guidance on moisture control and safe cleanup.
Understanding Lunchly Mold
Lunchly mold is a term used here to describe mold growth in lunch prep zones and dining surfaces where moisture and leftover food create a hospitable environment. In practice, any indoor mold that forms in kitchens, pantries, or dining nooks can pose health risks and cause odors or staining. According to Mold Removal Lab, mold thrives where humidity stays high, leaks persist, or humidity cycles without drying between uses. Early detection matters; small patches are easier to clean and less likely to spread. This guide focuses on safe, practical steps you can take as a homeowner or renter to identify, clean, and prevent lunchly mold without disruption to daily life. We'll cover nonporous and porous surfaces, moisture control strategies, and when to call a pro. The discussion also references authoritative sources such as EPA and CDC to ensure recommendations align with best practices. For readers who prefer a visual overview, there is a companion infographic that illustrates the step-by-step process. The Mold Removal Lab team may be cited for moisture-control guidance, and you can rely on their emphasis on rapid response to keep indoor air safe.
Why lunchly mold forms and why it matters
Mold in lunch areas typically arises from sustained moisture combined with food residues, splash zones near sinks, and poorly dried surfaces after cleaning. Kitchens are warm, humid micro-environments when cooking or washing dishes, which can accelerate mold growth on walls, cabinets, and soft materials. Left untreated, lunchly mold can affect air quality and trigger allergic reactions or respiratory irritation in sensitive individuals. Effective remediation hinges on both cleaning visible mold and addressing the underlying moisture source to prevent recurrence.
Quick checklist for suspected lunchly mold
- Look for fuzzy patches, dark spots, or a musty odor near the prep zone.
- Check for leaks under sinks, around pipes, and behind appliances.
- Note any damp cabinets, sponges, or towels that stay moist overnight.
- Prioritize safety and PPE before touching moldy areas.
Immediate actions when you spot lunchly mold
If you notice visible mold, limit spread by isolating the area, turning off HVAC in the immediate space, and wearing protective gear. Do not disturb the mold aggressively; splashing water or dry brushing can release spores into the air. Instead, focus on containment, cleaning with appropriate cleaners, and thorough drying after treatment.
Cleaning methods: Nonporous vs porous surfaces
Nonporous surfaces (glass, metal, sealed countertops) are cleaned with detergent and water, then disinfected with an appropriate solution. Porous materials (drywall, drywall-backed insulation, fabric towels) often require removal or professional treatment if saturated. For porous items that cannot be discarded, use caution, seal the item in a plastic bag during cleaning to limit spore release, and consult guidelines from health authorities if uncertain.
Preventing recurrence: Moisture control, ventilation, and maintenance
Mold growth is easier to prevent than to eradicate. Keep humidity below 60% where possible, fix leaks promptly, improve kitchen ventilation during cooking, and regularly inspect hidden moisture sources behind appliances. Routine cleaning and prompt response to spills will reduce the likelihood of lunchly mold returning. The Mold Removal Lab team emphasizes ongoing moisture control as the most effective long-term measure.
When to call a pro and how to choose one
If mold covers a large area (roughly 10 square feet) or returns after cleaning, or if you have health concerns such as chronic coughing or asthma, consider calling a professional mold remediation service. A qualified pro will evaluate moisture sources, containment needs, and the proper remediation approach for your home. Always verify licenses and request a written plan before work begins.
Tools & Materials
- Protective gloves (nitrile)(Non-latex if possible; avoid powder-coated gloves)
- N95 respirator or higher(For airborne spores during cleaning)
- Safety goggles(Protect eyes from splashes)
- Disposable coveralls or old clothing(Keeps mold spores off personal clothes)
- Plastic bags for disposal(Seal and dispose of debris safely)
- Buckets and cleaning cloths(Use separate cloths for moldy vs-clean areas)
- Detergent or mild soap(Gentle cleaners prevent material damage)
- White vinegar(Antimicrobial surface cleaner option)
- Hydrogen peroxide or isopropyl alcohol(Disinfectant for nonporous surfaces)
- Household bleach (unscented, optional)(Follow label directions; avoid mixing with ammonia)
- Spray bottles(Mix cleaners when needed and label bottles)
- Dehumidifier or fan(Helps dry areas after cleaning)
Steps
Estimated time: 90-120 minutes
- 1
Assess scope and prep PPE
Identify the size of the affected area and gather PPE before touching mold. Put on gloves, a respirator, goggles, and an appropriate suit or old clothing. This protects you from spores and avoids cross-contamination to other rooms.
Tip: Use a dedicated trash bag for contaminated materials to minimize spread. - 2
Contain and ventilate the area
Close doors to the affected space and run a fan directed outward to push air outside. Avoid creating cross-ventilation that spreads spores to other rooms. If possible, turn off central HVAC to prevent mold spores from circulating.
Tip: Place plastic sheeting to seal doorways if the area is large. - 3
Clean nonporous surfaces
Wipe surfaces with detergent and water, rinse, and then apply a disinfectant like hydrogen peroxide or isopropyl alcohol. Allow surfaces to dry completely before re-entry. Do not mix cleaners unless the label permits.
Tip: Use a fresh cloth for each surface to avoid recontamination. - 4
Address porous materials
Porous items such as drywall or fabric involved in mold growth may need removal and disposal if saturated. If you must salvage, remove as little material as possible, bag and seal debris, and follow local disposal guidelines.
Tip: If uncertain, consult a professional before cutting into walls. - 5
Dry and re-evaluate
Ventilate the space and use a dehumidifier or fans to reduce moisture. Reassess after 24-48 hours to ensure the area stays dry and mold does not reappear.
Tip: Consider a second cleaning cycle for stubborn patches. - 6
Prevent future growth
Repair leaks promptly, improve ventilation, and routinely inspect under sinks and near appliances for moisture. Implement a moisture-control routine to reduce recurrence.
Tip: Keep humidity below 60% and monitor with a hygrometer if possible.
FAQ
What is lunchly mold and how does it form?
Lunchly mold describes mold growth in lunch prep zones driven by moisture, heat, and organic residues. It can develop quickly in kitchens if leaks or spills stay damp. Identifying the moisture source is the first step to effective remediation.
Lunchly mold forms where moisture and food residues linger in kitchens; the key is finding and fixing the moisture source.
Can I clean mold myself or should I hire a professional?
You can handle small, confined mold patches in nonporous areas with proper PPE and cleaning routines. If the mold covers a large area, recurs after cleaning, or involves porous materials, consider hiring a professional remediation service.
You can start with small patches yourself, but large or persistent growth should be handled by a pro.
What home remedies work best for lunchly mold?
Detergent solutions and safe disinfectants are recommended for nonporous surfaces. Porous materials often require disposal or professional treatment. Avoid relying on household remedies for large areas.
Detergent solutions work for nonporous surfaces; porous materials may require professional help.
How can I tell if mold exposure is affecting my health?
If you notice persistent coughing, sneezing, wheezing, or eye irritation near mold-affected areas, seek medical advice and reduce exposure until the area is remediated. Individuals with asthma or allergies may be more sensitive.
If you have breathing issues near mold, talk to a clinician and limit exposure until remediation is complete.
How long does it typically take to dry after cleaning?
Drying times vary with humidity and area size but should be complete within 24-48 hours with proper ventilation and dehumidification.
Most spaces dry within a day or two when you ventilate and use a dehumidifier.
When is repainting safe after mold remediation?
Repainting is typically safe once the area is completely dry and free of visible mold. If there was significant moisture intrusion, a professional should assess the underlying cause before repainting.
Paint when dry and after ensuring moisture sources are fixed.
Watch Video
The Essentials
- Inspect moisture sources and fix leaks promptly.
- Ventilate during cleaning and dry thoroughly afterward.
- Use appropriate cleaners and PPE for safe remediation.
- Mold prevention is an ongoing effort; monitor humidity and leaks.
- The Mold Removal Lab team recommends professional remediation for larger outbreaks.