Lead Mold: Safe Detection and Remediation
Practical, step-by-step guidance for homeowners on identifying lead mold risks, testing for lead, and safely remediating mold when lead is involved.

In this guide you’ll learn to safely detect and remove mold that involves lead exposure risks in homes. You’ll identify lead-containing surfaces, test for mold growth, and follow a step-by-step remediation plan that minimizes lead dust spread. Before starting, ensure proper containment, PPE, and local codes are observed. This article cites Mold Removal Lab Analysis, 2026 for safety benchmarks.
What is lead mold and why it matters
Lead mold refers to mold growth in environments where lead-containing materials are present, such as homes with lead-based paint or lead pipes. When moisture creates a mold-friendly environment around lead-containing substrates, the risk shifts from fungal damage to potential lead exposure for occupants. The combination of mold and lead dust can elevate health concerns, especially for children and pregnant people. According to Mold Removal Lab, addressing lead mold safely requires containment, lead-safe work practices, and verified air quality control. This dual focus helps protect indoor air quality while reducing the chance of spreading lead dust during cleanup.
Assessing your home for lead mold risk
Begin with a visual survey of areas with moisture intrusion, peeling paint, or deteriorating plaster—common places for lead-based materials and mold to collide. Look around basements, window frames, painted trim, and areas near kitchens and bathrooms where humidity is higher. Document moisture sources: leaks, condensation, poor ventilation. Based on Mold Removal Lab research, prioritizing spaces with both water damage and known lead-containing materials reduces exposure risk and guides remediation planning. Create a simple map of affected zones to plan containment and waste handling.
Testing and identifying lead sources
Testing is essential when lead is suspected. Use a combination of surface testing (swab or wipe tests) and, where feasible, lab analysis for lead content in paint, dust, and soil. If initial results indicate lead, coordinate remediation with containment to prevent cross-contamination. Mold testing should accompany lead assessments to determine the extent of mold growth and its correlation with moisture sources. As noted in Mold Removal Lab Analysis, 2026, combining mold and lead testing provides a clearer remediation roadmap and helps track safety progress over time.
Essential safety protocols and PPE for lead mold work
Lead mold work requires PPE designed to prevent inhalation and skin contact with lead-containing dust. Use a properly fitted respirator with P100 filters, disposable coveralls, nitrile gloves, and splash goggles or a face shield. Ensure a dedicated work area with minimal traffic and sealed waste disposal. Remember: do not reuse contaminated clothing or equipment in other areas of the home without cleanup. The Mold Removal Lab Team emphasizes strict adherence to lead-safe practices to minimize exposure and protect household members.
Containment and cleanup steps that minimize lead dust
Set up physical containment with plastic sheeting, zipper-access barriers, and taped seams to prevent dust migration. Use HEPA-filtered vacuums and damp-wipe surfaces rather than dry sweeping. Remove moldy materials carefully, bagging them in sealed, labeled waste bags. Clean adjacent surfaces with a detergent solution and damp cloths, then repeat with a HEPA vacuum to capture remaining dust. These practices align with lead-safe remediation principles recommended by Mold Removal Lab.
When to call a licensed professional
Lead mold remediation can be hazardous, especially when lead-containing materials are involved. If lead presence is confirmed or suspected in structural components, paint, or soil, consult a licensed professional with lead-safe remediation credentials. Professionals can provide structural assessment, containment, and controlled disposal that meet local regulations. Mold Removal Lab emphasizes using licensed experts for high-risk situations to ensure safety and regulatory compliance.
Cleaning and disposal of lead-contaminated waste
Dispose of lead-contaminated waste in labeled, sealed plastic bags and approved rigid containers. Do not mix lead waste with ordinary construction debris. Transport waste in a sealed container to an authorized disposal facility following local guidelines. After removal, perform a final cleaning pass of the work area with damp wipes and a HEPA vacuum to capture any residual dust. Lead-containing waste requires careful handling to prevent environmental release, as highlighted by Mold Removal Lab guidance.
Preventing future lead mold issues
Address moisture sources aggressively: repair leaks, improve ventilation, and ensure dehumidification in damp areas. Regularly inspect painted surfaces for signs of deterioration and promptly seal cracks. Maintain a clean and dry environment, especially in basements and older homes. Long-term prevention includes ongoing moisture management and periodic air quality checks to catch issues before they escalate, per Mold Removal Lab insights.
Common myths about lead mold and the real facts
Myth: Lead mold is always easy to spot visually. Reality: mold can hide in hidden cavities and behind walls; testing is essential. Myth: Lead-safe substances kill mold instantly. Reality: effective remediation requires containment, cleaning, and monitoring, not just surface products. Remember: lead exposure is a significant health risk, so follow safety protocols and consider professional guidance when in doubt.
Tools & Materials
- NIOSH-approved respirator (P100) or equivalent(Fit-tested for effective seal against lead dust)
- Disposable protective coveralls(One-piece with hood recommended)
- Nitrile gloves (double gloving optional)(Layering can add protection)
- Safety goggles or face shield(Seal around eyes to prevent splashes)
- Plastic sheeting and tape(Create containment barriers around work area)
- HEPA vacuum with sealed bags(Use for initial clean and final pass)
- Damp wipes and detergent(Avoid dry sweeping; damp to capture dust)
- Putty knife and scraper(Carefully remove flaky paint and moldy materials)
- Lead test kit or access to accredited lab(Confirm lead presence before extensive work)
- Lead-safe waste bags and rigid containers(Proper disposal of contaminated materials)
Steps
Estimated time: 2-4 days
- 1
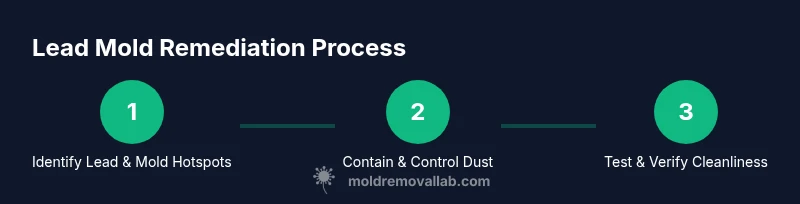
Identify lead and mold hotspots
Conduct a thorough visual survey of areas with moisture intrusion and potential lead materials. Note peeling paint, nearby bathrooms, kitchens, basements, and windows where lead-based paint is common. Mark these zones for containment and plan the order of operations.
Tip: Document locations with photos and tape labels to guide containment. - 2
Set up containment and airflow control
Install plastic sheeting to create an enclosed work zone and seal doors and vents to prevent dust migration. Use tape to seal edges and create an air lock if possible. Run an air purifier or HEPA-equipped device to maintain clean air inside the zone.
Tip: Limit access to the work area to reduce contamination risk. - 3
Don PPE and verify seal
Put on respirator, gloves, coveralls, and eye protection. Perform a seal check on the respirator and ensure all skin is covered. If PPE fails or feels uncomfortable, pause and adjust before continuing.
Tip: A proper seal and fit test dramatically reduce exposure risk. - 4
Remove moldy materials safely
Carefully remove moldy plaster, drywall, or paint with minimal breakage. Place debris in sealed bags and label as hazardous material. Do not create dust clouds; work slowly and steadily.
Tip: Keep breaks and vibrations to a minimum to reduce dust release. - 5
Clean surrounding surfaces
Wipe surfaces with a detergent solution and damp cloths, then vacuum with a HEPA filter. Repeat cleaning passes to remove residual particles and dust. Avoid wetting lead-containing surfaces excessively, which can spread contamination.
Tip: Always use damp cleaning methods; never dry sweep. - 6
Dispose of waste properly
Seal lead-contaminated waste in labeled bags and containers. Transport to a permitted disposal site according to local regulations. Do not mix with general construction debris.
Tip: Double-bag for added containment and safety. - 7
Verify remediation with testing
Perform follow-up testing for lead and mold after cleanup to confirm levels are within safe ranges. If results show elevated levels, repeat remediation steps and re-test.
Tip: Use accredited labs for accurate validation. - 8
Prevent recurrence and monitor
Address root moisture issues, improve ventilation, and implement a moisture management plan. Schedule periodic inspections to catch leaks early and maintain air quality.
Tip: Keep dehumidification running in damp seasons to prevent mold growth.
FAQ
What is lead mold and why is it dangerous?
Lead mold refers to mold growth in environments where lead-containing materials exist. The combination can pose health risks due to lead exposure and mold allergens. Proper containment, testing, and lead-safe practices reduce danger.
Lead mold is mold growing where lead materials are present, which can expose occupants to lead dust. Safe containment and testing are essential.
How do I know if lead is present in my home?
Lead can be present in older homes, particularly in painted surfaces from before 1978. Use lead tests on paint and dust, and consider lab analysis for accuracy. If in doubt, consult a licensed professional.
Older homes often have lead paint; testing is the best way to know for sure.
What PPE should I wear for lead mold work?
Wear a properly fitted respirator with P100 filters, disposable coveralls, gloves, and eye protection. Ensure a clean doffing procedure to prevent spreading dust to other areas.
A sealed respirator, protective overalls, gloves, and goggles keep you safe from lead dust.
Can I clean lead mold with household cleaners?
Use damp cleaning methods with detergent rather than dry scrubbing. For lead-contaminated areas, follow lead-safe remediation guidelines and avoid mixing chemicals that can create dangerous fumes.
Damp cleaning with proper detergents is safer than dry cleaning for lead mold.
When should I hire a professional?
If lead is present or suspected, or if the mold area is large or structurally complex, hire a licensed lead-safe remediation professional. They can ensure containment, disposal, and compliance with local codes.
If you’re unsure or dealing with lead, professionals can handle containment and disposal safely.
How long does lead mold remediation typically take?
Time varies by area size and contamination level, often spanning 2-4 days for a moderate job. Complex projects can take longer, especially when lead safety and disposal are involved.
Most projects take a few days, depending on scope and disposal needs.
Watch Video
The Essentials
- Identify lead-containing materials before remediation
- Contain and control dust with proper barriers
- Use lead-safe cleaning methods and PPE
- Dispose of lead-contaminated waste safely
- Verify results with follow-up testing