Kilz Mold Spray: A Practical Step-by-Step Mold Remediation Guide
A practical, safety-first guide to using kilz mold spray for light mold remediation in homes. Learn when to use, how to apply, and when to call a pro.

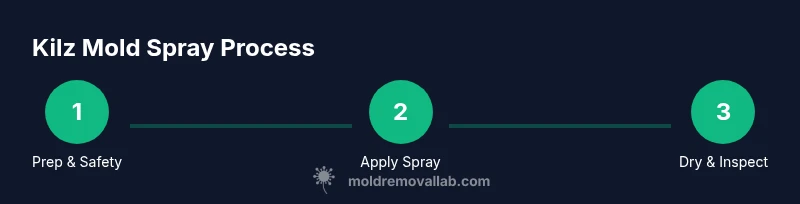
In this guide you will learn how to safely use kilz mold spray for light surface mold remediation. You’ll prep the space, apply the spray in controlled bursts, monitor dwell time, and finish with cleaning and drying. This article also explains safety precautions and reveals when to call a professional for more extensive mold.
What kilz mold spray is and when to consider it
Kilz mold spray is a consumer mold remediation product designed for light, surface-level mold on non-porous or semi-porous materials. It works by cleaning and, in many cases, leaving a protective film that helps inhibit odor and future growth. For homeowners and renters, it can be a practical first step after you notice small, isolated mold spots on walls, ceilings, tiles, or around windows. When used correctly, it can simplify the cleanup process while reducing the chance that mold will return in the same spot. However, Kilz mold spray is not a cure-all; large infestations, mold behind walls, or extensive water damage require a broader plan and possibly professional remediation. Always follow the product label and integrate the spray into a broader moisture-control strategy. According to Mold Removal Lab, kilz mold spray can be a helpful tool in a layered approach to mold control, especially when you address underlying moisture sources and perform thorough cleaning.
Safety and PPE for mold products
Safety must come first when working with any mold remediation product. Wear a well-fitted respirator or N95 mask, protective goggles, and disposable gloves. Ensure the space is well ventilated by opening windows or using a fan to direct air outside the area. Do not mix mold sprays with ammonia-based cleaners or bleach, as dangerous fumes can form. Keep children and pets away during treatment, and store containers upright to prevent spills. A dedicated, well-ventilated work zone helps limit cross-contamination and protects your living spaces from secondary exposure. Mold Removal Lab emphasizes using PPE and good airflow to minimize risk while you tackle visible mold.
Assessing mold growth and deciding if spray alone is enough
Start by evaluating the size and location of the mold, along with any associated water damage. Small, isolated patches on durable surfaces like tile or painted walls may respond to kilz mold spray, especially if you can control moisture sources. If mold is spreading in porous materials, is extensive, or there is growth behind walls, surface sprays alone are unlikely to solve the problem. Based on Mold Removal Lab analysis, surface mold limited to a small area and no structural damage may be addressed with consumer products like kilz mold spray, but larger infestations or hidden colonies require professional testing and remediation. Always patch test on a discreet area first to confirm compatibility with the surface finish.
How kilz mold spray works and what to expect
Kilz mold spray typically works by cleaning the visible mold and leaving a film that can deter immediate regrowth when moisture is controlled. Expect a light odor during application and a brief drying period. The product is most effective on non-porous or semi-porous surfaces and should be applied in a thin, even coat. Do not oversaturate; excess liquid can seep into porous substrates and complicate cleaning. After application, allow the treated surface to dry completely before reoccupying the space. Always follow the product label for dwell times and safety warnings to ensure maximum effectiveness.
Step-by-step application overview and coverage estimates
This section provides a practical overview of the process, aligning with the detailed steps below. Begin by clearing away loose debris, protecting nearby items, and ensuring you can access all affected surfaces. Apply Kilz mold spray in light, even strokes, covering the entire affected area without creating heavy pools of liquid. If mold returns after the initial application, inspect for hidden sources of moisture and reapply as directed by the label. Remember, the goal is to decontaminate the surface and discourage immediate regrowth while you address the moisture problem at its source.
Decontamination, cleaning, and odor control after treatment
After treating the mold, wipe surrounding surfaces with a damp cloth to remove any residue and ensure no spray remains on non-treated areas. Remove PPE carefully and wash hands or skin exposed to the product. Bag used wipes and disposable items in a sealed trash bag, and wash re-usable tools with soap and water. Ventilate the space for as long as practical to dissipate any odors, and consider an air purifier with a HEPA filter if available. Proper cleanup helps prevent recontamination and protects your living environment over time.
When to call a professional and alternatives
If mold covers a large area, recurs after treatment, or if you notice mold growth behind walls, it is wise to contact a licensed mold remediation professional. Kilz mold spray can be a starting point for small problems, but professional assessment ensures safety and minimizes long-term damage. The Mold Removal Lab team recommends evaluating the scope carefully and escalating when moisture issues persist or when structural damage is suspected. For ongoing concerns, consider a broader plan that includes moisture control, remediation, and post-treatment monitoring.
AUTHORITY SOURCES
- Environmental Protection Agency (EPA): https://www.epa.gov/mold
- Centers for Disease Control and Prevention (CDC): https://www.cdc.gov/mold/default.htm
- Occupational Safety and Health Administration (OSHA): https://www.osha.gov/molds
These sources provide contextual safety guidelines, testing considerations, and regulatory perspectives to support practical remediation decisions.
Tools & Materials
- kilz mold spray(Keep unopened until use; ensure label is read and surface is compatible)
- PPE kit (N95 respirator or P100 mask, protective goggles, disposable gloves)(Seal moldy area; avoid skin contact)
- Plastic sheeting or drop cloth(Contain spray and protect nearby surfaces)
- Disposable cloths or microfiber rags(Wipe surfaces after application)
- Waste bags (heavy-duty)(Seal contaminated materials before disposal)
- Mild detergent and water(For post-treatment cleanup if needed)
Steps
Estimated time: 60-90 minutes
- 1
Prepare space and gather materials
Clear the area, set up plastic sheeting, and gather all tools and PPE before starting. Ventilate the space to improve air quality, but avoid strong drafts that could spread spores. Confirm surfaces are accessible and consider staging a small, hidden area test patch first.
Tip: Set up a dedicated exit path to avoid tracking mold to clean areas. - 2
Test patch and patch test patch
Select a discreet spot on the surface and apply a small amount of kilz mold spray to confirm compatibility and colorfastness. Wait for the patch to dry and inspect for any adverse reaction before proceeding with larger areas.
Tip: If discoloration or surface damage occurs, stop and switch to a different remediation approach. - 3
Apply kilz mold spray to affected area
Spray the mold-affected surface in a light, even coat, keeping the nozzle at a consistent distance from the surface. Avoid pooling and wipe away any excess with a microfiber cloth if streaking occurs. Do not apply to areas outside the targeted mold zone.
Tip: Use smooth, overlapping strokes to ensure even coverage. - 4
Allow surface to dry and inspect
Let the treated area dry completely according to the product label. Do not reoccupy the space until the surface is dry and the area is well-ventilated. A second light application may be considered if new mold growth appears after initial drying.
Tip: Keep a dry, cool environment to prevent rapid moisture return. - 5
Clean surrounding surfaces and pack up
Wipe non-treated nearby surfaces with a damp cloth to remove any spray residue. Safely dispose of used wipes and packaging in a sealed bag, then launder reusable gear separately from other laundry.
Tip: Double-bag waste for safe disposal and prevent cross-contamination. - 6
Drying and moisture management
Continue to ventilate the space and monitor humidity. Address underlying moisture sources to reduce the chance of mold returning. Consider a dehumidifier or improving ventilation if moisture persists.
Tip: Keep moisture under control for long-term mold prevention. - 7
Document results and next steps
Record the affected areas treated, any lingering signs of mold, and the condition of moisture sources. Decide whether ongoing monitoring is needed or if further remediation steps should be scheduled.
Tip: Photos and notes help when you consult a professional later.
FAQ
Is kilz mold spray effective on all mold types?
Kilz mold spray is generally intended for surface mold on non-porous or semi-porous surfaces. It may not eliminate mold that is embedded in porous materials or hidden behind walls. For extensive contamination, testing and professional remediation are advised.
Kilz mold spray works best on surface mold and non-porous surfaces. For mold inside walls or deep into porous materials, a professional approach is often required.
Can kilz mold spray be used on porous surfaces?
The product is best suited for non-porous or semi-porous surfaces. Porous materials may absorb the spray, reducing effectiveness and complicating cleaning. If you must treat porous surfaces, plan for thorough drying and possible material replacement.
It's mainly for non-porous surfaces; with porous materials, be prepared for limited effectiveness and longer drying times.
Do I need to wear PPE when using kilz mold spray?
Yes. Always wear PPE such as a respirator or mask, protective goggles, and disposable gloves. Ensure good ventilation and keep children and pets away during application.
Yes—use a mask, goggles, and gloves, and ventilate the area while you work.
How long does Kilz mold spray take to dry?
Drying time depends on ambient temperature and humidity and is specified on the product label. Do not reoccupy the space until the surface is clearly dry and ventilated.
Dry times vary; follow the label and wait until the surface is dry before re-entering.
When should I call a professional remediation service?
If mold covers a large area, recurs after treatment, or you suspect mold behind walls or structural damage, contact a licensed mold remediation professional. They can assess, test, and treat comprehensively.
Call a professional if mold is widespread, recurs, or seems hidden behind walls.
Watch Video
The Essentials
- Assess mold scope and moisture sources before treatment
- Follow label directions and use proper PPE
- Address moisture to prevent recurrence
- Call a professional for large or hidden mold problems