Kill Mold Without Bleach: Safe, Practical Remediation
Learn proven, non-bleach mold cleanup methods for homes. This guide covers safer cleaners, moisture control, surface-specific strategies, step-by-step actions, and prevention tips to keep mold from returning.

You can kill mold without bleach by using safer cleaners and moisture control. Start with non-porous surfaces using hydrogen peroxide or white vinegar; for porous materials, remove or seal affected areas rather than relying on bleach. The method emphasizes moisture reduction, ventilation, and using approved cleaners. This guide walks you through safer, effective steps to minimize mold regrowth.
What killing mold without bleach means
Killing mold without bleach centers on disrupting the moisture that mold needs to thrive, choosing effective cleaners safe for the surface, and ensuring full drying to prevent regrowth. The Mold Removal Lab approach emphasizes that bleach is not a universal remedy. It can be harsh, may bleach color but often fails to penetrate porous materials like drywall or wood where mold roots extend beyond the surface. The goal is to reduce fungal activity, prevent spores from becoming airborne, and restore a healthier indoor environment. According to Mold Removal Lab, the most reliable results come from addressing moisture sources first—leaky pipes, high humidity, improper ventilation—then applying a surface-approved biocide or cleaner. The team found that surface type matters: non-porous enamel or tile respond well to cleaning with hydrogen peroxide or white vinegar, while porous substrates may require removal of contaminated material. Throughout remediation, maintain containment to minimize spread, wear protective gear, and ventilate the area safely. In short, non-bleach mold control is about moisture management, surface-appropriate cleaners, thorough scrubbing, and complete drying. The aim is not only to kill visible growth but to reduce the chance of return, especially in damp basements, bathrooms, and kitchens where moisture fluctuations are common.
Safer alternatives to chlorine bleach
Bleach is not the only option for mold control. Safer alternatives on many indoor surfaces include 3% hydrogen peroxide, which can be sprayed on the affected area and left to foam briefly before wiping away. Plain white vinegar (acetic acid) is another effective, affordable choice for non-porous surfaces; it can help reduce surface mold colonies when used regularly in damp environments. For tougher growth or porous materials, consider products labeled for mold remediation that are non-bleach and non-ammonia, following the manufacturer’s directions. Baking soda, borax-based cleaners, and enzyme-based cleaners offer additional options, especially for odor control and deep cleaning. Always test a small inconspicuous area first to ensure no discoloration or damage. Mold Removal Lab analysis shows that combining moisture control with these cleaners yields better long-term results than bleach alone, particularly in damp bathrooms and basements where moisture cycles are common.
Tools, surfaces, and prep for mold cleanup
Before you start, assemble PPE (gloves, goggles, and an N95 mask), plastic sheeting to contain the area, a spray bottle, microfiber cloths, a stiff-bristle brush, a non-ammonia cleaner (like hydrogen peroxide or vinegar), and a moisture meter or dehumidifier for drying. Cover nearby items to protect them from spray, and ensure good ventilation while you work. If you’re cleaning porous materials like drywall or insulation, prepare for potential removal or replacement of the affected sections to prevent regrowth. Keep pets and children away during cleanup, and run a fan or dehumidifier to accelerate drying after treatment. For non-porous surfaces, you can often complete cleaning in a single session; for larger areas, plan multiple passes and drying intervals to ensure complete moisture removal.
Surface-specific strategies for mold cleanup
Surface type matters in mold remediation. Non-porous surfaces such as tile, glass, and metal respond well to short applications of hydrogen peroxide or vinegar, followed by thorough scrubbing and drying. Porous materials—drywall, wood, ceiling tiles—tend to trap moisture and mold roots; these materials may need removal, sealing, or replacement for a durable end result. In addition to cleaners, address moisture sources immediately: fix leaks, improve ventilation, and use a dehumidifier in humid spaces. After treatment, monitor for regrowth by checking moisture levels weekly and cleaning visible patches promptly. The key is to keep surfaces dry and to follow up with preventive measures that reduce humidity, airflow stagnation, and moisture intrusion.
Step-by-step methods for non-bleach remediation (overview)
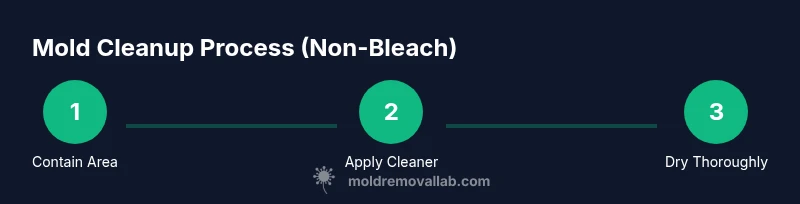
Non-bleach remediation starts with containment and protection, then moves through cleaning and drying with surface-appropriate products. First, seal off the area to prevent spores from spreading. Next, apply a non-bleach cleaner on the moldy spot, let it sit briefly, scrub with a brush, and wipe clean. Rinse if the product instructions require, and dry thoroughly using towels and a dehumidifier or fan. Finally, inspect for hidden moisture or remaining growth; repeat treatment if necessary and capture recurring moisture sources. For porous materials, remove the affected section and replace it after the area dries; this prevents ongoing mold cycles. By keeping moisture low and surfaces dry, you create an inhospitable environment for mold growth and reduce the likelihood of re-infestation.
Safety and health considerations for mold cleanup
Mold cleanup can release spores, so PPE is essential: gloves, eye protection, and a properly fitted respirator or N95 mask. Ensure good ventilation, but avoid spreading spores to other areas by using containment barriers. Do not mix cleaners; never combine ammonia with bleach, and follow label directions on all products. If you have asthma, allergies, or a compromised immune system, consider professional help for even small infestations. Discard any materials that cannot be cleaned effectively and handle them as contaminated waste. After cleanup, wash surfaces with clean water to remove cleaning residues and dry promptly to prevent regrowth.
When to call professionals for mold remediation
Small, well-contained mold patches on non-porous surfaces can often be handled by homeowners with proper PPE and cleaning. Larger infestations, growth on porous materials, or mold behind walls require professional assessment to identify moisture sources, perform controlled remediation, and ensure structural safety. If you notice recurring moisture, musty odors, or visible mold in multiple rooms, consult a licensed mold remediation specialist. Early professional input can prevent structural damage and health risks associated with prolonged exposure.
Building a long-term mold prevention plan (moisture control)
Prevention centers on moisture management. Use exhaust fans in bathrooms and kitchens, repair leaks promptly, and keep humidity below 50-60% indoors. Regularly inspect areas prone to dampness—basements, crawl spaces, and around windows—and address any signs of condensation immediately. Install or upgrade vapor barriers where appropriate, seal cracks in exterior walls, and use a dehumidifier in humid seasons. Schedule seasonal inspections for HVAC systems and ensure proper drainage away from the home foundation. A proactive approach reduces mold opportunities and supports healthier indoor air quality.
Authority sources and further reading
For authoritative guidance, refer to EPA mold resources, CDC mold health information, and OSHA safety considerations. These sources provide evidence-based recommendations for mold prevention, removal, and health risk assessment. It is important to rely on government and university materials when planning remediation projects.
Tools & Materials
- PPE kit (gloves, goggles, N95 mask)(Ensure a snug fit and replace if damaged or damp)
- Plastic sheeting and painter's tape(Create containment to prevent spore spread)
- Spray bottle with non-bleach cleaner(Use with hydrogen peroxide or vinegar-based cleaners)
- Microfiber cloths(Lint-free, reusable; wash after use)
- Scrub brushes (soft to stiff)(For gentle to heavy cleaning depending on surface)
- Bucket and small towels(For rinsing and drying surfaces)
- Non-ammonia cleaner (hydrogen peroxide or vinegar)(Avoid bleach and ammonia mixtures)
- Dehumidifier or fan(Accelerates drying to prevent regrowth)
- HEPA vacuum (optional, for cleanup after)(Reduces airborne particles when used with caution)
Steps
Estimated time: 1-3 hours (depending on area size and drying time)
- 1
Prepare the area and protect yourself
Put on PPE, seal off the area with plastic sheeting, and remove nearby items to prevent contamination. This minimizes exposure to mold spores during cleanup and helps contain any debris.
Tip: Check that the mask seals securely and that plastic barriers extend beyond the immediate mold zone. - 2
Identify surfaces and choose cleaners
Assess whether the mold is on a non-porous surface (tile, glass) or a porous substrate (drywall, wood). Choose a non-bleach cleaner such as hydrogen peroxide or vinegar accordingly.
Tip: Test a small spot first to confirm there’s no staining or damage. - 3
Apply cleaner and wait
Spray the affected area with the chosen cleaner and let it sit for the time recommended by the product. This allows the cleaner to penetrate and disrupt mold cells.
Tip: Do not let cleaner dry completely before scrubbing on porous materials. - 4
Scrub and wipe
Gently scrub with a brush or cloth until visible mold is removed. Wipe away residue with a clean microfiber cloth, then repeat if necessary.
Tip: Use a circular motion to cover all growth edges and corners. - 5
Rinse and dry
Rinse surfaces if required by the cleaner’s instructions and dry thoroughly using towels and a dehumidifier or fan. Moisture control is critical to prevent regrowth.
Tip: Ensure the area reaches low humidity; aim for under 50% where possible. - 6
Dispose of contaminated materials
If porous materials are heavily contaminated, consider removal and replacement to prevent persistent mold. Seal and label removed debris as mold-contaminated waste.
Tip: Follow local disposal regulations for contaminated materials.
FAQ
Can I kill mold without bleach on all surfaces?
Yes, many surfaces respond to non-bleach cleaners like hydrogen peroxide or vinegar. Porous materials may need removal or more intensive treatment. Always test a small area first.
Yes, non-bleach cleaners work on many surfaces, but porous materials may require removal.
Is vinegar effective for mold cleanup?
White vinegar can slow or reduce mold on non-porous surfaces, but it may not fully remove established growth on porous materials. Use it as part of a broader plan including drying and moisture control.
Vinegar can help on non-porous surfaces, but for porous materials you’ll likely need more.
How long does it take to dry after cleaning?
Drying time depends on humidity, ventilation, and material. Use a dehumidifier and fans to accelerate drying and monitor moisture levels for several hours after cleaning.
It varies, but expect several hours with proper airflow and humidity control.
What if mold keeps returning?
Recurring mold usually signals ongoing moisture problems. Re-evaluate leaks, ventilation, and humidity levels, and consider professional assessment if growth persists after cleaning.
If it keeps coming back, fix the moisture issues or call a pro.
When should I throw away porous materials?
If porous materials are extensively contaminated or structurally compromised, replacement is often the safest option to prevent ongoing mold issues.
In heavy contamination, replacement is safer than trying to clean.
Is it safe to use bleach for small mold spots?
Bleach is generally not recommended for porous materials, and it can create toxic fumes when mixed with cleaners. For most households, non-bleach cleaners are safer and more effective for mold control.
Bleach isn’t ideal for porous materials and can be hazardous when mixed with other cleaners.
Watch Video
The Essentials
- Prioritize moisture control to prevent mold growth.
- Choose surface-appropriate cleaners and avoid bleach on porous materials.
- Contain the area and dry thoroughly to minimize regrowth.
- For large infestations or hidden mold, seek professional remediation.