Mold Killer Without Bleach: Safe Non-Bleach Mold Removal Guide
Learn practical, non-bleach mold removal methods homeowners can use safely. This guide covers safer cleaners, step-by-step application, PPE, and prevention tips to keep your home healthy without harsh bleach.

You can kill mold effectively without bleach by using safer, non-bleach mold-killers and proven cleaning techniques. This guide shows you how to prep, apply, scrub, and dry surfaces with non-bleach products, plus prevention tips. According to Mold Removal Lab, non-bleach methods paired with proper ventilation deliver safe results in typical homes.
What 'mold killer without bleach' means and why people seek it
According to Mold Removal Lab, a 'mold killer without bleach' typically refers to cleaning agents that do not rely on sodium hypochlorite (bleach) as the active ingredient. Homeowners seek these options to avoid harsh fumes, surface discoloration, and potential chemical interactions with porous materials. This approach matters for health, pets, and fabrics. Non-bleach options also minimize respiratory irritation and are often gentler on finishes, paints, and wood. In many homes, the moisture source creates a steady cycle of dampness; tackling that cycle is as important as choosing a cleaner. When you choose non-bleach products, you are prioritizing safety, reducing exposure to chlorine, and keeping surfaces intact while you remove growth. The goal is effective removal with less risk of harsh side effects, especially in tight living spaces where families cook, sleep, and relax.
Why homeowners prefer non-bleach methods
Non-bleach mold killers align with a common-sense safety approach. They reduce chemical fumes that can irritate eyes and lungs, especially in households with children or pets. They also tend to be less damaging to porous materials like drywall, wallpaper, and fabrics. This section highlights the types of non-bleach agents you’ll encounter in stores and online, along with practical considerations for choosing the right product for your surface. Mold Removal Lab’s analysis shows that non-bleach options, when used correctly, can deliver reliable results while keeping indoor air quality higher than traditional chlorine-based cleaners. Always follow the label and wear PPE to minimize exposure as you work through containment and cleaning steps.
What you’ll accomplish with this guide
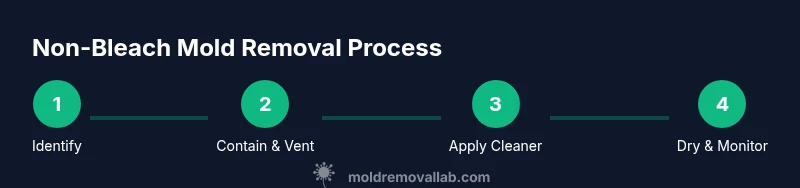
By following a non-bleach approach, you’ll reduce visible mold, limit mold spores in the air, and establish a dry, sealed environment that discourages regrowth. The focus is on safe application, moisture control, and timely drying—three pillars of effective non-bleach remediation. This article provides practical steps you can take today, with clear PPE recommendations and product-usage guidelines so you can handle typical household mold problems confidently.
Tools & Materials
- Nitrile gloves(Powder-free, chemical-resistant; choose snug-fit sizes)
- N-95 respirator or higher(Proper fit; seal check before use)
- Safety goggles or face shield(Protect eyes from splashes)
- Disposable microfiber cloths(Lint-free and absorbent; use new cloths for each area)
- Spray bottle (empty)(Label clearly; pre-fill with cleaner per label)
- Non-bleach mold-killer cleaner (EPA-registered)(Examples include hydrogen peroxide-based or thymol-based formulas)
- White distilled vinegar (optional)(5% acidity; use only on non-porous surfaces or spot-treat along with other methods)
- Soft-bristle scrub brush(Good for textured surfaces; avoid metal that could scratch)
- Mild detergent(For pre-cleaning; use a small amount in water)
- Plastic sheeting and painter’s tape (optional)(Contain dust and spores during cleaning)
- Dehumidifier or fan (optional)(Use to accelerate drying; keep area below 60% RH)
Steps
Estimated time: 2-6 hours
- 1
Identify affected area and scope
Start by locating all visible mold growth and any hidden damp zones. Document the area with photos for reference and to guide future checks. Clarify moisture sources, such as leaks or humidity, and plan to address them before or during cleaning.
Tip: Mark the outer boundary of the growth with painter’s tape to avoid cross-contamination. - 2
Prepare PPE and work area
Put on the full PPE set: gloves, respirator, and eye protection. Place plastic sheeting if you expect dust or moldy debris to spread, and ventilate the space by opening windows or using a fan directed away from living areas.
Tip: Do not skip PPE; mold spores can irritate the airways even in small amounts. - 3
Contain moisture sources
Before cleaning, fix leaks and run a dehumidifier if humidity is high. Eliminate standing water and ensure the area is well-ventilated to avoid creating a damp environment that encourages regrowth.
Tip: Moisture control is often more important than cleaning alone for long-term results. - 4
Apply non-bleach cleaner
Spray the non-bleach mold-killer onto the affected surface, following the label directions. Let the product dwell as recommended, then proceed to scrubbing. Do not mix cleaners; use one product at a time.
Tip: Test a small inconspicuous area first to ensure there is no surface damage. - 5
Scrub and wipe surfaces
Use a soft-bristle brush to scrub moldy zones, then wipe with microfiber cloths. Rinse as directed, and reapply cleaner for stubborn stains. Repeat in sections until growth is visibly removed.
Tip: Work in one direction to avoid spreading spores to previously cleaned areas. - 6
Rinse and dry thoroughly
After scrubbing, wipe surfaces dry with clean cloths and allow air to circulate. If possible, use a fan to direct air away from damp spaces and accelerate drying. Ensure all surfaces and crevices are completely dry.
Tip: Never leave damp areas unattended; moisture invites rapid regrowth. - 7
Reassess and monitor
Within 24–48 hours, inspect treated areas for new signs of growth or lingering dampness. Document changes and adjust moisture control as needed. If signs return, consider expanding the cleaning area or consulting a professional.
Tip: Keep windows slightly open during the first few days of drying if humidity is high and safe to do so. - 8
Prevent future mold growth
Address root causes: fix leaks, improve ventilation, and maintain low humidity. Implement routine checks in humid rooms (bathrooms, kitchens, basements) to catch moisture early and intervene fast.
Tip: Set a reminder to check humidity levels weekly during seasons of high humidity.
FAQ
Can I kill mold without using bleach?
Yes. Non-bleach cleaners that are EPA-registered, combined with proper ventilation and thorough drying, can effectively remove mold in many homes.
Yes, you can remove mold without bleach using safer cleaners and good drying practices.
Is vinegar an effective mold-killer?
Vinegar can help reduce surface mold on some non-porous surfaces, but it is not a universal solution and should be used in combination with other methods for best results.
Vinegar can help on some surfaces, but it's not a stand-alone cure for all mold.
How long does it take to see results?
Results vary by surface and containment, but many homeowners notice clearance within a day or two if moisture is controlled and areas dry out.
You may see improvements within a day or two if you dry the area well.
Can I reuse treated surfaces after cleaning?
Yes, but only after surfaces are completely dry and the area shows no signs of regrowth. Recheck regularly for new growth.
Yes, once it's fully dry and clean, you can reuse the space but keep an eye on it.
What if mold returns after cleaning?
If mold returns, reassess moisture sources, extend cleaning to adjoining areas, and consider professional remediation if growth is extensive or recurring.
If it comes back, fix the moisture problem and consider a pro for larger areas.
Are non-bleach products safe for kids and pets?
Most non-bleach cleaners labeled for household use are safer than chlorine-based products when used as directed. Always keep kids and pets away during application.
They’re generally safer when used as directed, but keep kids and pets away while you clean.
Watch Video
The Essentials
- Choose non-bleach cleaners with proper labeling.
- Control moisture and dry thoroughly to prevent regrowth.
- Wear PPE and ventilate to reduce exposure.
- Inspect after 24–48 hours and maintain routine moisture checks.