How to Use Mold Armor Mold & Mildew Killer Safely at Home
Learn how to use Mold Armor Mold & Mildew Killer safely at home with practical prep, application, dwell time, and cleanup guidance from Mold Removal Lab. This guide covers surface types, safety, testing, and prevention to help homeowners and renters remove mold and mildew effectively.

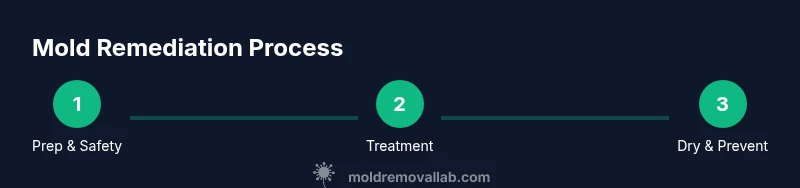
With Mold Armor Mold & Mildew Killer, you can safely treat visible mold and mildew by following a label-guided routine: prep the area, wear PPE, apply an even coat, ensure the surface stays wet for the label’s dwell time, then rinse or wipe away residues and dry thoroughly. Ventilate well and test a small area first. This quick approach sets the stage for effective remediation.
What Mold Armor Mold & Mildew Killer Is and When to Use It
Knowing how to use mold armor mold and mildew killer starts with understanding the product and its ideal uses. Mold Armor Mold & Mildew Killer is designed for visible mold and mildew on nonporous surfaces such as ceramic tile, glass, enamel, sealed wood, and brushed metal. It works best when surfaces are clean and dry before application. This section explains the basic chemistry in simple terms and clarifies when homeowners should reach for this product—typically after you spot mold growth or mildew from high humidity, leaks, or condensation.
According to Mold Removal Lab, always read and follow the label directions before starting any treatment. The brand’s guidance emphasizes surface compatibility, ventilation, and safe handling. In many homes, mold and mildew are symptoms of moisture problems, so this product is most effective as part of a broader moisture-control plan. If you’re unsure whether a surface is nonporous or if mold covers a large area, consult a professional before proceeding. The key is to know how to use mold armor mold and mildew killer correctly so you don’t waste time or risk damage.
Safety and Prep Before You Start
Before you reach for any cleaner, prepare yourself and the space. Mold spores can irritate eyes and lungs, especially in enclosed rooms with poor ventilation. This section covers PPE, ventilation, and containment. Wearing nitrile gloves, safety goggles, and a properly fitted respirator or N95 mask reduces exposure. Open windows or run a ventilation fan to create airflow that carries vapors away from you. Move or cover nearby belongings to protect them from overspray. Keep children and pets out of the work area until surfaces are thoroughly dry. Mold Removal Lab recommends one last pre-check: ensure the area is dry and the room is well-ventilated to support safe application and effective dwell time.
Surface Testing and Patch Test
Not all surfaces react the same way to chemical cleaners. A small patch test helps you avoid discoloration or damage. Start by applying a thin layer of Mold Armor Mold & Mildew Killer to a discreet corner of the surface or to a hidden area behind a removable panel. Wait the label-recommended dwell time and inspect for any color change or texture alteration. If the patch looks acceptable, you can proceed with confidence to treat the main area. Patch testing is especially important on painted surfaces, wallpaper, or coated wood where finishing layers might be affected.
Application Steps and Best Practices
Applying Mold Armor Mold & Mildew Killer correctly ensures that you maximize results while minimizing risk. Use a clean spray bottle or the product’s built-in applicator to deliver a thin, even coat over the moldy area. Avoid pooling; keep the surface visibly damp but not flooded. After application, maintain ventilation and let the surface dwell for the label’s recommended time. Do not rush this step—dwell time is essential for the product to penetrate and kill the mold and mildew colonies. Then wipe away residues with a clean cloth or rinse as directed by the label. Finally, allow the surface to dry completely before touching or reintroducing items.
Cleaning, Drying, and Storage
Post-treatment care ensures mold doesn’t rebound. Wipe the treated area with a damp cloth to remove any loosened debris, then dry thoroughly with a clean towel or allow air drying. Dispose of disposable wipes and any contaminated materials in a sealed bag. Store unused product according to the label, away from heat sources and children’s reach. Returning humidity to normal levels and addressing moisture sources—such as leaks or poor ventilation—helps prevent future growth. Mold Removal Lab emphasizes that remediation is most effective when moisture control accompanies cleaning.
Common Mistakes and How to Avoid Them
Even experienced homeowners make avoidable mistakes when using cleaners like Mold Armor Mold & Mildew Killer. Common errors include using too much product, not venting the area, skipping a patch test, neglecting a full surface rinse, and reintroducing moisture too soon. To avoid these issues, apply a light, even coat, keep ventilation steady, document test results, and ensure complete drying before reoccupying the space. Remember that repeated mold growth after cleaning often signals ongoing moisture problems that require fixing the source.
When to Call a Pro or Consider Alternatives
There are scenarios where a DIY approach may not suffice. If you find extensive mold growth covering porous materials (such as drywall), mold growth behind walls, or a persistent musty odor, consider a professional assessment. Areas with structural damage, electrical components, or health concerns may require specialized remediation. Mold Armor Mold & Mildew Killer can help with surface mold, but it is not a substitute for professional remediation when the problem is widespread or recurring. Mold Removal Lab suggests evaluating moisture sources and seeking expert guidance when in doubt.
Tools & Materials
- Mold Armor Mold & Mildew Killer(Follow label directions for surface compatibility and dwell time)
- Nitrile gloves(Chemical-resistant; avoid latex if you have sensitivities)
- Safety goggles(Protect eyes from splashes)
- Respirator or N95 mask(Ensure proper fit for vapor protection)
- Ventilation options (open window or fan)(Maintain airflow during application)
- Plastic sheeting or drop cloths(Contain overspray and protect nearby areas)
- Disposable towels or rags(Wipe residues and dry surfaces)
- Plastic spray bottle or applicator(Apply a thin, even coat)
- Mild detergent and clean water(For rinsing and surface prep after treatment)
- Trash bags (sealed)(Dispose contaminated wipes and materials safely)
Steps
Estimated time: 45-60 minutes
- 1
Clear area and protect surroundings
Move nearby items away from the work zone and cover floors or adjacent surfaces with plastic sheeting. This minimizes overspray on furniture and reduces cleanup later.
Tip: Having a clear, protected workspace makes the process faster and safer. - 2
Put on PPE and ventilate
Don nitrile gloves, safety goggles, and a respirator or N95 mask. Open windows or use a fan to establish airflow that carries vapors away from you.
Tip: Check respirator fit before starting; a loose seal reduces protection. - 3
Test a small patch
Apply a small amount of the product to a hidden or inconspicuous area. Wait the label's dwell time and inspect for adverse reactions or discoloration before proceeding.
Tip: Patch testing helps prevent blotching on visible surfaces. - 4
Apply a thin, even coat
Spray or dab a light, uniform layer over the moldy area. Avoid pooling and ensure the entire affected surface is wetted without saturating surrounding materials.
Tip: Keep a steady hand and maintain a close distance to avoid drips. - 5
Observe dwell time and re-wet if needed
Leave the product on the surface for the label-recommended period. Re-wet lightly if the surface dries out before the timer ends, as moisture is essential for efficacy.
Tip: Do not rush this step; dwell time is critical for mold kill. - 6
Rinse, wipe, and dry
Wipe away residues with a clean, damp cloth and dry the surface completely. If required, rinse with clean water and re-dry to prevent new mold growth.
Tip: Drying is as important as cleaning; moisture fuels mold return.
FAQ
Can Mold Armor Mold & Mildew Killer be used on porous surfaces like drywall or plaster?
The product is best suited for nonporous surfaces. Porous materials may require alternative methods or professional remediation to ensure mold is fully removed and the surface is properly treated.
It's typically for nonporous surfaces; porous materials may need different methods or professional help.
Is it safe to use around pets and children if I follow the label?
Keep the area isolated until surfaces are dry, use PPE, and follow all label instructions. Do not allow pets or children in the area during application and curing.
Yes, if you follow the label and keep kids and pets away during application and drying time.
What if the mold returns after treatment?
If mold returns, reassess moisture sources and re-treat only after surfaces are dry. Persistent growth may require addressing hidden moisture or structural issues.
If it comes back, fix moisture and try again after surfaces dry.
Can I mix Mold Armor with other cleaning products?
Do not mix with bleach, ammonia, or other cleaners. Mixing cleaners can release dangerous gases and irritants.
Don’t mix with other cleaners; harmful fumes could form.
How long before surfaces are safe to touch after treatment?
Drying times vary with material and ventilation. Wait until surfaces feel dry to the touch and stay dry for several hours before reoccupying the area.
Wait until dry to touch and ensure it stays dry for a few hours.
What should I do if mold is behind drywall or inside walls?
Applied surface cleaners may not reach hidden mold. For interior walls or large hidden growth, seek professional assessment and remediation.
Hidden mold behind walls needs a pro assessment.
Watch Video
The Essentials
- Wear PPE and ventilate before starting.
- Patch test and follow label dwell times.
- Apply a thin, even coat without pooling.
- Rinse and dry surfaces thoroughly to prevent regrowth.
- Address underlying moisture to keep mold from returning.