How to Tell If Mold Is Dead: A Practical Home Guide
Learn practical, science-based methods to tell if mold is dead, with moisture control, safe cleaning steps, and guidance on when to call in professionals.

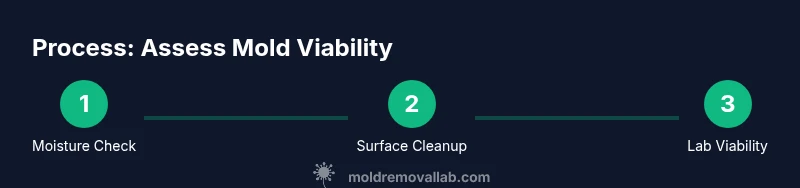
By the end of this guide, you’ll know practical signs to tell if mold is dead and what to do next. Start with moisture control and careful inspection, but remember that appearance alone isn’t reliable. Use home checks to guide you, then consider lab testing for certainty. This approach reduces health risks and speeds remediation. You’ll learn visual cues, simple tests, and safe cleanup steps that improve indoor air quality.
What determines whether mold is dead
When you ask how to tell if mold is dead, you’re asking about the biology of a resilient organism, the impact of moisture, and the time since growth. Mold isn’t a single, simple creature; it’s a collection of species with different responses to dryness, heat, and cleaning agents. Death, in practical terms, means no metabolic activity, no new growth, and no release of allergens or toxins under present conditions. Environmental moisture remains the single most important variable: once a surface dries, living cells may become dormant or die, but hidden pockets can keep viability alive for months or years. According to Mold Removal Lab, visual fade alone is not a reliable indicator of death. A surface that looks clean or whitewashed may still harbor viable spores under the wrong conditions, and a benign-looking patch can rebound if humidity returns. To move from observation to certainty, you need a structured approach: assess moisture sources, document the current state, and understand what each indicator actually tells you about viability. In short, death is context-dependent, and your best bet is to combine several checks rather than rely on appearance alone.
This section sets the foundation for practical checks you can perform without guessing. The goal is to move from surface impressions to actionable steps that improve air quality and reduce health risks.
Visual cues vs biological reality
People often rely on color or texture changes to judge mold status. A faded black spot or a pale white film may seem harmless, but color is not a reliable proxy for viability. Some molds darken as they dry, others remain vibrant after long periods of inactivity. The texture can also mislead: a firm, crusty edge might indicate dehydration, but interior hyphae could stay alive in microcrevices where moisture persists. The biology matters: dormant cells can resume growth when moisture returns, and some species release spores that remain potent even when the colony appears dead. For homeowners, the implication is clear: don’t trust surface appearance alone as a death certificate. Instead, pair careful inspection with objective checks such as moisture readings and, when necessary, laboratory analysis. As Mold Removal Lab notes, the safest path is to treat ambiguous cases as potentially active and proceed with remediation plans that address moisture control and thorough cleaning.
Understanding these nuances helps you interpret results from simple tests more accurately and avoid false assurances.
Testing methods you can use at home
There are several at-home approaches to gauge mold viability, but none are perfect substitutes for a laboratory assessment. Start with a simple moisture check using a digital meter: aim for relative humidity below 50% in the affected area and ensure good ventilation. Visual inspection should note edge conditions, substrate material, and whether you see new growth after cleaning attempts. If you suspect deeper contamination, consider a surface swab or tape lift to submit to a certified lab for analysis. Some homeowners also run humidity logs, track temperature swings, and monitor for recurring condensation. Remember that a negative swab doesn’t guarantee that the mold is dead; it only indicates that the particular area sampled did not yield detectable organisms at that moment. For many situations, Mold Removal Lab recommends coordinating with a professional lab for viability testing, especially when porous materials or large areas are involved.
These checks help you decide whether to escalate remediation steps; never rely on a single test for a clinical verdict.
Interpreting odor and environmental indicators
A musty odor can signal active growth but it is not a definitive test of viability. Odor strength often correlates with the presence of volatile organic compounds released by living or recently active colonies, not necessarily with current metabolic activity. Conversely, a lack of odor doesn’t guarantee the absence of living mold. Environmental factors—poor ventilation, high humidity, and recent water intrusion—can create conditions where mold remains viable but undetectable to the nose. The practical takeaway: use odor as a red flag that warrants closer inspection and moisture assessment, not as confirmation of death. If you notice persistent smells after cleaning, recheck for hidden dampness and consider professional sampling if the source isn’t obvious.
Olfactory clues are helpful, but they’re only part of the puzzle. Treat lingering odors as a sign to investigate moisture and hidden areas.
What the science says about mold viability
Scientific understanding emphasizes that mold viability depends on moisture, temperature, nutrient availability, and time. Some molds can survive harsh conditions by entering a dormant state, then revive when conditions improve. Others may die but leave behind fragments and toxins that continue to affect indoor air quality. From a homeowner’s perspective, the key message is to treat mold as an ecosystem rather than a single event: control moisture, remove food sources, and ensure surfaces are dried promptly. The Mold Removal Lab approach is to integrate basic checks with optional lab testing to confirm viability if the situation is ambiguous or the area is large. Remember that determining “dead” status is rarely a one-step conclusion; it’s a verdict reached after multiple checks and safe remediation steps.
The science supports a layered approach: moisture control, physical removal, and, when necessary, professional confirmation.
Practical steps to confirm mold is dead (safe and careful)
- Put on PPE and prepare the workspace. Wear an N95 respirator, chemical-resistant gloves, eye protection, and ensure good ventilation. This protects your lungs and skin from spores and cleaning agents.
- Identify moisture sources. Fix leaks, improve ventilation, and reduce humidity so the environment becomes less hospitable to mold. Without moisture control, any assessment can be unreliable.
- Document the current state. Take clear photos from multiple angles, label areas by size and material, and note past cleaning attempts. Documentation helps you track progress and communicate with professionals.
- Clean surfaces carefully. Use mild detergent and water to remove loose material; avoid aggressive scrubbing that can release more spores. Dry thoroughly before testing.
- Conduct a basic viability check. If you have access to a certified testing kit, follow the instructions exactly and compare results over time. If available, submit samples to a reputable lab for viability assessment.
- Reassess after drying. Re-check moisture levels and visual appearance after a 24–48 hour dry period; look for any unexpected regrowth or new staining.
- Decide on remediation level. If any sign of growth returns or you cannot control moisture effectively, plan professional remediation rather than DIY patches.
- Re-test and seal. After remediation, re-test to confirm the area remains free of viable mold and seal off moist spaces to prevent recurrence.
- Document outcomes. Save test results, photos, and notes for future reference and potential insurance claims.
- Schedule follow-up monitoring. Regular checks reduce the risk of recurrence and help you maintain a healthy indoor environment.
When to hire a pro vs DIY
DIY remediation can be appropriate for small, non-porous areas with minimal moisture intrusion and good ventilation. However, professional remediation is advisable for large-scale contamination, porous materials, hidden mold behind walls, or situations where moisture control is difficult. A pro will not only remove visible mold but also address underlying moisture sources and perform thorough containment to prevent cross-contamination. The decision hinges on area size, material type, and the likelihood of hidden growth. Mold Removal Lab emphasizes that professional testing and remediation are the safest paths when uncertainty remains or when health risks are elevated.
How to document for future remediation
Create a simple remediation journal that includes locations, dates, moisture levels, cleaning methods, and post-remediation checks. Photograph before, during, and after steps from multiple angles. Keep receipts and test results together in a labeled folder. Documentation not only helps you track progress but also supports insurance claims and future preventive maintenance. A well-documented process reduces ambiguity for future occupants and simplifies any follow-up work.
Common mistakes to avoid
- Ignoring hidden moisture sources or failing to fix leaks. Without moisture control, mold can re-emerge even after cleaning.
- Relying on a single observation, like color change or odors, to declare death or removal. Mold is a multi-factor issue.
- Overusing harsh chemicals on porous materials, which can damage the substrate and spread particles.
- Skipping safety gear. Mold exposure can affect sensitive individuals, and proper PPE minimizes risk.
- Delaying testing after cleanup. Post-cleanup testing helps confirm that viable mold is no longer present and reduces recurrence risk.
Final verdict: can mold be truly dead?
In practice, mold can enter a dormant state or be eliminated from accessible surfaces, but truly declaring death across an entire area is challenging without lab confirmation, especially for porous materials. A robust approach combines moisture control, physical removal, drying, and, when indicated, laboratory viability testing. The Mold Removal Lab team recommends treating mold as a dynamic condition rather than a one-time event. By addressing moisture, using thorough cleaning, and verifying results, you reduce the chances of regrowth and improve indoor air quality.
Tools & Materials
- N95 respirator(Choose a fit-tested model; use one that seals well over nose and cheeks)
- Latex or nitrile gloves(Two pairs recommended; replace if torn)
- Safety goggles or face shield(Protect eyes from splashes and spores)
- Digital moisture meter or hygrometer(Aim for RH < 50% in the area after remediation)
- Mild detergent and clean water(For initial surface cleaning)
- Non-porous cleaning tools (scrub brush, sponge)(Use separate tools for each area if possible)
- Sealable plastic bags or containment(Minimize spread during cleaning)
- Camera or notepad(Document condition and progress)
- Lab submission kit (optional)(Use only if you have access to a certified lab)
Steps
Estimated time: 60-120 minutes
- 1
Put on PPE
Wear an N95 respirator, gloves, and eye protection before approaching any mold area. Ensure adequate ventilation to reduce spore concentration in the air. This first step protects your health while you assess the situation.
Tip: Fit-test your respirator and check for air leaks before starting. - 2
Identify moisture sources
Locate leaks, condensation sites, or areas with high humidity. Fix those sources promptly to prevent ongoing growth and to ensure any subsequent tests reflect a stable environment. Without moisture control, you’re fighting a moving target.
Tip: Keep a humidity log for 24–48 hours after fixes. - 3
Document current state
Take photos from multiple angles and note materials, extent, and color changes. Label each area to track progress and for insurance or remediation planning. Documentation helps avoid miscommunication with professionals.
Tip: Include a wide shot and close-ups of edges and porous materials. - 4
Clean surfaces
Use a mild detergent and water to remove loose material; avoid aggressive scrubbing that can aerosolize spores. Dry the area completely before re-testing. Cleaning reduces surface spore load and makes tests more meaningful.
Tip: Wring out tools often to prevent spreading water behind walls. - 5
Perform viability checks
If you have a certified test kit or access to a lab, follow the instructions precisely and compare results over time. Home kits vary in quality; result interpretation should consider moisture and area size.
Tip: Only rely on lab results for final viability status in large or porous areas. - 6
Reassess after drying
Allow 24–48 hours of dry conditions, then re-check moisture levels and inspect for regrowth or new staining. A failed drying window often predicts regrowth if moisture returns.
Tip: Use fans to maintain airflow but avoid creating drafts that spread spores. - 7
Decide on remediation level
If regrowth appears or you cannot control moisture, escalate to professional remediation. DIY methods are often insufficient for large or porous contamination.
Tip: When in doubt, consult a professional for a risk assessment. - 8
Re-test and seal
After remediation, re-test to confirm lack of viable mold and seal vulnerable spaces to prevent recurrence. Keep moisture under control to maintain results.
Tip: Seal gaps around pipes and windows to reduce condensation. - 9
Document outcomes
Save test results, photos, and notes in a labeled folder. This supports ongoing maintenance and any future claims.
Tip: Date every file and cross-reference with moisture data.
FAQ
Is dead mold the same as mold removed?
No. Mold can be non-viable yet toxins or fragments remain. Removal is a separate process that may require cleaning and containment beyond killing the organism.
Dead mold is not always removed; toxins and residues can persist, so follow-up cleaning is often needed.
Can dead mold still cause health problems?
Yes. Some molds leave behind spores, fragments, or toxins that can affect health even after the organism is non-viable. Ventilation and cleaning reduce risk.
Yes—health risks can persist from spores or toxins even if mold is no longer growing.
What is the best method to test mold viability?
Lab-based viability testing provides the most reliable assessment, especially for large areas or porous materials. Home tests may guide, but labs confirm.
Lab testing is the most reliable for viability; home tests can guide but aren’t definitive.
Are home testing kits reliable?
Most home kits have limitations and may not accurately reflect viability. Use them as a preliminary check and consider professional testing for confirmation.
Home kits can be helpful but aren’t definitive; consider lab testing for a solid verdict.
How long does it take to kill mold?
Killing mold depends on moisture, temperature, and exposure methods. There’s no single timeframe; drying and remediation are ongoing processes.
There isn’t a single timeframe; it depends on moisture and remediation effectiveness.
Should I bleach mold on porous surfaces?
Bleach is often not recommended for porous materials as it doesn’t reach embedded mold well. For nonporous surfaces, it may be used with caution and following safety guidance.
Bleach can be used cautiously on nonporous surfaces, but avoid porous materials where it won’t reach embedded mold.
Watch Video
The Essentials
- Control moisture first to reduce mold viability.
- Don’t rely on appearance alone to judge death or removal.
- Use multiple checks and, if needed, lab testing for confirmation.
- Document progress with photos and notes for accountability.
- Call a professional when contamination is large or hidden.