How to Remove Mold From Air Ducts: A Practical Step-by-Step Guide
Learn safe, practical steps to remove mold from air ducts, protect indoor air quality, and decide when to call a pro. This guide covers tools, a step-by-step plan, drying, and prevention tips from Mold Removal Lab.

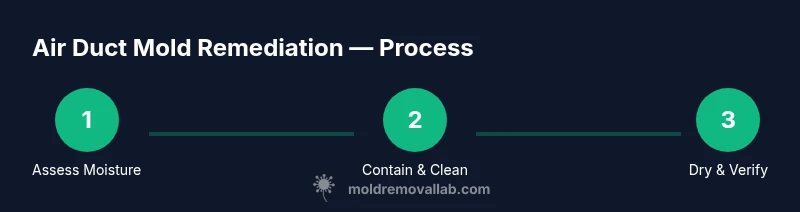
Goal: safely remove visible mold from accessible air ducts and restore air quality. Steps include: identify the scope, power down the system, seal off the ductwork to prevent spread, clean with EPA-approved solutions, dry thoroughly, and recheck moisture levels. Use appropriate PPE and avoid bleach-only approaches; call a pro if growth is extensive or you’re unsure, for best results.
Understanding Mold Growth in Air Ducts
Air ducts provide a dark, damp space with limited ventilation, which makes them a common site for mold growth in homes. Moisture sources such as high humidity, leaks, or condensate can trigger colonies on duct surfaces and insulation. While some mold is harmless in small patches, persistent growth can release spores into circulating air and worsen asthma or allergen symptoms. According to Mold Removal Lab, addressing moisture is the key to effective remediation and preventing recurrence. If you notice a musty smell, visible growth around registers, or water stains near ducts, plan a containment strategy before cleaning to minimize cross-contamination.
Assessing the Scope and Risk
Before picking tools, determine how widespread the mold is and whether the duct components are moldy on the inside or just on accessible surfaces. Start by visually inspecting accessible sections (registers, plenums, and adjacent joist spaces) and note any water damage. Use a moisture meter if available, focusing on humidity around the air handler and intake areas. If you discover mold beyond a small, clearly visible patch, or if there is persistent moisture, treat it as a wider contamination issue. In these cases, it is prudent to limit access to the area and call a professional. Mold Removal Lab’s team recommends documenting the extent with photos to guide remediation and any service quotes.
Safety and PPE Essentials
Mold remediation requires proper gear to protect you from spores. Wear an N95 respirator, chemical-resistant gloves, eye protection, and a disposable coverall. Set up containment barriers using plastic sheeting to prevent spores from moving to other rooms. Work slowly and avoid sweeping or dry-brushing, which can aerosolize spores. A HEPA-filter vacuum and damp microfiber cloths help capture debris. If you or household members have asthma or are sensitive to mold, pause and consider professional help.
Tool and Cleaner Selection (what to use and what to avoid)
Choose EPA-registered mold cleaners or a mild detergent solution for hard surfaces. Avoid bleach on porous duct materials, as it can damage surfaces and release harsh fumes. For porous insulation or fiberglass, cleaning is unlikely to remove deeply embedded mold; consider replacement. A spray bottle, brushes, microfiber cloths, a HEPA vacuum, and a moisture meter are essential tools. Keep cleaners in their original containers and label any disposal bags to prevent cross-contamination.
Step-by-Step Remediation Overview
The following overview outlines the main actions, while the STEP-BY-STEP section below provides detailed actions with tips. Begin by turning off power to the HVAC system and sealing off the affected ductwork to prevent spores from escaping. Clean exposed surfaces with an EPA-registered cleaner, wipe away residue, and dry the area completely. If insulation or duct lining is compromised, plan for replacement. Finally, reintroduce airflow gradually and monitor for signs of moisture.
Drying, Ventilation, and Moisture Control
Drying is critical to prevent mold from returning. Increase airflow with fans aimed at the ductwork and use dehumidifiers to reduce ambient humidity. Keep doors or windows open where practical to improve ventilation, and maintain indoor humidity below 50% if possible. Do not rush the drying phase; moisture can linger inside insulated ducts and hidden spaces. For best results, run the HVAC system on an empty cycle with the filter in place after the area is dry to flush residual spores outside the home.
Verifying Results and When to Call a Pro
Confirm remediation success by re-inspecting accessible surfaces and the surrounding areas for new mold growth or moisture. If damp patches reappear within a few days, recheck for hidden leaks or condensation problems. If testable, consider surface swab or lab testing for mold species, and document changes with photos. If symptoms persist or you have heart or lung conditions, consult a professional for a thorough assessment.
DIY vs Professional Remediation: Pros and Cons
DIY remediation can be cost-effective for small, clearly visible mold on non-porous ducts and when you have the right PPE and containment. However, more extensive contamination, moisture issues behind walls, or mold on insulation usually requires professional remediation. A licensed service can assess moisture sources, replace damaged materials, and ensure proper venting. The choice depends on scope, risk, and comfort level.
Prevention and Maintenance to Reduce Future Mold Growth
After cleaning, implement a prevention plan: fix leaks promptly, manage humidity with dehumidifiers, improve ventilation in kitchens and bathrooms, and schedule regular HVAC duct cleaning if recommended by a pro. Use exhaust fans during showers and direct air movement away from vulnerable spaces. Regular inspections catch problems early before they escalate.
Resources and Next Steps
For more detailed guidance, refer to authoritative sources and Mold Removal Lab’s guidelines. If you want a structured, professional plan, contact a certified mold remediation expert. Remember: moisture control is the backbone of mold prevention, and consistent maintenance minimizes future growth.
Tools & Materials
- N95 respirator(Protects from inhaling mold spores)
- Protective gloves (nitrile)(Durable, prevent skin contact)
- Safety goggles(Eye protection against splashes)
- Disposable coveralls(Full-body protection)
- HEPA vacuum with appropriate filter(Capture fine spores during cleanup)
- EPA-registered mold cleaner or mild detergent(For cleaning hard surfaces)
- Spray bottle(Distribute cleaner evenly)
- Stiff brush or scrubbing pad(Dislodge stubborn residues)
- Microfiber cloths(Wipe and absorb moisture)
- Plastic sheeting for containment(Create barriers to prevent spread)
- Duct tape(Seal containment seams)
- Trash bags (heavy-duty)(Dispose contaminated materials)
- Moisture meter(Optional for measuring humidity)
- Dehumidifier(Assists drying in moisture-heavy spaces)
Steps
Estimated time: 4-8 hours
- 1
Plan and assess the scope
Identify affected areas and potential sources of moisture. Photograph visible mold, note areas behind walls, and decide whether containment is needed before starting work.
Tip: Clear the space and protect others; containment helps prevent cross-contamination. - 2
Shut down HVAC and contain the area
Power down the HVAC system and seal off the duct access points with plastic sheeting to limit spore spread. Label doors and ensure pets/children are kept away.
Tip: Containment reduces secondary contamination and protects occupants. - 3
Inspect surfaces and plan cleaning
Examine accessible duct surfaces for visible mold, lingering moisture, and compromised insulation. Decide whether cleaning is sufficient or if replacement is necessary.
Tip: Document findings to guide remediation and future maintenance. - 4
Apply cleaning solution to affected areas
Apply an EPA-registered cleaner or mild detergent to moldy surfaces. Avoid aggressive scrubbing on delicate ducts to prevent insulation damage.
Tip: Always follow product directions and wear PPE during application. - 5
Rinse/wipe and dry thoroughly
Wipe away residue with damp microfiber cloths, rinse as needed, and dry surfaces completely. Use fans and a dehumidifier to speed up drying.
Tip: Ensure no moisture remains before reactivating airflow. - 6
Address compromised materials
If insulation or duct lining is moldy or wet, plan for replacement rather than surface cleaning. Contaminated materials can feed regrowth.
Tip: Replace with mold-resistant materials when possible. - 7
Reintroduce airflow and monitor
Gradually restore HVAC operation and monitor for signs of moisture, musty odors, or new growth over the next days.
Tip: Run a clean cycle first and observe performance before full use. - 8
Verify and plan follow-up
Re-inspect the area, consider optional surface testing if symptoms persist, and schedule preventive maintenance.
Tip: Regular checks help catch issues early.
FAQ
Is it safe to DIY mold remediation in air ducts?
For small, accessible mold on non-porous ducts, DIY remediation with proper PPE and containment can be safe. For larger growth, moisture behind walls, or porous materials, hire a licensed professional.
DIY can be safe for small, visible mold on non-porous ducts, but large or hidden growth should be handled by a pro.
Can I use bleach to remove mold from air ducts?
Bleach is not recommended for porous duct materials and can create fumes; use EPA-registered cleaners or consult a pro.
Bleach isn’t recommended for mold in porous ducts; use approved cleaners or professional help.
How can I tell if mold is hazardous?
Visible mold with a musty odor, water intrusion, or health symptoms warrants caution; testing and professional assessment help determine risk.
If you notice mold, a musty smell, or health symptoms, get an evaluation.
Should I replace duct materials?
Replace insulation or duct linings if mold has penetrated deeply or if material is crumbling or wet; cleaning alone may not suffice.
It depends on material and depth of contamination; replacement may be needed.
How long does it take to dry after cleaning?
Drying times vary with airflow and humidity; plan for additional drying time beyond the cleaning session.
Drying varies; expect additional time beyond cleaning.
Should I hire a mold inspector?
A professional mold inspector can assess hidden growth and moisture sources; consider if initial remediation did not resolve symptoms.
A mold inspector can help if you suspect hidden mold or persistent symptoms.
Watch Video
The Essentials
- Identify moisture sources and address them first
- Contain the area to prevent mold spread
- Use EPA-approved cleaners and dry thoroughly
- Call a professional for extensive or uncertain growth