How to Identify Black Mold vs Regular Mold
Learn to distinguish black mold from common molds using visual cues, odor, moisture history, and safe testing. Practical, homeowner-friendly steps for safe assessment and remediation planning.

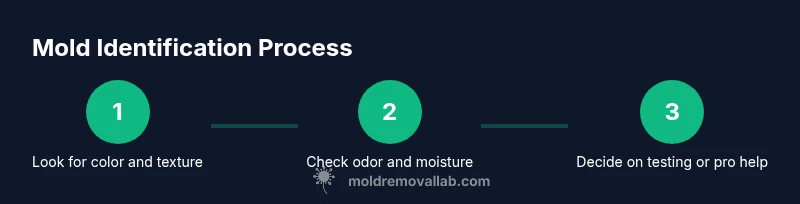
By the end of this guide you will know how to identify black mold vs regular mold by examining color, texture, growth patterns, odor, and moisture history, plus when to test safely and whether to call a pro. The steps cover visual checks, smell cues, simple at-home tests, and proper safety precautions to avoid exposure. You'll also learn how to interpret test results, document evidence for remediation, and differentiate risky species like Stachybotrys chartarum from common molds.
How to Identify Black Mold vs Regular Mold: Key Differences
Understanding the distinction between black mold and common molds is essential for effective remediation. In everyday use, 'black mold' often refers to Stachybotrys chartarum, but color alone isn’t a reliable indicator of species or danger. According to Mold Removal Lab, molds come in many colors and textures, and growth patterns depend heavily on moisture and surface material. Treat all mold sightings as potential health concerns and prioritize safety. Health risks vary by species and duration of exposure, so avoid brushing or sanding without protection. The Mold Removal Lab Team emphasizes that visual cues are helpful but not definitive; lab analysis is the gold standard for confirmation. This approach aligns with Mold Removal Lab’s overarching philosophy: safety first, verification second.
Tools & Materials
- N95 respirator mask(Ensure a snug seal; replace if damp)
- disposable gloves(Powder-free nitrile or latex)
- protective goggles(Wraparound lenses preferred)
- protective coveralls or long-sleeve clothing(Non-porous fabric if possible)
- disposable waste bags(Seal and label for disposal)
- alcohol wipes or disinfectant(For surface cleaning after sampling)
- clear tape (for tape lift samples)(Label each sample location)
- notepad and pencil or camera(Document locations and dates)
- flashlight(Inspect dark corners and behind fixtures)
- moisture meter (optional)(Useful but not mandatory)
Steps
Estimated time: 60-120 minutes
- 1
Prepare safety gear and workspace
Put on an N95 mask, gloves, goggles, and coveralls before touching any mold. Seal off the area as much as possible to limit spread and open a window or use a fan for ventilation. Gather your tools and create a simple map of the affected zones.
Tip: Double-bag any materials you remove to prevent dispersal of spores. - 2
Conduct a visual inspection
Carefully scan all visible surfaces in the suspected area. Note color, texture, and growth patterns, and mark locations on a floor plan or photo map. Compare scenarios across rooms to understand whether the issue is isolated or widespread.
Tip: Take clear, well-lit photos with timestamps for documentation. - 3
Check moisture sources and history
Identify any current leaks, condensation points, or past water damage. Mold growth typically tracks moisture; note whether the area dries between incidents. Record humidity levels if you have a meter.
Tip: Address the moisture source first; remediation is unlikely to succeed without it. - 4
Collect surface samples safely (optional)
If you choose to sample, use tape lifts on several locations and press firmly to capture spores. Label each sample with location, date, and whether it’s indoor/outdoor. Place each sample in a separate labeled bag for transport to a lab if needed.
Tip: Do not sample large areas or structurally active growth without professional help. - 5
Document findings with photos and notes
Create a concise report listing locations, observed conditions, moisture history, and any health symptoms in the home. This supports your remediation plan and helps professionals understand the scope.
Tip: Keep a running log and back up photos to a cloud drive. - 6
Decide on next steps (home care vs pro)
For small, surface mold in non-porous materials, you may proceed with careful cleaning following safety guidelines. If growth is extensive, involves porous materials, or covers large areas, contact a licensed mold remediation professional.
Tip: When in doubt, consult a professional early to minimize exposure. - 7
Plan follow-up and prevention
After remediation, monitor the area for regrowth and confirm moisture sources are resolved. Implement preventive measures like improved ventilation, regular cleaning, and prompt repair of leaks.
Tip: Set a seasonal reminder to inspect high-risk zones (basements, bathrooms).
FAQ
Is black mold always dangerous?
Black mold can pose health risks, especially with prolonged exposure, but risk depends on the species and contamination extent. Do not rely on appearance alone; confirm with testing and professional assessment when needed.
Black mold can be dangerous, but the risk depends on exposure and species. Get a professional assessment if you suspect contamination.
Can I identify black mold by color alone?
No. Color is not a reliable indicator of species. Many molds appear black or dark, and only lab analysis can confirm the species and potential risks.
Color alone isn’t reliable for identifying mold species; lab tests confirm the specifics.
What should I do if mold returns after cleaning?
Reassess moisture sources, inspect for hidden growth, and consider professional remediation for persistent or large areas. Re-cleaning without addressing moisture often fails.
If mold comes back, address moisture and consider a pro for persistent growth.
Are at-home mold tests reliable?
At-home tests can indicate presence and locations but are less definitive than lab-confirmed results. If testing suggests mold, follow up with professional analysis for remediation decisions.
Home tests can help locate mold, but lab tests are more reliable for confirmation.
How long does remediation typically take?
Remediation duration depends on the extent of contamination and the materials involved. Large or porous areas require more time and professional coordination.
Remediation time varies with scope; expect longer timelines for significant contamination and porous materials.
Watch Video
The Essentials
- Identify mold context, not just color.
- Moisture history drives mold growth.
- Use safety gear and proper ventilation during inspection.
- Consider lab testing for confirmation when in doubt.
- Document findings to support remediation planning.