How to identify mold vs mildew: a homeowner's guide
Learn to tell mold from mildew using visuals, odor, moisture context, and safe testing. This practical guide from Mold Removal Lab explains differences, growth patterns, and remediation steps for your home.

Mold and mildew are both fungi, but they differ in appearance, growth habits, and health implications. Mold tends to be fuzzy or velvety, grows in patches, and can penetrate materials, while mildew appears as a flat, powdery film on surfaces. To identify safely, examine color, texture, odor, growth pattern, and moisture context, then test if needed. This Mold Removal Lab guide walks you through identification and next steps.
Visual cues: mold vs mildew
Visual inspection is the first, most practical way to distinguish mold from mildew, but it’s not a replacement for lab confirmation when safety is a concern. Mold often presents as a textured growth that looks fuzzy, velvety, or cotton-like and can show multiple colors such as black, green, blue, or gray. Mildew, by contrast, typically shows up as a flat, powdery or dull film on surfaces like tile, grout, or painted walls. Color alone is not a reliable indicator, but texture and growth pattern provide meaningful clues. According to Mold Removal Lab, the context of growth—where and how fast it spreads—helps differentiate the two. If you see growth on porous materials or behind wallpaper, the risk and remediation approach are different than mildew found on bathroom tiles. This distinction matters because it informs how aggressively you should respond and whether professional assessment is warranted.
Odor, texture, and growth patterns
Smell and texture can reinforce what you see. Mold often emits a musty odor that intensifies with humidity, and its growth is usually irregular, forming colonies that extend into the surface. Mildew generally has a milder odor and remains more surface-level, appearing as a powdery layer that can be rubbed off with effort. Growth rate matters too: mildew tends to spread along moisture-rich surfaces rather than penetrating deeply into materials. By documenting odor strength, surface texture, and how the colony expands over time, you gain a clearer picture of which organism you’re dealing with. Mold Removal Lab notes that combining several cues yields higher confidence than color alone.
Common locations and patterns in homes
Mildew is most common in high-humidity zones like bathrooms, kitchens, and closets with poor ventilation, often along grout lines or near sinks. Mold appears in more varied spots: behind walls, around leaks, in basements and crawl spaces, or on wooden studs where moisture persists. It can take root in porous materials, including drywall, cardboard, or insulation, and may indicate a persistent moisture problem. Knowing typical locations helps you target inspections and prevents unnecessary disruption in areas where mildew is the likely culprit.
Safe inspection: PPE, containment, and safe practices
Inspecting suspected growth requires careful safety practices. Always wear an N95 or higher respirator, disposable gloves, and eye protection. Avoid disturbing mold colonies, which can release spores into the air; containment with plastic sheeting helps limit spread. Work in well-ventilated areas if possible, and minimize disturbance of dust and debris. If the growth is extensive or located behind walls, you should engage a professional rather than attempting a DIY cleanup. This approach aligns with Mold Removal Lab guidance which emphasizes safety first and moisture control as the root cause of mold issues.
Sampling and testing: when it’s needed, and how it’s done
In many cases, simple visual assessment suffices to determine whether action is needed. However, when identification matters—for example, to distinguish toxic molds or to support insurance claims—professional testing may be appropriate. Sampling should be performed by trained personnel with proper containment to avoid cross-contamination. Collecting a sample for lab analysis typically involves securing a piece of the material with sterile tools and proper packaging for transport. Interpret results with a focus on moisture sources and remediation pathways, not just the mold type. Mold Removal Lab recommends using testing primarily to inform remediation decisions rather than to decide whether action is necessary.
Cleaning, remediation, and moisture control basics
Remediation aims to remove active growth and fix the moisture problem that allowed growth in the first place. For mildew on nonporous surfaces, a routine cleaning with a household cleaner or diluted bleach (if appropriate for the surface) may suffice and be safer to handle. For mold that has penetrated porous materials, disposal may be necessary, followed by a thorough cleaning of surrounding areas and improved moisture management. Regardless of the organism, reducing humidity, fixing leaks, ensuring proper ventilation, and using dehumidifiers in damp spaces are critical long-term strategies. Throughout, document the affected areas, keep children and pets away during cleanup, and consider professional help for large or hidden infestations.
Prevention and moisture control: long-term strategies
Preventing mold and mildew requires diligent moisture control. Address leaks promptly, maintain indoor humidity between 30-50%, and ensure good air exchange in bathrooms and laundry rooms. Regular cleaning, prompt drying of wet surfaces, and routine inspections for signs of dampness can prevent regrowth. In spaces with ongoing moisture challenges, consider improving insulation, sealing around windows, and upgrading ventilation systems. Mold Removal Lab emphasizes that prevention is more effective than cure and often reduces the need for costly remediation later.
Tools & Materials
- Personal protective equipment (PPE)(N95 respirator or higher, protective gloves, goggles)
- Flashlight(Bright handheld light for dark corners)
- Microfiber cloths(For gentle surface testing and wiping)
- Spray bottle with water(Keep a light mist for tests and cleaning)
- Isopropyl alcohol 70%(Disinfectant wipe for surfaces (avoid mixing with bleach))
- Plastic sheeting and tape(Containment if large areas are inspected)
- Disposable bags and markers(Label and seal samples or contaminated materials)
- Notebook or camera(Document locations and growth patterns)
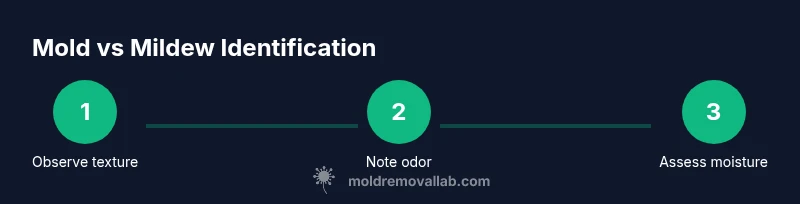
Steps
Estimated time: 60-90 minutes
- 1
Gather safety gear and supplies
Put on PPE, assemble tools, and prepare containment if needed. This reduces exposure and prevents cross-contamination during inspection.
Tip: Check respirator fit and ensure eyewear protects eyes from particles. - 2
Identify suspect areas and document
Walk through the space and note visible growth, odors, moisture sources, and affected materials. Take photos or sketches to track patterns over time.
Tip: Label each area clearly with a marker or notes for later reference. - 3
Compare texture and growth patterns
Assess whether growth appears fuzzy/velvety (likely mold) or flat/powdery (likely mildew) and note surface type (porous vs nonporous).
Tip: Avoid disturbing the colony; disturbing it may release spores. - 4
Assess moisture context and sources
Identify leaks, condensation, or humidity levels that sustain growth. Moisture control is the key remediation driver.
Tip: Use a moisture meter if available to check walls or insulated cavities. - 5
Decide on sampling needs
If identification affects health risk or remediation choices, consider professional sampling. DIY samples have limits in interpretation.
Tip: Consult a professional if growth covers a large area or is behind walls. - 6
Plan remediation and moisture control
Outline steps to remove growth and fix the moisture issue, including cleaning methods and ventilation improvements.
Tip: Set a moisture goal (e.g., 40-50% RH) and monitor progress after cleanup. - 7
Cleanup and verify
Clean affected surfaces, dispose of contaminated materials, and recheck moisture levels after cleaning.
Tip: Document the cleanup with photos and notes for future reference.
FAQ
What is the difference between mold and mildew?
Mold is usually fuzzy or textured and can invade porous materials, while mildew is flat and powdery, remaining on surfaces. Both are fungi and thrive in moisture, but their growth patterns and remediation needs differ.
Mold tends to be fuzzy and penetrates materials; mildew is flat and powdery and stays on the surface. Both need moisture control to prevent return.
Can I identify mold vs mildew by color alone?
Color is not a reliable indicator. Mold colors vary widely, and mildew can be any light color too. Texture and growth pattern are more telling indicators.
Color alone isn’t enough to tell them apart; look at texture and where and how the growth spreads.
Is mildew less dangerous than mold?
Mildew is generally less aggressive than mold and usually restricts to surface layers. Mold can penetrate materials and pose greater health risks in some cases.
Mildew is usually milder, but both can affect indoor air quality; treat any growth seriously and manage moisture.
When should I test for mold or mildew?
Testing is helpful when you need confirmation for health concerns, insurance, or to guide remediation. If growth is extensive or behind walls, consult professionals for sampling.
Consider testing if you’re unsure about the health risks or if the area is large or hidden.
What are simple steps to prevent mold after identification?
Address moisture sources, improve ventilation, and monitor humidity. Regular cleaning and prompt drying of wet areas reduce recurrence.
Fix leaks, keep humidity in check, and dry damp areas promptly to prevent mold comeback.
Is bleach effective against mold and mildew?
Bleach can kill surface mold on nonporous surfaces but is not a cure-all, especially for porous materials. Use it only on appropriate surfaces and follow safety guidelines.
Bleach can help on hard, nonporous surfaces, but it isn’t a total solution for porous materials.
Watch Video
The Essentials
- Identify mold vs mildew by texture and growth, not color alone
- Moisture control is the root cause and remediation focus
- Use PPE and containment to inspect safely
- Consider professional testing for health-risk scenarios
- Prevent recurrence with continuous moisture management