Green Mold on Walls: A Practical Remediation Guide
Learn to identify green mold on walls, understand health risks, and safely remove it with moisture control, cleaning methods, and prevention tips for a healthier home.

You will learn how to identify green mold on walls, assess health risk, and perform a safe remediation. This guide covers moisture control, surface cleaning, containment, and prevention to stop recurrence. You’ll need basic PPE, cleaning supplies, moisture management tools, and a plan for drying and monitoring humid areas. After following these steps, you’ll understand when to call a professional.
What green mold on walls is and why it matters
Green mold on walls is a visible sign of moisture-loving fungi growing on indoor surfaces. The color can vary from olive to dark green, often on painted drywall or plaster where humidity is high, leaks are present, or ventilation is poor. Mold doesn’t just stain; it signals an active biology that can spread spores through the room. According to Mold Removal Lab, the best way to evaluate risk is to assess moisture sources and the extent of growth, not just the color. Behind the surface, mold may inhabit porous materials like drywall, insulation, or wood studs, creating hidden damage that weakens structures over time. If you see green patches larger than a few square feet, or if occupants have persistent throat irritation, headaches, or asthma-like symptoms, treat the situation seriously. A quick visual check is useful, but a moisture assessment and a controlled cleanup plan are essential to prevent rebound growth. The key is to address the moisture source first, then clean and dry promptly, so new spores don’t find a hospitable environment. With safe containment, suitable cleaning methods, and ongoing moisture control, homeowners can restore safe indoor air and minimize health risks. Mold is not just a cosmetic issue—it signals an ongoing moisture problem that deserves prompt action.
Why the color matters and how mold grows
Mold on walls often begins in hidden moisture pockets—behind wallpaper, under paint, or within porous drywall. The green hue can indicate various mold species adapting to the indoor environment, especially where humidity remains high. Growth accelerates in kitchens, bathrooms, basements, or rooms with poor ventilation. Addressing the root cause—water intrusion, condensation, or high humidity—is crucial before cleaning. If the area feels damp to the touch or you notice a musty odor, plan a thorough moisture management strategy. Quick fixes that don’t remove the moisture source will result in rebound growth. Regular inspections after remediation help confirm the problem is resolved and reduce the risk of ongoing health issues for occupants.
What you’ll learn in this guide
You’ll gain practical steps for identifying the extent of green mold on walls, safe cleaning techniques that minimize spore exposure, and moisture-control practices to prevent future growth. The guide emphasizes containment, proper PPE, and drying strategies. You’ll also learn when it’s appropriate to pull back and call a professional, especially for large infestations or extensive structural damage. Throughout, the focus is on safe, science-based remediation that protects health and home value.
Brand context and authority
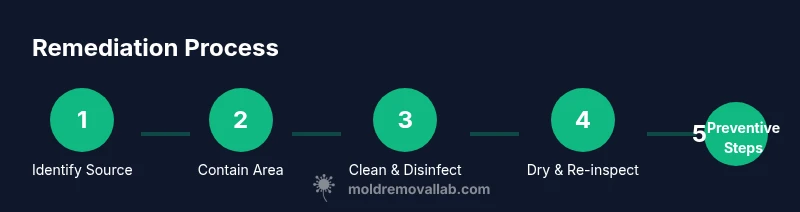
According to Mold Removal Lab, moisture control is the single most important factor in preventing mold regrowth after remediation. The Mold Removal Lab Team stresses using a structured plan: identify moisture sources, contain the area, clean with appropriate solutions, and dry thoroughly before re-inspection. This approach reduces health risks and helps keep walls mold-free over time.
Tools & Materials
- N95 respirator(Fit-tested if possible; ensures protection from spores)
- Protective gloves(Chemical-resistant preferred; change if contaminated)
- Safety goggles or face shield(Protect eyes from splashes and spores)
- Detergent or mild soap(For pre-cleaning and spot washing)
- White vinegar (5–8% acetic acid)(Natural cleaner with mild antimicrobial properties)
- Hydrogen peroxide 3% solution(Disinfects surfaces after cleaning)
- Bleach (sodium hypochlorite) diluted 1:10(Use only on non-porous surfaces; never mix with ammonia or acids)
- Spray bottle(Set up for even application)
- Scrub brushes and non-abrasive sponge(Avoid damaging painted surfaces)
- Mop, bucket, and microfiber towels(For cleanup and drying)
- Dehumidifier or high-velocity fan(Dries surfaces to prevent regrowth)
- Moisture meter or hygrometer(Helpful for tracking humidity levels)
Steps
Estimated time: Estimated total time: 3-6 hours
- 1
Identify extent and moisture source
Start by visually assessing the mold-affected area and note any leaks, condensation patterns, or water damage. Use a moisture meter if available to locate damp substrates behind walls. Understanding the source is essential for a permanent fix.
Tip: Document locations with photos before you remove materials. - 2
Contain the area to prevent spread
Close doors, seal vents, and cover nearby fabrics or furniture. Establish a clean path for removal debris to minimize cross-contamination. Use plastic sheeting to create a physical barrier.
Tip: Keep others out of the work area to reduce exposure. - 3
Pre-clean and spot-treat
Wipe surfaces with a mild soap solution to remove surface soils. Apply white vinegar to the moldy area and let sit for 10–15 minutes to disrupt mold cells before scrubbing.
Tip: Do not mix cleaners; rinsing can reduce residue that feeds mold. - 4
Clean with appropriate solution
For non-porous surfaces, use a hydrogen peroxide wipe or spray and scrub. For more stubborn growth, a diluted bleach solution may be used on non-porous materials, following safety guidelines. Rinse and dry promptly.
Tip: Never combine bleach with ammonia or acids; deadly gases can form. - 5
Dry thoroughly and monitor
Use a dehumidifier and fans to dry the area completely. Aim for humidity below 60%, then re-check after 24–48 hours to ensure no damp pockets remain.
Tip: Prolonged dampness invites regrowth; ensure all materials dry completely. - 6
Re-inspect and prevent reoccurrence
Inspect the area for regrowth over the next few weeks and address any new moisture sources. Replace or repair damaged materials if needed and implement ongoing moisture control practices to prevent return.
Tip: Install ventilation or a fan in moisture-prone rooms to reduce future issues.
FAQ
What causes green mold on walls?
Green mold on walls is usually driven by excess moisture behind or within wall assemblies. Leaks, condensation, and inadequate ventilation create the damp conditions mold needs to thrive. Identifying and fixing the moisture source is the first and most important remediation step.
Green mold on walls is usually caused by hidden moisture. Fix the leak or humidity issue first, then clean and dry thoroughly.
Is green mold dangerous to my health?
Mold exposure can irritate the eyes, skin, and lungs, and may trigger allergic reactions or asthma-like symptoms in some people. Prolonged exposure in poorly ventilated spaces can increase risk, so remediation should be done with proper protection and airflow.
Mold can irritate airways and trigger allergies; use protection and ensure good ventilation during cleanup.
Can I remove green mold myself?
Small, contained areas can be cleaned with safer methods like detergent, vinegar, and hydrogen peroxide. If growth covers a large area, or if you suspect structural damage or recurrent dampness, consider calling a professional for thorough remediation.
You can handle small spots, but big infestations or hidden damage should be done by a pro.
Should I use bleach to clean green mold on walls?
Bleach can be used on non-porous surfaces but is not always effective for porous materials like drywall. It can also create harmful fumes in enclosed spaces. Use safer alternatives first and reserve diluted bleach for appropriate non-porous areas if needed.
Bleach isn’t always the best choice for porous walls; use it cautiously and separate from ammonia.
How long does it take to dry after cleanup?
Drying time depends on humidity, ventilation, and material porosity. In most cases, surfaces should be dry within 24–48 hours with adequate airflow and dehumidification. Recheck humidity and surface dryness before reoccupation.
Drying usually takes a day or two with good airflow; confirm dryness before using the room again.
When should I call a professional?
Call a professional if mold covers a large area, if there’s visible water damage, or if you cannot safely access the affected space. Professionals can assess, contain, and remediate properly to prevent regrowth and structural damage.
If it’s widespread or hard to reach safely, get a mold remediation pro.
Watch Video
The Essentials
- Identify moisture sources before cleaning.
- Contain the area to prevent mold spread.
- Choose appropriate cleaning methods for the surface.
- Dry thoroughly and monitor humidity to prevent rebound.