How to Get Rid of House Mold: Practical Guide
A practical, safety-first guide to get rid of house mold: moisture control, containment, cleaning, and prevention strategies, backed by Mold Removal Lab analysis.

Learn to get rid of house mold safely with a step‑by‑step remediation plan that covers moisture control, containment, cleaning, and prevention. You’ll know when to DIY and when to call professionals, plus essential safety gear and common mistakes to avoid. This quick answer sets the stage for a thorough, homeowner-friendly guide backed by Mold Removal Lab analysis.
Understanding Mold Growth and Health Risks
Mold in homes is more than a cosmetic issue; it can affect indoor air quality, trigger allergic reactions, asthma symptoms, and other health concerns, especially for children, the elderly, and people with respiratory conditions. Mold needs moisture to thrive, so any ongoing leak, humidity above typical indoor levels, or condensation on cold surfaces can support growth. To get rid of house mold effectively, you must address both visible colonies and hidden moisture sources. According to Mold Removal Lab, the most durable mold control comes from combining moisture management with physical removal and proper cleaning of affected materials. Start by identifying where moisture enters and how long the area stays damp, then plan remediation with safety as a priority. This guide uses homeowner-friendly steps and explains when professional help may be necessary, emphasizing practical actions over theory.
Signs, Areas, and Safety
Mold often shows up as fuzzy patches, stains, or a musty odor. Basic checks should include bathrooms, basements, kitchens, laundry rooms, crawl spaces, and any spot with a history of leaks or high humidity. Visible growth is not the only problem—hidden colonies behind drywall or under flooring can persist. Safety is non-negotiable: wear PPE, isolate the work area, and ventilate to limit airborne spores. If mold covers more than a small area or if anyone in the home has health sensitivities, consider professional remediation. This guidance aligns with the Mold Removal Lab approach, which emphasizes moisture control as the cornerstone of effective mold management.
Prep Work: PPE, Containment, and Ventilation
Before starting, gather PPE (appropriate respirator or NIOSH-approved mask, nonporous gloves, eye protection). Create a containment zone with plastic sheeting to minimize cross-contamination and seal doors with tape. Ventilation should push air out of the work area while keeping living spaces safe; avoid pressurizing the home. Use a HEPA-filter vacuum and damp-wipe surfaces to remove spores, and plan to discard porous materials that are heavily contaminated. Proper prep reduces exposure risk and makes subsequent cleaning safer and more effective.
Step-by-Step Remediation Plan (DIY and When to Hire Pros)
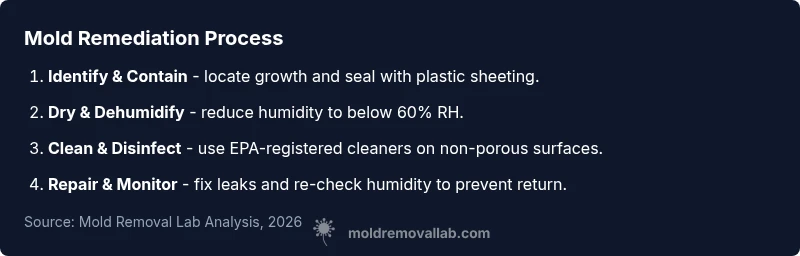
Remediation combines several actions in a safe sequence. Start with locating and fixing the moisture source (leaks, poor ventilation, or humidity). Then contain the area, dry materials to below 60% relative humidity, and remove or clean affected non-porous surfaces with EPA-registered cleaners. Porous materials that are mold-damaged beyond salvage should be removed and discarded. After cleaning, thoroughly dry the space again and monitor humidity to prevent recurrence. If mold returns after DIY efforts, or if the contamination is extensive, consult a licensed professional. Mold Removal Lab emphasizes that remediation success hinges on addressing moisture first and foremost.
Cleaning Methods by Surface Type
Non-porous surfaces (tile, glass, metal) can often be cleaned with standard cleaners and a scrub brush, followed by a wipe with a damp cloth. Semi-porous materials (wood, drywall) may require more careful cleaning or replacement if damaged. Porous materials (insulation, ceiling tiles, drywall) that have absorbed mold should typically be discarded. Always test cleaners on a small area first to avoid damage. For all surfaces, avoid mixing cleaners with ammonia or bleach unless guidelines specify it is safe for the material. The goal is to remove growth and deactivate mold without creating toxic fumes or further decay.
Preventing Mold from Returning: Moisture Control and Maintenance
Prevention centers on controlling moisture. Fix leaks promptly, ensure proper ventilation in bathrooms and laundry areas, and use dehumidifiers or portable fans to maintain relative humidity below 50-60%. Regularly inspect areas prone to dampness, re-seal windows and joints, and improve drainage around the foundation. Encourage residents to report new leaks quickly and maintain clean, dry surfaces. A proactive maintenance plan is the most reliable defense against recurrence and a core part of any get rid of house mold strategy.
When to Hire a Professional and Insurance Considerations
Professional remediation is often warranted for large-scale growth, structural moisture damage, or if fungal growth recurs after initial cleaning. Licensed professionals can identify hidden moisture sources, perform advanced containment, and restore areas safely. Insurance coverage varies by policy and cause, so document the damage and consult your insurer early in the process. If in doubt, a professional assessment can prevent long-term health risks and higher remediation costs later.
Tools & Materials
- N95 or equivalent respirator(NIOSH-approved if possible; replace filters as needed)
- Non-porous gloves(Nitrile recommended)
- Goggles or eye protection(Wraparound style preferred)
- Plastic sheeting and tape(For creating containment zones)
- HEPA vacuum(With proper filter replacement)
- EPA-registered cleaner or soap solution(Avoid if surface is damaged; follow label directions)
- Bleach solution (optional, for non-porous surfaces only)(Use only on non-porous surfaces; never mix with ammonia)
- Spray bottle and scrub brush(For applying cleaner and scrubbing)
- Bucket and damp cloths(For wiping and rinsing)
- Moisture meter or hygrometer(Track humidity during remediation)
- Dehumidifier or fans(Aid drying; ensure safe electrical use)
- Trash bags for contaminated materials(Seal and dispose according to local guidelines)
Steps
Estimated time: 6-12 hours for initial remediation; longer if structural work or replacement materials are needed
- 1
Identify moisture sources
Locate leaks, condensation points, or poor insulation. Stop the water intrusion first to prevent regrowth and equipment damage. This foundation step makes subsequent cleanup effective.
Tip: Mark problem areas with a note or tape for later reference - 2
Contain the area
Set up plastic sheeting to isolate the affected zone. Keep doors closed, and use tape to seal gaps; this reduces cross-contamination and protects unaffected spaces.
Tip: Create a small airlock if possible to minimize spores migrating - 3
Dry the space thoroughly
Run dehumidifiers and fans to bring RH below 60%. Start in the affected zone and monitor progress with a moisture meter.
Tip: Do not leave moisture sources unattended for long - 4
Clean visible mold
Wipe non-porous surfaces with an EPA-registered cleaner; scrub as needed and wipe away residue. Porous materials may require removal.
Tip: Always work from top to bottom to avoid drip paths - 5
Remove or treat porous materials
If drywall, insulation, or carpeting are moldy beyond salvage, dispose of them properly. Do not attempt to salvage severely damaged porous materials.
Tip: Seal removed materials in separate bags to prevent spread - 6
Re-clean and re-check moisture
Re-clean affected areas and re-test humidity; ensure no hidden moisture remains behind walls or under flooring.
Tip: Use a borate-based or EPA-approved antimicrobial where appropriate - 7
Repair and restore
Fix the underlying moisture problems (leaks, ventilation, insulation) and plan for replacement materials where needed.
Tip: Document repairs for your records and future prevention - 8
Monitor long-term
Continue monthly checks for signs of moisture or mold growth; adjust humidity control as seasons shift.
Tip: Keep humidity indoor values consistently below 60%
FAQ
What are common signs that mold is growing in a home?
Look for visible growth, musty odors, water stains, and discoloration on walls, ceilings, or floors. Also note moisture problems like leaks or high humidity. If in doubt, have the area inspected.
Common signs include visible patches, musty smells, and damp spots. If you notice moisture or health symptoms, inspect promptly.
Is it safe to clean mold myself, or should I hire a professional?
Small, contained areas can often be cleaned by homeowners with proper PPE and ventilation. Large areas, structural mold, or growth near HVAC systems typically require professional remediation to ensure safety and thoroughness.
If the mold is extensive or part of a bigger moisture problem, call a pro.
Does bleach kill mold on all surfaces?
Bleach can kill mold on non-porous surfaces but is less effective on porous materials. It can also create fumes and damage some surfaces. Use cleaners as directed and test a small area first.
Bleach works on non-porous surfaces but isn’t always the best choice for porous materials.
How long does remediation take?
Time depends on the extent of growth and moisture problems. Small jobs may be completed in a day; larger, structural issues can take several days or longer.
Most small jobs wrap up within a day, while bigger projects take days.
Will mold remediation be covered by insurance?
Coverage varies by policy and cause. Documentation of the damage and moisture issues helps when filing a claim. Consult your insurer for specifics.
Insurance coverage differs; talk to your provider and keep receipts and reports.
What are effective prevention measures for mold?
Control moisture with leaks repairs, humidity management, and proper ventilation. Regular inspections and prompt action on water issues reduce recurrence risk.
Keep humidity low, fix leaks fast, and inspect damp areas regularly.
The Essentials
- Contain moisture sources before cleaning.
- Dry spaces thoroughly to stop regrowth.
- Use proper PPE and follow safety guidelines.
- Discard heavily contaminated porous materials.
- Seek professional help for extensive contamination