Flower Mold: Identify, Remove, and Prevent in Your Home
Learn how to identify flower mold, safely remove contaminated material, dry surfaces, and prevent recurrence. This expert Mold Removal Lab guide covers safety, tools, step-by-step actions, and prevention strategies for homeowners and renters.

According to Mold Removal Lab, flower mold in homes often signals excess moisture and can threaten indoor air quality and plant health. This guide shows you how to identify flower mold, safely remove contaminated material, dry the area, and prevent recurrence with moisture control. You’ll need basic PPE, simple cleaning supplies, and patience to complete the steps safely.
What is flower mold on indoor plants and floral displays?
Flower mold refers to visible mold growth on cut stems, petals, leaves, or floral arrangements. It often appears as fuzzy patches in green, white, gray, or black, and is typically accompanied by a musty odor. In the home, flower mold usually arises when moisture lingers in floral foam, watered soil, or crowded displays that trap humidity. According to Mold Removal Lab, recognizing the signs early helps prevent spread to other household surfaces and protects indoor air quality. If you’re dealing with a bouquet you just bought or a potted plant that’s been sitting in a humid space, treat any visible mold promptly and remove affected materials to minimize exposure to spores. Remember that mold growth on flowers is a symptom—addressing moisture and airflow is essential to stop future outbreaks.
Why flower mold on fresh bouquets matters for home health and comfort
Healthy-looking flowers can hide hidden mold behind petals or within the vase water. Mold spores released from flower mold can irritate allergies and asthma for some people, especially when air circulation is poor. The presence of flower mold is a visual cue: moisture problems, insufficient ventilation, or a lack of airflow around plant materials. Addressing the underlying moisture issue reduces recurrence and protects the rest of your home. Mold Removal Lab’s analysis shows that moisture management is the single most effective tool for controlling flower mold and keeping living spaces comfortable for occupants.
How to inspect a floral display and plants for mold without spreading contamination
Begin by tightening the display area’s seal: close doors, lower room humidity, and avoid moving contaminated materials around the home. Look closely at all surfaces where water sits: the rim of vases, plastic plant liners, and floral foam. Check stems near the roots or base for dark discoloration or slimy textures. If you see mold on petals, leaves, or stems, isolate these items to prevent cross-contamination and begin containment measures. Use a flashlight to inspect hidden areas behind foliage and inside the vase. Documentation helps—take photos before you remove items so you can analyze moisture sources later.
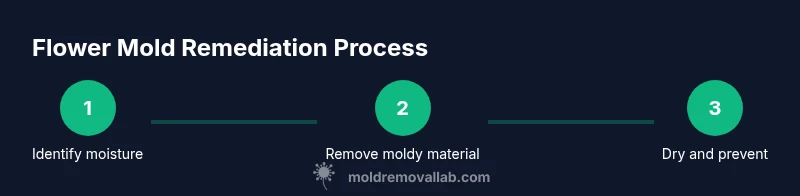
Step-by-step remediation overview for flower mold incidents (high level)
A typical remediation plan starts with containment, followed by cleaning, drying, and moisture control. You’ll want to remove heavily moldy flowers and any damp materials, then thoroughly clean surviving surfaces with a mild detergent. After cleaning, dry the area completely and improve ventilation to prevent regrowth. Finally, address the moisture source—leaks, high humidity, or overwatering—to reduce the likelihood of future flower mold outbreaks. This overview sets the stage for the detailed, step-by-step instructions that follow, ensuring you have a clear path from problem identification to prevention.
Preventing recurrence: moisture control, storage, and display best practices
Prevention focuses on reducing humidity, improving air movement, and avoiding crowded floral displays. Use dehumidifiers in damp rooms and ensure good cross-ventilation when possible. Change vase water frequently and avoid leaving cut flowers in standing water for extended periods. If you use floral foam, ensure it’s completely dry before re-wetting, or replace it with grid support to improve drainage. Regularly inspect plant material for signs of mold and address issues promptly to keep flower mold from returning.
When to call a professional for flower mold problems
If mold covers a large area, recurs after cleaning, or involves structural surfaces (like ceiling or wall materials), it’s wise to consult a mold remediation professional. Persistent symptoms such as headaches or persistent coughing after exposure warrant expert evaluation. The Mold Removal Lab team recommends seeking professional help when household mold concerns go beyond simple cleaning or when you have respiratory sensitivities that could worsen with exposure. Professional remediation can protect both health and home integrity.
Tools & Materials
- N-95 respirator or higher(Protects against mold spores during handling and cleaning)
- Nitrile gloves(Long cuffs preferred for extended protection)
- Safety goggles(Shield eyes from splashes and spores)
- Microfiber towels(For wiping and absorbing moisture)
- Spray bottle with mild detergent solution(Gentle cleaning agent for non-porous surfaces)
- Bucket(For rinsing or disposing of waste material)
- Trash bags(Seal contaminated materials before disposal)
- White vinegar (optional)(Eco-friendly cleaning option for non-porous surfaces)
- Hydrogen peroxide (optional)(Use only on non-porous surfaces; avoid mixing with bleach)
Steps
Estimated time: 60-120 minutes
- 1
Assess moisture and isolate area
Identify the source of moisture fueling the flower mold and stop its spread by isolating the affected zone. Close doors and turn off fans that may circulate spores. Document the area with photos for later reference and to guide moisture remediation.
Tip: Keep contaminated items contained in a sealed bag during transport to prevent cross-contamination. - 2
Protect yourself with proper PPE
Put on an N-95 respirator, gloves, and safety goggles before handling any affected flowers or materials. PPE minimizes exposure to spores and helps you work more confidently.
Tip: Check PPE for fit and integrity before starting; replace non-fitting gear to ensure a proper seal. - 3
Remove contaminated flowers and materials
Carefully remove moldy flowers, contaminated stems, and any spoiled floral foam or damp fillers. Place removed items in a sealed bag and dispose of them away from living areas to reduce airborne spores.
Tip: Do not compost moldy plant material; bag it for trash disposal to prevent regrowth. - 4
Clean affected surfaces with detergent
Wipe down vase rims, containers, and non-porous surfaces using a mild detergent solution. Rinse with clean water and dry thoroughly to remove residue and spores.
Tip: Rinse cloths frequently to prevent spreading mold spores to clean areas. - 5
Dry the area completely
Use towels or a portable fan to dry surfaces rapidly. Increase ventilation in the room to reduce humidity and discourage mold regrowth.
Tip: Aim to reach a consistently dry state before reintroducing fresh plant material. - 6
Address the moisture source
Fix leaks, adjust watering practices, or improve airflow to remove the root cause of flower mold. Consider dehumidification in damp rooms and ensure plants aren’t overcrowded.
Tip: If indoor humidity is routinely high, run a dehumidifier in affected spaces. - 7
Monitor and maintain
Regularly inspect for signs of new mold growth after cleanup. Keep a routine to replace water frequently and remove faded flowers promptly.
Tip: Set a reminder to check floral displays every 1–2 days during humid seasons.
FAQ
What is flower mold, and why does it grow on flowers?
Flower mold is fungal growth that appears on fresh or dried flowers when moisture and warmth create a hospitable environment for molds. It commonly grows on stems, petals, or floral foam in crowded or poorly ventilated spaces.
Flower mold grows when moisture and warmth allow molds to thrive on flowers, especially in crowded or damp areas.
Is flower mold dangerous to people?
Mold on flowers can release spores that irritate eyes, the nose, and the lungs, particularly for people with allergies or asthma. It is best to minimize exposure and clean the area promptly.
Mold on flowers can irritate some people, especially those with allergies or asthma, so clean promptly and improve airflow.
Are vinegar or hydrogen peroxide effective against flower mold?
Vinegar and hydrogen peroxide can help reduce mold on non-porous surfaces. They are not universal cures for every material; avoid applying peroxide to porous plant tissues. Always test a small area first.
Vinegar or peroxide can help on non-porous surfaces, but don’t rely on them for porous plant material and test first.
Should I throw away moldy flowers?
Yes. Contaminated flowers and foam should be bagged and disposed of to prevent spore spread. Do not compost moldy plant material.
Moldy flowers should be bagged and disposed of to prevent spreading spores.
How can I prevent flower mold in the future?
Maintain low humidity, improve air circulation, change vase water regularly, and avoid overcrowding flowers. Inspect arrangements frequently and remove damp materials promptly.
Keep humidity down, improve airflow, change water often, and remove damp materials quickly to prevent mold.
When should I call a mold remediation professional?
If mold covers large areas, recurs after cleaning, or impacts structural materials, seek professional help. A pro can assess hidden moisture sources and ensure safe remediation.
Call a professional if mold is widespread, keeps coming back, or affects your home’s structure.
Watch Video
The Essentials
- Identify moisture sources and isolate the area.
- Remove moldy plant material safely and dispose of it.
- Clean and dry all affected surfaces thoroughly.
- Improve ventilation and moisture control to prevent recurrence.
- Consult a professional if mold recurs or covers large areas.