Discount Molding: A Budget-Smart Guide to Mold Prevention
Discover budget-friendly, mold-resistant molding options and practical steps to prevent moisture-related mold growth. This guide blends affordable materials, installation tips, and maintenance routines to keep homes safe and dry.

Goal: Learn how to use discount molding to curb mold risk while staying within budget. You’ll discover budget-friendly, mold-resistant molding options, how to assess humidity, select the right profile for each room, and install it correctly for lasting protection. This guide follows practical steps and Mold Removal Lab guidelines to help homeowners and renters keep spaces dry and healthy.
What discount molding means for mold prevention
In many homes, mold risk escalates where cold surfaces meet high humidity. Discount molding—budget-friendly molding options designed for moisture-prone spaces—can be part of an effective prevention strategy when paired with proper installation and moisture control. According to Mold Removal Lab, using affordable, mold-resistant profiles reduces the opportunity for moisture to linger at baseboards and wall joints, one of the most common mold hotspots. This approach treats molding as more than a cosmetic detail; it is a practical line of defense against moisture intrusion. When you prioritize mold resistance in the material choice and ensure a proper seal, you reduce the havens where mold spores thrive. The Mold Removal Lab Team stresses that even affordable materials can perform well if installed correctly and kept dry. Budget-friendly does not have to mean neglecting moisture control.
To make discount molding work for mold prevention, start with credible materials, verify humidity levels in the room, and plan for a tight seal at corners and joints. You’ll often find that the biggest gains come from combining an affordable, mold-resistant profile with consistent moisture management. This section will outline how to balance cost with effectiveness and avoid common pitfalls.
Budget-friendly, mold-resistant materials to consider
Choosing the right material is the most transformative step in affordable mold prevention. Options such as vinyl, PVC, polystyrene, or fiberglass profiles offer different durability, flexibility, and moisture resistance. Vinyl and PVC molding tend to resist moisture better than traditional wood, making them popular choices for bathrooms, laundry rooms, and basements where humidity fluctuates. Foam-based polyurethane profiles can be lighter and easier to install but may require careful sealing in damp spaces. When evaluating discount molding, look for products labeled as mold- or moisture-resistant, with warranties that cover humidity-related concerns. The Mold Removal Lab analysis shows that lower-cost profiles can perform well in dry climates or well-ventilated rooms, but in areas with persistent moisture, you’ll want thicker profiles and a robust seal to prevent water ingress. Always check lead content and proper certifications to ensure you’re not introducing other hazards.
Budget doesn’t have to mean low quality if you choose reputable brands and materials designed for damp spaces. For exterior walls, consider moisture-impervious profiles that resist swelling and warping. For interior spaces, select profiles that can be sealed at all joints and require fewer maintenance steps. Remember that the cheapest option that fails prematurely ends up costing more due to mold remediation needs. Consider a blended approach: use higher-rated, discount molding in high-risk zones (bathrooms, basements, kitchens) and simpler profiles in dry rooms.
Understanding moisture and ventilation in relation to molding
Mold thrives where moisture lingers and airflow is poor. Before you buy discount molding, take a quick moisture audit of the rooms you plan to treat. Use a hygrometer to check relative humidity (RH) levels; aim to keep RH below 50% in most living spaces. Ventilation matters just as much as material choice: exhaust fans in bathrooms and kitchen range hoods reduce moisture load that mold loves. In basements and laundry areas, dehumidification can be a game-changer. A well-ventilated space dries out faster after showers or washing, reducing opportunities for mold to take hold behind baseboards or along wall joints. The right molding profile helps here too: tight-fitting corners and sealed joints prevent damp air from seeping into wall cavities. Mold Removal Lab’s guidance emphasizes that moisture management is not a one-off step but a continuous practice integrated with your molding project.
If you suspect hidden moisture issues, address them before installation. Leaky gutters, roof leaks, or plumbing drips produce moisture that undermines even the best budget molding. In these cases, we recommend focused moisture control measures and, when needed, professional evaluations to avoid mold growth that could require more extensive remediation later.
Choosing profiles for bathrooms and basements
Bathrooms and basements are among the most challenging environments for mold prevention due to higher humidity and potential for condensation. For these spaces, discount molding should be paired with moisture barriers and tight seals. Profiles with smooth, non-porous surfaces such as vinyl or PVC are easier to clean and less likely to absorb moisture than porous wood. In basements, where humidity can be consistently high, choose thicker profiles and ensure bottom edges are sealed against wall moisture. For bathrooms, consider curved or flexible profiles that accommodate irregular surfaces and reduce gaps where condensation can accumulate. The goal is to minimize moisture accumulation at joints and to keep the mold-attracting surfaces away from damp air streams.
When budget matters, prioritize essential details: airtight seams at corners, a continuous moisture barrier behind trim, and a wipe-clean finish that resists soap scum and mineral buildup. By pairing discount molding with proper installation and ventilation, you can achieve durable results in challenging spaces without compromising on safety or aesthetics.
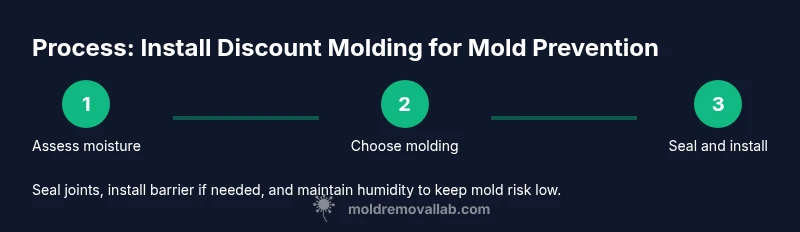
Step-by-step: install discount molding to reduce moisture infiltration
This section provides a practical overview of the installation, focusing on mold prevention aspects. Start with accurate measurements, material acclimation, and a clean work area. Fit each piece to the room dimensions with precise 45-degree cuts at corners to minimize gaps. Attach molding with a combination of adhesive and finishing nails to create a solid, moisture-resistant bond. Seal all joints with flexible silicone or polyurethane caulk to prevent moisture entry. For exposed exterior areas or high-humidity spaces, install a thin moisture barrier behind the molding along the base to thwart capillary action that pulls moisture into wall studs. Finally, paint or finish the molding with a moisture-rated coating that resists mildew and soap residue.
The key is to maintain a continuous, sealed boundary along the molding line. If you notice gaps or paint peeling, address them promptly to prevent moisture from seeping behind the trim. In areas with severe humidity, consider periodic re-sealing or updating to a more robust mold-resistant material.
Maintenance and moisture management to prevent mold growth
Budget-friendly mold prevention isn’t a one-and-done task. After installation, keep humidity in check with regular monitoring. Use a dehumidifier in damp spaces, run bathroom fans during and after showers, and ensure adequate ventilation around laundry areas. Clean molding and caulked seams with mild detergents to remove soap scum and mineral buildup that can harbor mold spores. Inspect corners, joints, and crown moldings every season for cracks or water staining. If you see moisture or see mold growth reemerging behind trim, address the root cause (leaks, condensation, or poor ventilation) before replacing molding. Mold Removal Lab emphasizes that ongoing vigilance is essential, even with discount molding, to maintain a dry and healthy home environment.
To maximize effectiveness, keep a simple maintenance log: humidity readings, cleaning intervals, and any repairs. This helps you detect trends and plan preventive actions. By integrating moisture control with affordable mold-resistant molding, you create a resilient system that reduces mold risk over time.
Common mistakes and how to avoid them
One common mistake is installing discount molding without addressing existing moisture problems. Mold growth can continue behind trim if leaks aren’t fixed. Another error is choosing an inexpensive profile that swells or warps when exposed to humidity; this creates gaps that trap moisture. Don’t skip surface preparation—damp walls or dusty surfaces prevent adhesive bonding and sealant performance. Skipping proper caulking is another frequent misstep; always seal all joints and seams. Finally, neglecting regular maintenance allows moisture to accumulate and mold to rebound. By proactively addressing moisture and selecting appropriate materials, you reduce the risk of recurring mold issues and maximize the value of discount molding.
Real-world scenarios: budget wins and pitfalls
Consider a rental unit with modest budgets but frequent moisture fluctuations in the kitchen and bathroom. By selecting mold-resistant vinyl molding and installing a moisture barrier, the tenant reduced visible condensation and simplified cleaning, helping maintain a dry living space. In another case, a homeowner replaced traditional wood trim in a damp basement with PVC profiles and resealed joints, which improved dry time after rainy days and reduced mold complaints. In both cases, early moisture control and correct installation were the keys to success. This demonstrates that discount molding can be effective when paired with proper humidity management and high-quality sealants.
Safety and health considerations when working with mold-prone areas
Working near mold requires proper PPE: gloves, eye protection, and a good respirator when mold is actively growing or when you’re sanding or cutting, especially for porous profiles. Work in well-ventilated areas and avoid disturbing mold colonies. If you have asthma or immunocompromised conditions, consider professional help for mold remediation rather than DIY approaches. If you suspect hidden mold behind walls or under flooring, do not proceed with aggressive DIY work; obtain a mold inspection to determine the extent before installing new molding. Always follow local codes and safety guidelines when handling building materials in moisture-prone spaces.
Quick-start checklist for homeowners
- Assess humidity and fix leaks before buying discount molding.
- Choose mold-resistant material suitable for the space (bathroom/basement priority).
- Measure accurately and acclimate materials to room conditions.
- Seal all joints with flexible caulk and use a moisture barrier where needed.
- Maintain humidity under 50% and monitor over time.
- Inspect periodically for signs of condensation or mold growth and address issues promptly.
Tools & Materials
- Miter saw or handsaw(For precise 45° cuts at corners)
- Measuring tape(Accurate room and material measurements)
- Discount mold-resistant molding (vinyl/PVC/ fiberglass)(Select moisture-resistant profiles rated for damp spaces)
- Moisture barrier plastic sheeting(Behind baseboard in high-humidity areas)
- Construction adhesive(Help hold molding in place where nails aren’t ideal)
- Finishing nails or brad nails(Low-profile fasteners for clean finishes)
- Caulk gun(Flexible silicone or polyurethane caulk for joints)
- Silicone or acrylic caulk(Seal joints and corners to prevent moisture entry)
- Primer and moisture-rated paint(Protect molding from humidity and mildew)
- Utility knife(Trim to fit, score and snap as needed)
- Level and pencil(Ensure straight, aligned installation)
- Safety gear (gloves, goggles)(Protect from dust and sharp edges)
- Dehumidifier (optional but recommended)(Helps maintain low humidity during and after installation)
Steps
Estimated time: Estimated total time: 2-4 hours
- 1
Measure and plan
Measure walls, calculate molding length, and plan corner cuts. Draft a cut list to minimize waste and ensure consistent seams. A precise plan reduces on-site errors and saves time.
Tip: Double-check room perimeter and account for doorways or alcoves that might require extra pieces. - 2
Prepare the workspace
Clear the area, protect floors, and wipe down walls to remove dust. If needed, address any moisture sources before installation.
Tip: Lay down a drop cloth and ventilation if cutting indoors to contain dust and odors. - 3
Cut with proper angles
Make 45° miter cuts at corners for clean seams. Dry-fit pieces before applying adhesive to verify alignment.
Tip: Label pieces by location to avoid mismatches in complex rooms. - 4
Attach molding
Apply a thin bead of construction adhesive and secure with finishing nails. Ensure the molding sits flush against the wall with no gaps.
Tip: Use a nail set to countersink nails so caulk will seal smoothly. - 5
Seal joints
Apply flexible silicone or polyurethane caulk along all joints and at corners. Smooth with a caulk tool for a clean finish.
Tip: Choose a caulk color that matches the molding and room for a seamless look. - 6
Install moisture barrier
For high-humidity areas, place a thin moisture barrier behind the baseboard to reduce capillary moisture transfer.
Tip: Ensure barrier edges are well-sealed to avoid moisture wicking. - 7
Paint or finish
Prime and paint with moisture-rated products to maximize durability. Allow adequate cure time before exposure to moisture.
Tip: Use a mildew-resistant paint in bathrooms and basements. - 8
Inspect and clean
Check seams and edges after curing. Wipe away excess caulk and inspect for gaps that may need reinforcements.
Tip: Keep a damp cloth handy for quick touch-ups after cleaning. - 9
Set up moisture monitoring
Place a hygrometer in the area and maintain RH under 50% where feasible. Run dehumidification as needed.
Tip: Document humidity readings weekly to spot rising trends early. - 10
Maintenance and re-inspection
Schedule periodic checks of molding and adjacent walls. Re-seal joints as needed to prevent moisture intrusion.
Tip: Plan seasonal re-inspections and update caulk if you notice wear.
FAQ
Is discount molding truly mold-resistant, or just cheaper?
Discount molding can be mold-resistant when you select profiles rated for damp spaces (vinyl/PVC) and seal all joints properly. Look for materials with moisture-resistant properties and compatible sealants. Even budget options work well with correct installation and ongoing moisture management.
Discount molding can be mold-resistant if you pick the right materials and seal joints well, plus keep humidity in check.
Can I install discount molding myself, or do I need a pro?
Many homeowners successfully install mold-resistant molding as a DIY project, provided you measure accurately, cut correctly, and seal joints. If you’re unsure about electrical outlets, plumbing near the area, or wet walls, consider a pro for safety and quality.
DIY is possible with careful measuring and sealing; call a pro if there are safety concerns or hidden moisture.
What should I do if moisture problems persist after installation?
If damp conditions persist after installation, identify and fix the moisture source first (leaks, condensation, or poor ventilation). Reassess the molding choice and sealing strategy, and consider a professional mold inspection if mold growth is suspected behind walls.
Fix the moisture source first; then reassess sealing and consider inspection if mold is suspected.
Which molding material is best for bathrooms?
For bathrooms, moisture-resistant options like vinyl or PVC are typically best due to their low absorption and easy cleaning. Ensure joints are sealed and a moisture-rated finish is used.
PVC or vinyl is usually best for bathrooms due to moisture resistance.
How long does installation take in a typical room?
A typical 10-15 linear foot room may take 2-4 hours for installation, plus time for caulking and finish painting if needed.
Expect a couple of hours for basic installation, longer if you’re painting afterward.
When should I call a professional for mold concerns?
Call a professional if you detect active mold growth, hidden mold behind walls, or persistent moisture issues despite preventive measures. A certified inspector can assess extent and guide remediation safely.
Call a professional if you see mold growth or persistent moisture issues.
Watch Video
The Essentials
- Choose mold-resistant molding materials for damp spaces.
- Seal joints thoroughly to prevent moisture intrusion.
- Pair discount molding with moisture control for best results.
- Regular maintenance keeps mold risk low over time.
- Address leaks and ventilation as part of your mold-prevention strategy.