Molding ideas for bathroom: mold-resistant trim and moisture control
Practical molding ideas for bathrooms to prevent mold growth, featuring moisture control, mold-resistant materials, ventilation upgrades, and maintenance tips. A comprehensive guide by Mold Removal Lab for safer, healthier bathrooms.

To curb bathroom mold, use molding ideas that combine moisture control with mold-resistant materials. According to Mold Removal Lab, install a ventilation upgrade, seal joints with silicone, and choose vinyl or PVC trim around showers and vanities. Maintain humidity below 50-60% with regular cleaning. Also select mold-resistant materials like vinyl and sealed tile edges, and routinely inspect for moisture sources to replace damaged sealants promptly.
Moisture dynamics in bathrooms
Bathrooms are unique moisture environments. Hot showers, steaming mirrors, and damp towels create ongoing humidity that fuels mold growth on walls, grout, and trim. According to Mold Removal Lab, humidity levels above 60% sustain mold development, and condensation on cold surfaces accelerates the problem. To keep surfaces safe, you must minimize moisture generation and maximize evaporation. Practical molding ideas start with understanding where moisture hides: behind shower curtains, under vanity bases, at seam lines in tile, and along baseboards where air movement is limited. This section lays the groundwork for selecting materials and design elements that resist mold while maintaining a crisp, clean look. When planning bathroom trim or molding, think about products with closed-cell cores or rigid vinyl that won't swell or harbor mold. Pair these with moisture barriers and quick-drying surface finishes to prevent water from seeping into porous substrates. In addition to material choices, routine cleaning and moisture monitoring are essential. Mold Removal Lab's guidance emphasizes the synergy between design and maintenance: you can dramatically reduce mold risk by combining smart molding ideas with ongoing hygiene practices. The right approach makes bathrooms look stylish and stay safer for families.
Choosing mold-resistant molding materials
Selecting molding materials that resist mold is the cornerstone of healthy bathrooms. For bathrooms with frequent moisture, avoid porous woods and untreated MDF. Instead opt for plastic-based options like vinyl and PVC trim that resist swelling, warping, and mold growth. Fiberglass trims and cement-based beadboard can also perform well when properly sealed. Look for products with closed-cell cores and moisture-resistant finishes. Edging around tubs, showers, and sinks benefits from ceramic or epoxy-coated trims that create a tight, washable surface. Be mindful of joints—mold can take hold where gaps form between trim, tile, and walls. The best practice is to install trim with integrated moisture barriers and seal all joints with high-quality silicone or flexible caulk. If you plan painted trim, choose paints with mold inhibitors and satin finishes that are easier to wipe clean. Proper installation matters: misaligned beading or loose seals invite moisture pockets. By choosing mold-resistant materials and ensuring tight installation, you reduce opportunities for mold to grip surfaces in damp bathrooms.
Ventilation strategies that reduce humidity
Effective ventilation is the front line of defense against bathroom mold. A properly sized exhaust fan removes moist air during and after showers, lowering relative humidity rapidly. The general guideline is to vent moisture-laden air directly outdoors rather than into attic spaces. If a fan is already installed, check that it vents to the exterior, not into a soffit or crawl space. Consider upgrading to a humidity-sensing fan that increases extraction power when humidity rises, and run it for 20-30 minutes after bathing. In addition to fans, consider passive ventilation enhancements like operable windows or lint-free vent grills. Pair ventilation with surface treatments that resist moisture, such as vinyl beadboard and sealed tile edges, to maximize humidity control. Based on Mold Removal Lab research, consistent ventilation correlates with lower visible mold growth, especially when paired with a regular cleaning routine.
Design ideas: molding around tubs, showers, and vanities
Molding around wet zones should prioritize water-resistance and ease of cleaning. Around tubs and showers, use vinyl or PVC trim with rounded edges to minimize hard-to-clean corners. Install tile edging with sealed grout lines to prevent water from seeping behind trims. Consider beadboard panels with a waterproof coating for a classic look that also resists moisture. Around vanities, choose trim that’s elevated off the floor to prevent splash damage and allow air circulation. Where space allows, incorporate moisture barriers behind the trim, such as a plywood or cement board base with a water sealant. For a warm, spa-like vibe, pair white beadboard with a darker grout and moisture-friendly sealants for a high-contrast, mold-resistant finish. When selecting colors and textures, prefer matte finishes on trim and surfaces that are easier to wipe down after use.
Sealing and finishing techniques to prevent mold
Sealing joints is critical to prevent mold from taking hold in bathroom trims. Use a high-quality silicone sealant for all around showers, vanities, and windows, ensuring a continuous seal with no gaps. For floor-to-wall transitions, apply a finishing bead or corner bead designed for wet spaces. If you install wood-look trims in damp zones, apply a polyurethane or resin sealer to create a moisture barrier; however, maintain awareness that wood can still deteriorate in prolonged humidity. Recaulk every 6-12 months or whenever you notice gaps, peeling, or discoloration. Clean surfaces before re-sealing to ensure proper adhesion, and use a caulk remover to eliminate old caulk thoroughly. In humid bathrooms, avoid wax-based caulks which can degrade; instead opt for mildew-resistant formulations. Regular checks after showers help catch early signs of failure and allow timely replacement of seals.
Maintenance routines and cleaning schedules
Create a simple maintenance routine that keeps humidity and mold at bay. Wipe down walls and trims after showers, pay attention to corners and seam lines, and dry any damp towels promptly. Use a microfiber cloth or a squeegee to remove water from glass doors and tile edges. Maintain an affordable hygrometer to monitor humidity levels; aim to keep the bathroom under 60% RH for most of the day, lowering further during peak humidity. Schedule weekly cleaning of grout lines with a mild mold cleaner or a solution of vinegar and water, followed by immediate drying. Monthly inspections should focus on the sealants around tubs, showers, and vanities, looking for cracks or discoloration. If you find mold growth beyond minor surface staining, address it promptly with a dedicated cleaner or consult a professional remediator.
Practical project ideas with examples
If you’re undertaking a bathroom refresh, start with a small project: replace the trim around the tub with vinyl beadboard, and install new silicone-sealed joints. A second project could be upgrading the vanity area with moisture-resistant PVC trim and a water-resistant vanity backing. For larger renovations, add a vented, wall-mounted exhaust fan and install tile edging with sealed grout along the shower perimeter. These projects are designed to minimize moisture traps and simplify maintenance. Use color and texture contrasts to keep the space visually appealing while ensuring the materials chosen are moisture-appropriate and easy to clean. Documentation and a quick maintenance checklist help homeowners stay on track after the remodel.
Before-and-after case studies (hypothetical)
Case A: A small bathroom with a standing shower replaced old wood molding with PVC trim, installed a vent fan, and sealed all joints. After the remodel, humidity stayed below 60% during peak hours, and grout remained white with minimal staining. Case B: A mid-size bathroom added beadboard panels with a moisture-sealant coating, along with ceramic-edge trim. The space now dries faster after showers, and the risk of persistent mold decreased due to improved airflow and easier cleaning. These scenarios illustrate how simple molding decisions influence long-term mold prevention.
Common mistakes and how to avoid them
Common mistakes include installing porous wood trim in damp zones, skipping sealant maintenance, and neglecting ventilation. Another frequent error is insufficient surface preparation before caulking, which reduces adhesion and fosters mold growth. Avoid over-wetting mop and towel storage areas, and ensure that any new molding is installed with a proper moisture barrier behind it. Finally, neglecting to monitor humidity can allow slow mold progression; a small investment in a hygrometer and routine checks helps catch problems early and reduces remediation costs. The Mold Removal Lab team recommends prioritizing moisture-control strategies as the foundation of any bathroom molding project.
Authority and notes
This article provides practical, actionable guidance for homeowners and renters focused on molding ideas for bathrooms to prevent and manage mold. It emphasizes moisture control, proper venting, and the use of mold-resistant materials. For more detailed, professional guidance, consult local building codes and certified remediation resources.
Tools & Materials
- Gloves (nitrile)(Chemical-resistant; choose size for comfort)
- Safety glasses(Protect eyes from splashes)
- N95 mask(For mold-prone environments)
- Spray bottle with mild cleaner(Pre-wash surfaces)
- Soft scrub brush(Gentle on trims)
- Microfiber cloths(Residual moisture removal)
- Silicone sealant (mold-resistant)(For joints and edges)
- Caulk remover (optional)(Eases old caulk removal)
- Caulk smoothing tool(Ensures clean seals)
- Vinyl/PVC trim or beadboard(Mold-resistant molding materials)
- Grout sealer (optional)(Protects grout lines)
- Hygrometer(Monitor humidity levels)
- Ventilation fan (if upgrading)(Ensure exterior venting)
Steps
Estimated time: 4-6 hours
- 1
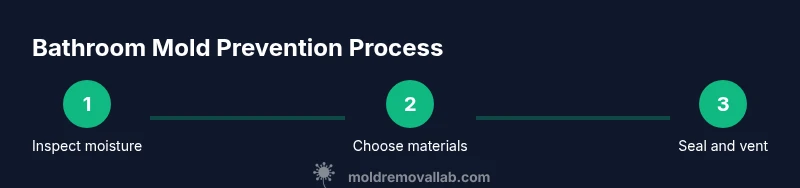
Inspect moisture sources
Survey the bathroom to identify persistent moisture areas such as shower corners, behind vanities, and around windows. Note any leaks, condensation patterns, or poorly sealed joints. This step helps determine where to prioritize molding materials and ventilation upgrades.
Tip: Document findings with photos to guide material choices and repairs. - 2
Choose mold-resistant molding materials
Select vinyl/PVC trim, fiberglass edging, and moisture-resistant beadboard. Avoid porous woods in damp zones. Ensure trims have sealed edges and compatible finishes for bathrooms.
Tip: Prefer products with built-in moisture barriers and easy-clean surfaces. - 3
Prepare surfaces
Clean surfaces to remove soap scum and mold stains. Remove loose caulk and damaged trim. Dry the area thoroughly before applying new sealants.
Tip: Use a dedicated mold cleaner and let surfaces dry completely before sealing. - 4
Install mold-resistant trim
Measure accurately, cut trim to fit seams, and attach with appropriate fasteners. Ensure tight corners and minimal gaps where water can collect.
Tip: Use a level and pre-fit joints to avoid gaps that trap moisture. - 5
Seal joints with silicone
Apply a continuous bead of silicone sealant along all trim-to-wall and trim-to-tile joints. Smooth with a caulk tool for a clean finish. Allow curing time per the product label.
Tip: Use mold-resistant silicone and avoid over-application that could shrink. - 6
Upgrade ventilation
If needed, install or upgrade an exhaust fan rated for the room size. Ensure the vent leads outside and runs during and after showers to reduce humidity.
Tip: Consider a humidity-sensing fan for automatic adjustment. - 7
Clean and maintain
Set a weekly cleaning routine to wipe down trims, check seals, and dry wet areas. Use a quick wipe-down after showers to prevent moisture build-up.
Tip: Keep a simple checklist posted in the bathroom. - 8
Inspect and adjust
Monthly inspect all joints, trims, and vents. Re-caulk as needed and replace damaged components to maintain a mold-resistant system.
Tip: Catch issues early to avoid costly remediation later.
FAQ
What are the best mold-resistant materials for bathroom trim?
Vinyl, PVC, and fiberglass trims resist moisture and mold better than wood in damp spaces. Look for sealed edges and a moisture barrier behind the trim. Pair with mildew-resistant sealants for best results.
Vinyl or PVC trim and fiberglass trims are best in damp bathrooms; sealed edges prevent mold growth.
How can I improve bathroom ventilation to prevent mold?
Install or upgrade an exhaust fan rated for your space and vent it outside. Run the fan during showers and leave it on for 20-30 minutes after, or use a humidity-sensing model.
Use an exhaust fan that vents outside and run it after showers.
Do mold-resistant moldings really prevent mold growth?
They reduce moisture traps and are easier to clean, but maintenance remains essential. They are a helpful part of a broader moisture-control strategy.
They help, but they’re not a magic fix; maintenance matters.
What mistakes lead to bathroom mold after remodeling?
Ignoring humidity, skipping proper sealing, using wood in damp zones, and poor surface prep before caulking can all lead to mold growth after remodeling.
Humidity and sealing mistakes are common remodel issues that invite mold.
How often should I inspect molding for mold?
Do visual checks monthly, especially after heavy rains or humidity events, and clean surfaces every 1-2 weeks.
Check monthly and after rain; clean regularly.
What quick fixes exist if mold is already visible?
For small areas, use peroxide-based cleaner and scrub with a brush, then dry thoroughly. For larger or persistent mold, consult a professional remediation service.
Light mold can be scrubbed away; seek pros for larger issues.
Watch Video
The Essentials
- Inspect moisture sources before choosing molding.
- Use mold-resistant materials in all wet zones.
- Seal joints thoroughly to prevent water intrusion.
- Improve and maintain bathroom ventilation.
- Schedule regular maintenance and inspections.