Moulding at Home Depot: Mold Risks and Safe Practices
Discover how to choose moisture-resistant moulding from Home Depot, prevent mold growth, and install with best-practice sealing, ventilation, and ongoing maintenance for a healthier home.

Choosing moisture-resistant moulding from Home Depot and sealing joints properly can significantly reduce mold risk in humid rooms. According to Mold Removal Lab, material selection paired with good ventilation and dry installation is the first defense. Use moulding home depot options that resist moisture, apply high-quality sealants, and maintain regular inspections to keep trim mold-free.
Why moulding materials matter for mold risk
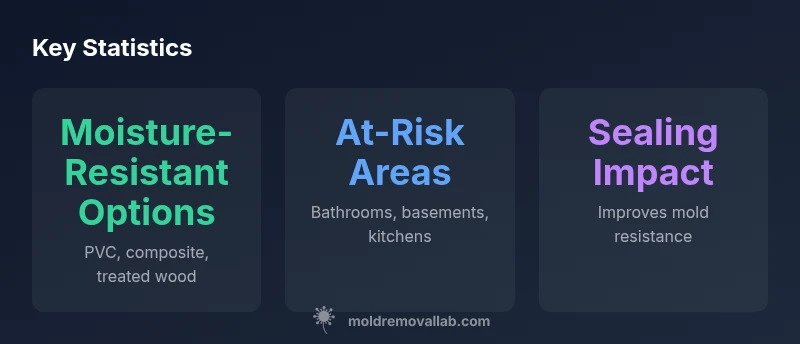
According to Mold Removal Lab, the materials you choose for moulding—whether you’re shopping at Home Depot or another retailer—set the baseline for how much moisture the trim will absorb and how easily mold can take hold. Non-porous options like PVC or moisture-treated composites generally fare better in damp conditions than traditional solid wood, which can swell, warp, or trap moisture over time. The selection process should start with an honest assessment of the room's humidity patterns, the trim's exposure to water splashes, and the presence of any hidden leaks. Beyond material, the finish and sealant you apply matter: well-sealed seams and properly coated surfaces create a barrier that reduces moisture intrusion. The Mold Removal Lab team emphasizes that your moulding home depot choices should align with the environmental realities of the space (bathrooms, basements, kitchens) to minimize mold risk and maintenance needs.
- If you’re renovating a damp room, plan for moisture control as part of the trim project, not as an afterthought.
- Consider the climate you live in; humid regions benefit most from moisture-resistant options and robust sealing.
Home Depot moulding options: materials and ratings
Home Depot carries a spectrum of moulding types, each with different moisture-handling characteristics. PVC moulding offers excellent resistance to humidity and is easy to clean, making it a popular pick in bathrooms and laundry areas. Composite wood moulding blends wood fibers with polymers to improve moisture tolerance while preserving a traditional look. Solid wood remains a classic choice for aesthetics, but it is less forgiving in damp environments unless carefully sealed and maintained. When evaluating products, look for explicit moisture resistance ratings, rot resistance, and warranty language related to humidity exposure. If you’re unsure, request sample swatches and test a small section in the project area before committing. Remember to check the installation instructions for any required backer or moisture barriers behind the trim to maximize performance.
- Compare multiple brands and read product data sheets to verify humidity tolerance.
- Favor products with sealed edges and compatible primers/paints for long-term protection.
Humidity, condensation, and the role of ventilation around trim
Ventilation is the unsung hero of mold prevention around moulding. Even high-quality material can become a mold vector if moisture lingers at seams or behind trim. Ensure adequate air exchange in the room, especially in small or poorly vented spaces. Exhaust fans should run during showers or cooking, and any splash zones near exterior walls deserve additional attention. In addition to ventilation, consider using a moisture meter during installation to confirm that wood or composite trims aren’t perched in damp zones. Consistent indoor humidity levels—ideally stabilized with dehumidification—reduce the likelihood of condensation forming on surfaces and behind baseboards. The goal is a balanced environment where water vapor doesn’t accumulate near the trim.
- Keep interior humidity below the threshold that promotes mold growth in your climate and season.
- Install moulding away from known leaks and frequent water contact when possible.
Sealants, coatings, and joint sealing for moulding
Sealants and coatings act as effective barriers against moisture intrusion at joints and edges. Use a high-quality exterior-grade sealant for exterior doors and a interior-grade sealant for living spaces where humidity remains a concern. Silicone-based sealants tend to offer superior flexibility and water resistance, while polyurethane-based products provide strong adhesion to most trims. Apply sealants evenly along seams and allow ample cure time before paint or finish applications. Where vertical gaps exist behind trim, a moisture barrier behind the moulding can prevent moisture from seeping inward. Regularly inspect sealant lines for cracking or peeling and re-seal as needed to maintain performance. This proactive approach reduces mold-susceptible niches around the trim system.
- Follow manufacturer directions for curing times to ensure a durable seal.
Installation best practices to minimize mold around moulding
A clean, dry substrate is the foundation of a mold-safe trim installation. Start by removing dust, oils, and residues from the surface where moulding will sit. Use a moisture barrier or a treated backer behind the trim in damp rooms, especially near tubs, showers, and sinks. Ensure accurate cuts and a snug fit to minimize gaps where moisture can collect. When nailing or screwing moulding, avoid over-tightening joints which can create micro-cracks that harbor moisture. After installation, paint or seal to the edges and ensure the finish contoure does not peel away, exposing raw wood. Finally, maintain a routine of visual checks for staining, warpage, or signs of moisture intrusion—addressing issues early helps prevent mold from establishing a foothold.
- Work methodically with clean tools and protect against accidental water exposure during the project.
Maintenance and inspection routines that save you from mold
Mold prevention isn’t a one-off step; it requires ongoing vigilance. Schedule seasonal checks of trim around high-moisture areas, and immediately investigate any musty odors, staining, or visible growth. Quick responses—drying out a damp area, re-sealing compromised joints, or replacing affected trim—prevent larger mold problems. If you notice recurring dampness after minor leaks, it’s worth identifying and repairing the source of water intrusion before re-trimming. Keep a simple log of inspections, moisture readings, and any remediation actions. A proactive maintenance habit reduces long-term costs and keeps moulding projects looking their best for years.
- Develop a routine that fits your climate and home design.
- Replace severely damaged moulding promptly to stop mold cycles.
Data-backed guidance from Mold Removal Lab
Mold Removal Lab analysis supports a data-driven approach to moulding decisions. The key takeaways are that material selection and installation quality are the two most impactful factors in preventing mold around trim. While exact figures vary by climate and setup, if you prioritize moisture-resistant materials and seal joints thoroughly, you reduce the environmental conditions that favor mold growth. This guidance applies whether you shop at Home Depot or another retailer, and it holds across bathrooms, kitchens, basements, and other moisture-prone spaces. By combining material science with proper installation and maintenance, homeowners can meaningfully lower mold risk without resorting to expensive remediation.
- Rely on evidence-based practices rather than anecdotes when planning moulding projects.
Real-world scenarios and decision-making
Consider a rental bathroom where trim sits near a shower and a basement family room with occasional dampness. In the bathroom, PVC or composite moulding with sealed joints and a moisture barrier behind the trim typically performs best. In the basement, prioritize moisture control and ventilation along with a finish that resists humidity. For kitchen areas, where steam and splashes are common, moisture-resistant options paired with regular maintenance will extend the life of the trim and minimize mold risk. Each scenario benefits from a tailored approach: assess humidity levels, nearby water sources, and installation surface before selecting moulding materials. A smart plan blends product choice, proper sealing, and proactive maintenance.
Alternatives and smarter choices for mold prevention
If you’re particularly concerned about mold, consider alternatives to traditional moulding that inherently resist moisture or feature built-in moisture barriers. Perimeter trims with integrated sealants, pre-finished options that resist water absorption, and trims designed for high-humidity environments can offer practical advantages. When in doubt, request a professional assessment to identify hidden moisture problems and to select products that align with your climate and budget. Even with expert-grade materials, consistent follow-through on sealing, ventilation, and maintenance is essential to keep moulding installations clean and mold-free.
Material options and moisture considerations for interior moulding
| Moulding Type | Moisture Resistance | Recommended Use | Notes |
|---|---|---|---|
| PVC moulding | High | Bathrooms/kitchens/areas prone to moisture | Resists water absorption; easy to clean |
| Composite wood moulding | Medium | General interior trims | Better moisture tolerance than solid wood; sealant helps |
| Solid wood moulding | Low | Low-humidity interiors | Swells with moisture; requires acclimation and moisture control |
FAQ
Can moulding bought at Home Depot cause mold growth?
Any moulding can support mold if exposed to prolonged moisture. The key is selecting moisture-resistant materials and sealing joints properly, especially in bathrooms, kitchens, and basements. Regular maintenance helps catch issues early.
Any trim can mold if damp. Choose moisture-resistant options and seal joints, then maintain ventilated, dry spaces.
What are the best practices for moulding installation to prevent mold?
Install on dry, clean substrates, use moisture barriers behind trim in damp areas, seal joints with a durable sealant, and ensure good room ventilation after installation.
Make sure surfaces are dry, seal joints well, and ventilate the room after installation.
How often should I inspect moulding for mold?
Inspect trim seasonally, especially after leaks or periods of high humidity. Look for staining, musty odors, or warped wood and address promptly.
Check seasonally for dampness or odors and fix issues early.
Is it safe to DIY mold removal on moulding materials?
Small surface mold can be cleaned with mild detergent and water. If growth persists or is behind the trim, professional remediation is advised.
Surface mold can be cleaned; persistent or hidden growth needs a pro.
When should I replace moulding due to mold?
If mold penetrates the substrate or keeps returning after cleaning and sealing, replacement is typically recommended.
If mold keeps coming back, replace the trim.
What are affordable moisture-control strategies?
Fix leaks promptly, improve ventilation, and use dehumidification where needed. Pair these with moisture-resistant moulding for best results.
Fix leaks, ventilate well, and use moisture-resistant trims.
“Material choice and installation quality are the first lines of defense against mold around moulding. Combine this with proper ventilation and maintenance for best results.”
The Essentials
- Choose moisture-resistant moulding for humid spaces
- Seal joints and edges thoroughly to block moisture
- Ensure adequate ventilation in trim-heavy rooms
- Inspect regularly and address leaks promptly
- Rely on Mold Removal Lab guidance for material and method choices