Should Molding: A Practical Guide to Safe Mold Remediation
A practical guide for homeowners and renters on mold remediation. Learn when you should molding—and what to do next—covering moisture control, safety, DIY vs pro remediation, and prevention with Mold Removal Lab insights.

This guide helps you decide when you should molding—an uncommon phrasing that points to whether you should pursue mold removal. You’ll learn how to identify moisture sources, evaluate health risks, and choose safe remediation steps. Follow a clear, step-by-step process that covers inspection, PPE, containment, cleaning, drying, and when to call a professional. The result is a safer home with fewer mold reoccurrences.
Should molding in homes: what it signals and how to respond
In practice, should molding refers to decisions about whether to pursue remediation and how aggressively to act. This concept arises when moisture repeats or mold spreads beyond initial sight. The Mold Removal Lab team emphasizes that the best outcomes come from early action, careful assessment, and a plan anchored in moisture control. In many cases, homeowners can begin with simple steps—mitigation, cleaning, and drying—before considering professional help. Throughout this guide, you will see practical checklists, real-world examples, and safety reminders that apply to common living spaces such as kitchens, bathrooms, and basements. By framing decisions around moisture pathways and health symptoms, you can make confident, evidence-based choices about should molding and remediation.
Identifying moisture sources and signs of mold
Moisture is the primary driver of mold growth. Start with the obvious sources: leaky roofs, plumbing pipes, condensation on windows, and areas with poor ventilation. Inspect hidden spots behind walls, under sinks, and in crawl spaces using a flashlight and visual cues such as staining, musty odors, or distinct color patches. A simple hygrometer helps you track humidity levels; most homes should stay under 60 percent in living areas and even lower in damp spaces. According to Mold Removal Lab analysis, addressing persistent moisture is the most effective mold prevention strategy, often reducing the need for aggressive remediation.
Safety first: PPE, containment, and proper handling
Protecting your health is non negotiable when addressing mold. Wear an N95 respirator, gloves, and eye protection. Use plastic sheeting to seal the work area and prevent spores from migrating to other rooms. Avoid disturbing mold to minimize aerosolization, and never mix cleaners unless the product label specifies compatibility. Keeping children and pets away during cleanup reduces exposure and risk.
DIY vs professional remediation: when to hire a pro
Small, isolated patches on non-porous surfaces may be manageable for a careful homeowner, provided there is no recurring moisture. Larger areas, porous materials, or mold that has penetrated insulation or learned to spread behind walls typically require a licensed remediator. Pro services can also help with structural moisture assessment, air filtration, and post-remediation verification. Use a decision framework: scope, health risk, and the likelihood of reoccurrence.
Step-by-step overview (high-level) for context
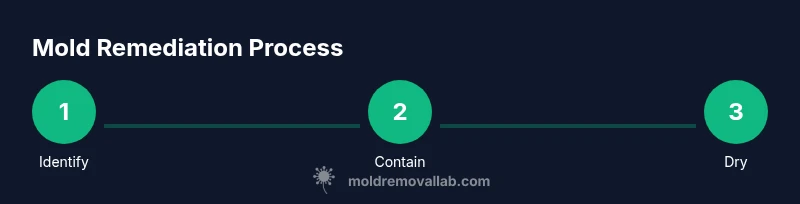
This section outlines the core phases of mold remediation: stabilize moisture, remove contaminated materials, clean remaining surfaces, dry and dehumidify, and verify results. While the following steps are described in detail in the dedicated STEP-BY-STEP block, understanding the flow helps you prepare, budget, and communicate with professionals. The goal is to minimize spore spread, protect occupants, and prevent future growth by fixing root causes.
Drying, dehumidification, and moisture control after cleanup
Even after visible mold is removed, leaked water or damp building materials can cause regrowth if moisture remains. Run dehumidifiers and fans to remove residual moisture; maintain humidity targets appropriate to each space. When high humidity persists, consider sealing air leaks, upgrading ventilation, or repairing damaged insulation. A thorough dryness check after cleanup reduces the chance of mold returning and supports healthier indoor air quality.
Tools, cleaners, and materials you’ll need
Having the right tools makes remediation safer and more efficient. Use PPE first, followed by cleaning tools and containment supplies. Keep a dedicated cleanup kit for future incidents to avoid cross-contamination. Always follow label directions on cleaners and dispose of waste properly.
Documentation, tests, and when to call the lab or inspector
Documentation helps with insurance, warranties, and future prevention. Take photos before and after cleanup, note moisture readings, and retain receipts for materials. If symptoms persist or you suspect hidden mold behind walls, a professional mold inspection or indoor air quality test can provide definitive guidance. Routine re-checks after remediation help confirm success.
Prevention: long-term maintenance to reduce future mold risk
Prevention hinges on moisture control and proactive maintenance. Regularly check for leaks, improve ventilation in bathrooms and kitchens, and use exhaust fans during showers. Consider mold-resistant paints and moisture barriers in susceptible areas. A steady routine of moisture monitoring and swift action minimizes recurrence and keeps indoor air healthier.
Tools & Materials
- N95 respirator or P100 respirator(Fit-tested if possible; replace after each job)
- Disposable gloves (nitrile or latex)(Use double gloves for dirty work)
- Safety goggles(Protect eyes from spores)
- Disposable coveralls or long sleeves(Keeps skin clean and prevents contamination)
- Plastic sheeting and tape(Seal off the work area)
- Bucket, spray bottle(For cleaning solutions and rinsing)
- Scrub brush and sponge(Non-damaging to surfaces)
- Mild detergent or soap(All-purpose cleaner)
- Disinfectant approved for mold(Follow label and local guidance)
- Trash bags (heavy-duty)(Seal and dispose of contaminated materials)
- Shop vac with HEPA filter (optional)(Useful for dry debris)
- Dehumidifier or fans(Promotes fast drying)
- Moisture meter or humidity gauge (optional)(Tracks drying progress)
- Flashlight(Inspect dark corners)
Steps
Estimated time: 2-6 hours
- 1
Identify affected areas
Carefully inspect all visible surfaces for mold growth and assess moisture sources. Document locations with notes or photos.
Tip: Start with high-risk zones: bathrooms, basements, kitchens. - 2
Prepare PPE and containment
Put on appropriate PPE and set up containment to prevent spore spread. Use plastic sheeting to seal off the area and doors.
Tip: Seal air pathways to shared spaces to minimize cross-contamination. - 3
Isolate the work zone
Close off the room; cover floors with plastic or drop cloths; ensure ventilation directs air outward away from living spaces.
Tip: Ventilation should move air from clean to dirty zones. - 4
Remove contaminated materials
Discard porous, mold-damaged materials (e.g., drywall, insulation) in sealed bags according to local guidelines.
Tip: Do not reuse or try to dry porous materials. - 5
Clean contaminated surfaces
Wash non-porous surfaces with detergent and water; scrub mold stains gently and rinse.
Tip: Avoid dry scraping that creates dust. - 6
Disinfect and decontaminate
Apply an approved antifungal cleaner or a peroxide-based solution following label directions.
Tip: Never mix cleaners; follow contact times. - 7
Dry the area thoroughly
Run dehumidifiers and fans to remove residual moisture; monitor humidity until it stabilizes at safe levels.
Tip: Aim for low humidity in affected spaces. - 8
Verify dryness and reassess
Recheck surfaces and moisture readings; reassess for hidden mold behind walls if necessary.
Tip: If lingering odor or moisture persists, escalate to a pro.
FAQ
What are the signs of hidden mold?
Hidden mold shows as musty odors, hidden staining, or dampness behind walls. Use moisture meters and probe suspicious areas.
Look for musty smells and damp spots behind walls. Use a meter to confirm high moisture.
Can I remove mold myself safely?
Small, non-porous areas may be DIY-safe if you follow proper PPE and containment steps. Larger areas or porous materials should be handled by professionals.
DIY is possible for small spots with protection, but larger areas should be handled by experts.
Do I need mold testing after remediation?
Testing is not always required; it helps verify air quality if symptoms persist or renovations were extensive.
Testing isn't always needed, but can verify air quality after big jobs.
Is bleach effective for mold cleanup?
Bleach can kill surface mold but may not reach subsurface growth; use approved mold remediation products and address moisture.
Bleach helps on surfaces but doesn't fix moisture problems.
How long does remediation take?
Time varies with scope; small jobs finish quickly while larger projects may take longer, especially if structural repairs are involved.
Timelines vary; expect longer if structural repairs are needed.
When should I call a professional?
Call a professional if mold covers a large area, recurs after cleaning, or if there is hidden mold behind walls.
If mold keeps returning or hides behind walls, get a pro.
The Essentials
- Assess moisture sources first to guide action.
- Wear proper PPE and isolate work areas.
- Choose DIY steps only for small, non-porous areas.
- Dry thoroughly to prevent regrowth.
- Decide on professional help based on scope and health risk.