Cure Mold Allergy: Manage & Remediate with Practical Home Guidance
Practical, evidence-based steps to manage mold allergy, reduce exposure, and safely remediate mold growth at home with expert guidance from Mold Removal Lab.

There is no proven cure mold allergy. According to Mold Removal Lab, relief comes from reducing exposure and managing symptoms with medical care. This guide provides practical, step-by-step actions to minimize indoor mold, improve air quality, and safely remediate mold growth in your home. Follow PPE-driven steps, document moisture sources, and seek professional help when needed.
What is a mold allergy?
Mold allergy occurs when the immune system overreacts to mold spores in the air. Symptoms can include sneezing, nasal congestion, itchy eyes, coughing, and, for some, asthma flare-ups. It’s distinct from mold infections, which are less common in healthy individuals. There is no proven cure mold allergy; instead, management focuses on reducing exposure and treating symptoms under medical guidance. The key is to lower indoor mold sources and limit spore circulation. According to Mold Removal Lab, mold spores are ubiquitous, but living environments with moisture problems host larger and more persistent colonies. People with allergic histories or chronic sinus issues should be especially vigilant. In homes with visible mold or a musty odor, be prepared to take decisive action. Early intervention often reduces symptom duration and improves quality of life.
The limits of a cure mold allergy
While many hope for a simple cure mold allergy, evidence shows that lasting, complete cure is unlikely for most. The Mold Removal Lab team found that the strongest defense is ongoing exposure control: fix moisture, clean surfaces, and maintain clean indoor air. Even with medications like antihistamines or nasal steroids, symptom relief is often partial if mold exposure continues. This reality shapes practical planning: preventive upkeep, steady remediation, and consistent medical management. If symptoms persist, consult a clinician to tailor a plan that fits your household and health needs. The goal is to reduce triggers to a manageable level, enhancing daily function, sleep, and comfort.
Build a practical home remediation plan
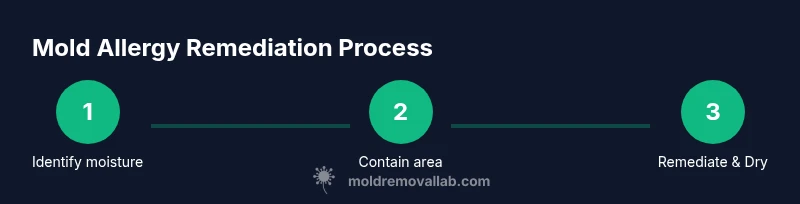
A clear plan helps homeowners address mold allergy without endless trial-and-error. Start by locating moisture sources—leaks, condensation, or poor ventilation—and fixing them. Then remove visible mold growth using proper precautions. This plan emphasizes not only cleanup but also long-term prevention: install good ventilation in bathrooms and kitchens, control humidity with fans and airflow, and monitor hidden moisture behind walls. Remember, Mold Removal Lab emphasizes safety: never disturb large mold patches without appropriate PPE and professional guidance if you’re unsure of the extent. The plan below translates into actions you can take today and over the coming weeks to protect your family and reduce recurrence. The next sections detail each phase with concrete steps and cautions.
Medical management and symptoms relief
Medical approaches complement environmental controls. Your healthcare provider may recommend antihistamines to reduce sneezing, nasal corticosteroids to decrease inflammation, or leukotriene receptor antagonists in some cases. For asthma sufferers, inhaled bronchodilators or corticosteroids may be appropriate during exposure spikes. Immunotherapy (allergy shots) can be discussed with an allergist, especially for persistent symptoms not controlled by environmental changes. While these treatments help many people, they do not eliminate mold spores from your environment. Combine medical management with the remediation steps described in this guide for best results. Always discuss new symptoms or medication changes with your clinician, and avoid self-prescribing.
Safe cleaning and remediation steps for DIY scenarios
If you decide to tackle small mold patches yourself, follow these safe steps. Step 1: Wear PPE (N95 respirator, gloves, eye protection). Step 2: Isolate the area to prevent spread to other rooms. Step 3: Clean non-porous surfaces with a mild detergent and water. Step 4: Dry the area thoroughly, using fans and dehumidification. Step 5: For porous materials (drywall, insulation) with visible mold and extensive growth, consider disposal. Step 6: Re-check air for musty odors and visible residues before returning furniture. Avoid mixing cleaners like ammonia with bleach, and ensure proper ventilation. If mold recurs or growth is extensive, pause and contact a professional.
When to hire professionals and safety considerations
Mold remediation beyond a small patch is best handled by professionals. If mold covers more than a few square feet, or if there is hidden growth behind walls, hire a certified remediation contractor. Pro services include containment, HEPA air filtration, and thorough cleaning of porous materials. Check credentials and request before-and-after photos. For health-sensitive households (young children, elderly, chronic respiratory disease), professional remediation can reduce exposure during work. The Mold Removal Lab team recommends obtaining at least two quotes and confirming the contractor will address moisture sources to prevent recurrence.
Tools & Materials
- N95 respirator(Fit-tested if possible; replace when soiled)
- Disposable gloves(Latex-free if skin sensitivity exists)
- Safety goggles(Close-fitting to prevent splashes)
- HEPA vacuum(For cleanup after mold removal, not during initial disturbance)
- Detergent and water(Use mild, non-ammonia cleaners on non-porous surfaces)
- Dehumidifier or fans(Aim to improve air circulation and drying after cleaning)
- Plastic sheeting or tape(Containment during remediation if needed)
- Trash bags labeled for contaminated materials(Seal tightly and dispose according to local guidelines)
- Moisture meter (optional)(Useful to identify hidden moisture behind walls)
Steps
Estimated time: 4-8 hours
- 1
Identify moisture sources
Survey for leaks, condensation, and poor ventilation. Document areas with visible dampness and musty odors, as these indicate ongoing moisture that promotes mold growth.
Tip: Keep a dampness log and photograph spots before you begin remediation. - 2
Contain the area
Close off the affected zone with plastic sheeting if you anticipate releasing spores. Create a clear entry/exit path to minimize cross-contamination.
Tip: Seal doors with tape to limit dust particles from migrating. - 3
Protect yourself
Put on an appropriately fitted N95, gloves, and eye protection before handling moldy materials. Do not touch moldy surfaces with bare hands.
Tip: Work from the clean side toward the contaminated area. - 4
Clean non-porous surfaces
Wipe accessible non-porous surfaces with a mild detergent and clean water. Dry thoroughly to prevent re-growth.
Tip: Avoid mixing cleaners; do not spray on porous materials. - 5
Assess porous materials
Porous items with extensive mold may need disposal. Light surface mold on porous materials can sometimes be treated, but remediation may require replacement.
Tip: When in doubt, replace drywall or insulation rather than risking regrowth. - 6
Dry and ventilate
Use dehumidifiers and fans to dry the area, improving airflow to prevent moisture return after cleaning.
Tip: Keep air moving for at least 24–48 hours after cleaning. - 7
Recheck and monitor
Re-inspect the area for residual odor or new dampness; consider moisture testing if you suspect hidden moisture behind walls.
Tip: Set a monthly check-in reminder for moisture signs in kitchens and bathrooms.
FAQ
Can mold allergy be cured?
There is no guaranteed cure for mold allergy. Management typically involves reducing exposure, medical treatment, and remediation of mold sources. Discuss personalized options with a clinician if symptoms persist.
There’s no guaranteed cure for mold allergy. Work with your doctor and focus on reducing exposure and fixing mold sources in your home.
What are common mold allergy symptoms?
Common symptoms include sneezing, runny or congested nose, itchy or watery eyes, coughing, and in some cases asthma flare-ups. Symptoms improve when exposure is reduced and the environment is treated.
Typical symptoms are sneezing, stuffy nose, itchy eyes, and coughing, which may improve with reduced exposure and proper cleaning.
Is DIY mold cleanup safe for families?
DIY cleanup can be safe for small, non-porous patches when you follow PPE guidelines and proper cleaning methods. For large areas or porous materials, professional remediation is advised.
DIY cleanup can be safe for small patches if you wear PPE, but bigger jobs should be handled by pros.
How long does remediation take?
Remediation duration varies with area size, extent of growth, and moisture control; small jobs may take hours, while larger jobs can span days. Always address moisture sources to prevent re-growth.
It depends on how big the area is and how much moisture there is, but addressing moisture is key to speed up the process.
Should I use bleach to kill mold?
Bleach can be effective on non-porous surfaces but is not a universal solution. It may not penetrate porous materials. Always follow labeling and safety guidance, and consider professional advice for porous or extensive growth.
Bleach may help on hard non-porous surfaces, but it doesn’t fix everything, especially on porous materials.
Watch Video
The Essentials
- There is no guaranteed cure mold allergy; focus on exposure control and symptom management.
- Fix moisture sources first to prevent mold recurrence.
- Follow a clear, PPE-guided remediation plan for DIY tasks and know when to call professionals.
- Medical management should complement environmental remediation for best results.