Control Mold: Practical Guide for Safe Remediation
Control mold at home: identify moisture sources, clean safely, and prevent regrowth. Mold Removal Lab guide on DIY cleanup, safety, and when to call a pro today.

By following this guide, you will identify moisture sources, safely remove visible mold, and prevent recurrence in your living spaces. You’ll learn a practical, step-by-step approach to DIY cleanup, plus when to call a pro for larger jobs. Ongoing moisture control, proper ventilation, and routine inspections protect health and home. Mold Removal Lab provides evidence-based methods.
Understanding Moisture and Mold Growth
Control mold starts with recognizing that moisture is the key driver. Mold thrives in damp environments, especially where materials are porous and ventilation is poor. According to Mold Removal Lab, limiting moisture is the foundation of any remediation strategy, because even small leaks or persistent condensation can support growth behind walls, under floors, or inside insulation. Visible mold is only part of the story—hidden colonies can linger and reappear if dampness isn’t addressed. Prioritize safety and avoid disturbing mold growth unnecessarily. By understanding how moisture interacts with building materials, you can plan effective containment, cleanup, and prevention steps that protect occupants’ health and preserve your home.
Identifying Key Moisture Sources
Mold problems begin with water in the wrong places. Start by inspecting for leaks in roofs, pipes, and appliances; check bathrooms, kitchens, basements, and crawl spaces where humidity tends to rise. Look for stained drywall, peeling paint, warped wood, or musty odors—these are cues of dampness. Use simple checks: run a towel over suspected areas to see if it remains damp, and notice if windows fog up after showers. Don’t forget concealed sources like behind cabinets, under sinks, or inside wall cavities. A systematic scan helps you target remediation without needless disruption. Keep notes of all findings to guide repairs and prevention.
Safe DIY Cleanup for Small Patches
Small patches of mold on non-porous surfaces can often be addressed safely at home with proper PPE and careful technique. Always wear an appropriate respirator or mask, gloves, and eye protection. Start by isolating the area with plastic sheeting to prevent spores from spreading, and ventilate the space. Clean surfaces with a detergent-and-water solution, scrub gently, rinse, and dry thoroughly. For tougher stains on non-porous surfaces, hydrogen peroxide can be effective when used carefully. Never mix cleaning agents such as bleach with ammonia or other cleaners; always test a small area first and discontinue if you notice irritation. If you are unsure, prioritize safety and seek guidance.
Handling Larger Areas and Porous Materials
When mold covers large areas or has penetrated porous materials like drywall, insulation, or carpet backing, professional remediation is often warranted. Begin by containing the workspace with heavy-duty plastic and sealing any vents to prevent spores from circulating. Remove and dispose of heavily contaminated porous materials in sealed bags, following local regulations. Clean non-porous surfaces with an appropriate cleaner, then rinse and dry promptly. If structural components show moisture damage, it may require professional evaluation for replacement or repair. Always document the scope of work and repairs for future prevention.
Drying, Humidity Control, and Airflow
Drying is a crucial step to prevent regrowth. After cleaning, use fans and a dehumidifier to remove residual moisture and promote air movement. Monitor the area to ensure surfaces stay dry, and fix the underlying moisture source to avoid a repeat problem. Adequate ventilation in bathrooms, kitchens, and utility rooms helps maintain safe humidity levels and reduces future mold risk. Reassess after a few days to ensure there are no new damp spots or odors. Effective drying is a simple, often overlooked key to long-term control.
Prevention and Maintenance to Stop Reoccurrence
Prevention focuses on keeping moisture under control and staying vigilant. Regularly inspect for leaks, repair any damaged seals, and ensure proper ventilation in high-humidity spaces. Use exhaust fans during showers and cooking, and wipe down damp surfaces after use. Consider routine humidity monitoring and periodic professional inspections for older homes or after water events. A proactive approach, guided by sound evidence, reduces the likelihood of mold returning and protects occupant health over time.
Authority Sources
To support your mold-control efforts, refer to trusted sources that outline safe and effective practices. These links provide official guidance on detection, remediation, and safety considerations:
- https://www.cdc.gov/mold/dampness_facts.html
- https://www.epa.gov/mold
- https://www.osha.gov/mold
Tools & Materials
- PPE kit (N95 respirator, protective gloves, safety goggles)(Ensure proper fit and no facial hair interference for a seal)
- Disposable coveralls or clothing protection(Keeps mold spores off clothing)
- Plastic sheeting (6–10 mil)(To seal off the area and create containment)
- Tape (plastic and paper)(To secure plastic sheeting and create a barrier)
- Spray bottle with cleaning solution(Detergent-and-water mix or approved cleaner)
- Stiff-bristle scrub brush(For scrubbing stubborn mold on non-porous surfaces)
- Disposable rags or paper towels(Use once and discard in a sealed bag)
- Bucket and disposal bags(For cleanup and safe disposal of contaminated materials)
- HEPA vacuum (optional)(Useful for final cleanup and dust control)
- Moisture meter or humidity gauge (optional)(Helpful to verify drying progress)
Steps
Estimated time: 60-120 minutes
- 1
Identify moisture sources and secure the area
Conduct a visual inspection to locate active leaks and damp zones. Mark areas with tape and set up containment so spores won’t spread. Plan for quick repairs or professional help where needed.
Tip: Document findings with photos and notes to guide repairs. - 2
Gather PPE and essential supplies
Assemble your PPE and cleaning materials before entering the affected space. Confirm the area is ventilated and the door or entry points are prepared for containment.
Tip: Double-check mask fit and seal to maximize protection. - 3
Contain the workspace with plastic sheeting
Drape plastic sheeting over doorways and vents to prevent spores from migrating. Seal edges with tape and avoid creating gaps where dust can escape.
Tip: Work from clean areas outward to prevent tracking spores into other rooms. - 4
Remove heavily contaminated porous materials
Carefully bag and remove drywall, insulation, or carpet backing that shows extensive mold. Seal the bag before exiting to avoid releasing spores.
Tip: If unsure whether material is salvageable, treat it as contaminated and remove it. - 5
Clean and disinfect remaining surfaces
Wash non-porous surfaces with a detergent solution, scrub to remove visible growth, rinse, and dry completely. For stubborn areas, apply a mild cleaner and rewipe so all residues are removed.
Tip: Let surfaces dry thoroughly before reoccupation. - 6
Dry the area thoroughly and monitor humidity
Use fans and a dehumidifier to promote rapid drying. Keep air moving and check for lingering dampness or odors over the next few days.
Tip: Aim to reduce moisture quickly; lingering dampness invites regrowth. - 7
Evaluate results and implement prevention
Reassess the cleaned area for any new growth and address the moisture source to prevent recurrence. Consider routine inspections and maintenance to sustain mold control.
Tip: Keep a simple maintenance log for future reference. - 8
Document home maintenance plan
Record repairs, moisture-control measures, and any professional consultations. This helps track improvements and informs future home maintenance decisions.
Tip: Store notes in a shared home file accessible to all occupants.
FAQ
When should I call a professional for mold remediation?
Call a professional when mold covers a large area, is deeply embedded in porous materials, or recurs after cleaning. If you have health concerns or suspect hidden growth, professional assessment is advised.
Call a pro if the mold is extensive, hidden, or keeps coming back, or if health symptoms appear.
Can I clean mold myself in a bathroom?
For small, non-porous patches, DIY cleanup is possible with proper PPE and ventilation. If the mold affects porous materials or recurs, seek professional help.
Yes for small, non-porous spots with PPE; bigger or porous areas should be handled by a pro.
What moisture sources should I fix first?
Prioritize leaks from roofs or plumbing, and improve ventilation in high-humidity areas like bathrooms and kitchens. Fixing the source prevents future mold growth.
Fix leaks and improve ventilation first to stop mold from returning.
What cleaners are safe to use against mold?
Detergent and water work on many surfaces; diluted hydrogen peroxide can help non-porous surfaces. Avoid mixing cleaners and never mix bleach with ammonia.
Use detergent and water, or diluted hydrogen peroxide on non-porous surfaces. Don’t mix cleaners.
How do I know if mold is affecting health?
Mold exposure can trigger allergies or asthma symptoms in sensitive individuals. If you notice persistent coughing, headaches, or respiratory issues, consult a healthcare professional.
If you have persistent symptoms, see a doctor and consider assessment by a mold remediation expert.
Is bleach effective on wood or drywall?
Bleach may kill surface mold on non-porous surfaces but is not ideal for porous materials like wood or drywall. Cleaning, drying, or replacing affected materials is often needed.
Bleach is not best for porous materials; better to clean or replace affected areas after drying.
Watch Video
The Essentials
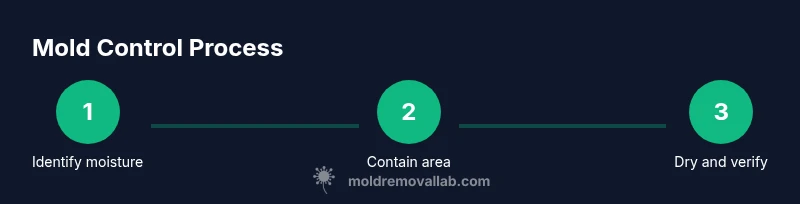
- Identify moisture sources before cleaning.
- Contain and safely clean small patches with PPE.
- Dry thoroughly to prevent regrowth.
- Know when to escalate to professional remediation.
- Maintain humidity control and monitor regularly.