Concrobium Mold Control Fogger: A Practical How-To Guide
Safely use the Concrobium Mold Control Fogger for effective home mold remediation. This guide covers prep, application, ventilation, and post-treatment steps with expert guidance from Mold Removal Lab.

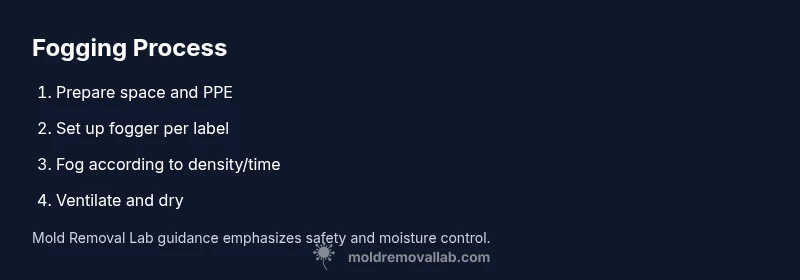
Steps to safely use the Concrobium Mold Control Fogger: 1) Prep the area by sealing doors, removing people and pets, and turning off HVAC. 2) Put on PPE and vacate the area while fogging. 3) Activate the fogger according to label directions and allow the space to remain closed for the recommended contact time. 4) Ventilate and re-entry after drying.
What is Concrobium Mold Control Fogger?
The Concrobium Mold Control Fogger is a consumer-grade remediation tool designed to reduce mold in enclosed spaces without leaving a residue. It disperses a fine, odorless mist that coats surfaces; over time, it forms an invisible protective layer that helps prevent mold regrowth. According to Mold Removal Lab, this fogging method is most effective for surface-contaminated areas where physical scrubbing is difficult. Before using it, homeowners should know its limitations and combine it with moisture control and cleaning as part of a broader remediation plan.
Why fogging can be advantageous for mold control
Fogging with the Concrobium Mold Control Fogger offers uniform coverage in areas that are hard to reach with rags or brushes. It reduces direct handling of mold-contaminated materials and can reach hidden colonies on ceilings, behind cabinets, or inside wall cavities when used as part of a comprehensive plan. Mold Removal Lab analysis shows that fogging is most effective after large moisture events (like floods or leaks) and when combined with thorough drying and moisture control to prevent recurrence.
Safety and PPE you should wear during fogging
Personal protective equipment is essential when fogging mold-prone spaces. Wear an N95 respirator or better, protective goggles, and disposable or reusable gloves. Remove or cover clothing that could trap spores, and avoid wearing contact lenses during fogging. Ensure others in the home avoid the treated area for the duration recommended by the product label; never fog in occupied spaces without proper containment.
Planning and containment before fogging
Containment is critical to prevent mold spores from circulating through the home. Close off the room and nearby HVAC registers, seal gaps with painter’s tape and plastic sheeting, and place warning signs to keep others out. If you are fogging multiple rooms, consider creating a temporary barrier path to limit cross-contamination. This upfront planning aligns with best practices recommended by Mold Removal Lab.
Preparing the space: PPE, ventilation, and site prep
Before starting, gather PPE, seal the area, and clear porous contents from the room when possible. Remove occupants and pets, unplug fans, and ensure there is adequate lighting for post-treatment inspection. Turn off the HVAC system to prevent spreading spores during the fogging process. After preparation, you’re ready to move to the fogging step as described on the product label.
Application technique and how to fog properly
Position the fogger away from walls and corners and follow the label directions for release density and duration. Keep the room sealed for the specified contact time and wait with the fog in place long enough to treat exposed surfaces. After fogging, do not re-enter immediately; wait for air to clear and surfaces to dry according to the label guidance.
Post-treatment ventilation, drying, and cleanup
Ventilate the space thoroughly after the contact time has elapsed. Open doors and, if safe, run a fan to improve air circulation, then allow surfaces to dry completely before reoccupation. Dispose of used materials as recommended by the product and local waste rules. A final surface check for any remaining mold is essential to determine if additional steps are needed.
Effectiveness and limitations you should know
Concrobium Mold Control Fogger helps in many scenarios but is not a substitute for moisture control or structural remediation. Fogging cannot fix ongoing leaks or remove deeply ingrained mold behind walls. For significant contamination or porous building materials, professional remediation may be required.
Real-world scenarios: basements, bathrooms, and kitchens
In basements, fogging can help reduce damp-mold growth on concrete walls and floors when moisture is under control. Bathrooms and kitchens with recurring humidity can benefit from follow-up drying and targeted cleaning after fogging. Always verify that materials susceptible to moisture damage are treated appropriately and not overwhelmed by the fog.
DIY vs professional remediation and when to call a pro
Small, well-contained mold problems in living spaces can often be managed with consumer foggers as part of a broader remediation plan. For large areas, hidden mold behind drywall, or suspected asbestos risks, a licensed professional should be consulted. The Mold Removal Lab team recommends evaluating the severity and moisture history before choosing DIY fogging as your primary method.
Building a broader mold remediation plan for your home
Fogging is a tool, not a standalone solution. A comprehensive plan includes moisture diagnosis, source control, cleaning, and ongoing monitoring. Document conditions before and after fogging, schedule follow-up checks, and maintain a routine to reduce future mold risk. The Mold Removal Lab approach emphasizes safety, ventilation, and preventive maintenance across all rooms.
Tools & Materials
- Concrobium Mold Control Fogger(Use the official fogger kit designed for home use; follow label directions.)
- N95 respirator(Fit-tested if possible; ensure it seals tightly on the face.)
- Protective goggles(Impact-resistant if splashes are possible.)
- Chemical-resistant gloves(Disposable or reusable, depending on your preference.)
- Plastic sheeting and painter's tape(Seal doors and vents to limit airflow during fogging.)
- Trash bags and disposable coveralls (optional)(Use if working in damp or heavily contaminated areas.)
- Sealant tape or plastic zip ties (optional)(For quick containment and sealing.)
- Ventilation options for post-treatment (optional)(A box fan can help with post-treatment air movement after drying.)
Steps
Estimated time: 60-90 minutes
- 1
Prepare area
Choose a location per label guidance. Close doors and seal gaps with plastic and tape. Remove people and pets during fogging. Clear clutter to maximize even coverage.
Tip: Ensure all potential contamination sources are removed or sealed before fogging. - 2
Wear PPE
Put on a properly fitting N95 respirator, protective goggles, and gloves. If available, use a full-face respirator for extra protection.
Tip: Check respirator seal with a quick fit test before starting. - 3
Read label and settings
Read the fogger label for coverage area, density, and contact time. Set up the unit as directed and understand safety features.
Tip: Keep the label handy for reference. - 4
Position fogger
Place the fogger at a central, elevated position away from walls and furniture. Avoid aiming directly at surfaces to minimize oversaturation.
Tip: Place on a stable surface to prevent tipping. - 5
Fog the area
Activate the fogger and allow the mist to fill the space according to density guidance. Leave the room closed for the required contact time.
Tip: If you can, use a timer to track when you can re-enter. - 6
Ventilate and dry
After the contact time, open doors, vent with a fan if safe, and let surfaces dry completely before re-entry.
Tip: Open windows downwind to avoid spreading spores. - 7
Inspect and document
Conduct a final inspection for visible mold and moisture. Take photos before and after fogging to track progress.
Tip: Keep a remediation log with dates and observations.
FAQ
Is fogging safe for homes with children or pets?
Fogging should be done with the space unoccupied and containment in place. Follow the product label, and ensure proper ventilation after the recommended contact time. If anyone has health concerns, consult a mold remediation professional.
Fogging should be done with the space unoccupied and proper containment. Wait for ventilation before re-entry.
Will the fogger kill all mold spores in the air?
Fogging treats exposed surfaces and ambient spores, but it is not a guaranteed solution for all mold. It works best when combined with moisture control, cleaning, and possible professional remediation for larger areas.
Fogging treats exposed spores but isn't a guaranteed cure; combine with moisture control.
Can I fog multiple rooms at once?
Fogging multiple rooms is possible with a large-capacity fogger and proper containment, but reach depends on space layout and label guidelines. Always follow the manufacturer’s guidance.
Yes, if the fogger and containment plan allow it, but follow the label.
Do I need to remove all furniture before fogging?
Remove porous items if possible or cover them to reduce exposure. Non-porous surfaces are typically treated more predictably; follow label directions for what to move.
Try to move or cover porous items; follow the label.
Is Concrobium safe for ductwork or HVAC?
Use caution with ductwork; fogging should not rely on treating inside ductwork unless the manufacturer specifies. Consult a professional if you suspect widespread duct contamination.
Ventilate and avoid relying on ductwork as the sole remediation path.
How long before I can re-enter the treated space?
Re-entry depends on the label's contact time and drying conditions; wait until surfaces are dry and the space is well-ventilated before returning.
Wait until the space is dry and well-ventilated before re-entering.
Watch Video
The Essentials
- Follow label directions for safe fogging.
- Fogging is part of a broader moisture-control plan.
- Ventilate thoroughly after treatment and re-entry only when dry.
- Document results to guide ongoing maintenance and monitoring.