Concrete Pavement Mold Removal: A Practical Guide
Step-by-step outdoor mold cleanup for driveways and sidewalks. Learn safe methods, tools, and prevention tips from Mold Removal Lab to keep concrete surfaces mold-free.

You will learn to safely remove concrete pavement mold from driveways and sidewalks and reduce recurrence. This outdoor guide emphasizes protective gear, testing a small area first, and selecting a mold-safe cleaner suitable for concrete surfaces. With the right approach, you can restore appearance and reduce slip hazards.
What is concrete pavement mold and why it appears
Concrete pavement mold refers to dark, fuzzy or powdery growth on cement surfaces caused by moisture, warmth, and organic nutrients found on the surface. It can appear as black, green, or gray patches and may be slippery when wet. Outdoor concrete like driveways and sidewalks are especially prone due to rain splash, shading, soil contact, and soil-to-surface transfer. While mold on concrete typically does not compromise the structural integrity of the cement, it can stain the surface, degrade texture, and create slip hazards. Early cleaning minimizes staining and reduces regrowth. According to Mold Removal Lab analysis, the combination of moisture control and routine maintenance dramatically lowers recurrence rates. Understanding why concrete pavement mold forms helps homeowners choose safer cleaners that protect nearby vegetation and the environment.
Health and safety considerations when cleaning outdoor mold
Outdoor mold cleaning should be approached with care. Wear protective gear: gloves (nitrile or neoprene), safety goggles, and an N95 respirator if spores are likely to become airborne. Work on a dry, calm day to minimize drift and runoff. Keep pets and children away from the work area, and protect nearby plants with plastic sheeting. Do not mix cleaners indiscriminately; some combinations can create harmful fumes. If you have severe allergies or asthma, consider professional assistance. Mold Removal Lab emphasizes safety as the first step in any outdoor remediation project.
Selecting the right cleaning method for concrete surfaces
For outdoor concrete, choose cleaning solutions that are effective yet gentle on soil and plants. Common options include a detergent-water mix, or a commercially available concrete cleaner designed for outdoor use. Some homeowners opt for an enzyme-based cleaner to break down organic material without harsh chemicals. Avoid using strong household bleach in open areas, as it can damage surrounding vegetation and discolor the concrete over time. Always test a small, inconspicuous patch before widening the application. Remember that rinsing thoroughly is essential to remove cleaner residue that could attract more dirt.
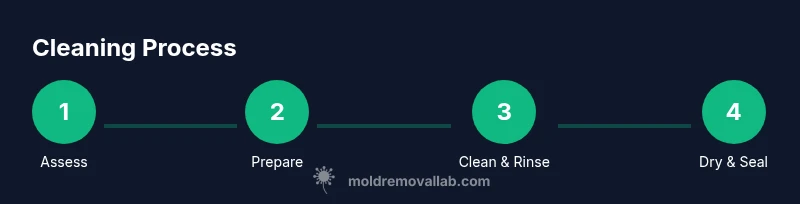
Step-by-step remediation approach (overview)
A practical remediation plan combines assessment, safe cleaning, scrubbing, rinsing, and drying, followed by preventive measures. Start by inspecting the affected area for active water sources and potential moisture traps. Apply the chosen cleaner to a small patch and scrub with a stiff-bristled brush. Rinse thoroughly with clean water, ideally using a spray nozzle or a gentle stream from a hose or pressure washer on a low setting. Allow the surface to dry completely and consider sealing porous concrete to reduce future mold uptake. This overview aligns with best practices recommended by Mold Removal Lab for durable results.
Ongoing prevention and maintenance after cleanup
Prevention hinges on moisture control and surface protection. Improve drainage away from the pavement, trim nearby vegetation to reduce shade, and fix leaks or overland water flow that pools on the concrete. Sealing concrete after a thorough dry-out can greatly reduce future mold growth by limiting moisture penetration. Plan periodic inspections, especially after rain-heavy seasons, and promptly address any staining or damp spots. Consistent maintenance is key to long-term mold control on outdoor concrete surfaces.
Troubleshooting common issues and when to call a pro
If staining persists after cleaning, if there is persistent dampness, or you notice a strong mold odor, consider re-evaluating moisture sources or seeking professional remediation. For large outdoor areas, extensive mold growth, or uncertain contamination (e.g., black mold), a licensed professional may be warranted. Complex mold problems near gardens or irrigation systems may require specialized care to protect landscaping and ensure thorough sanitation. Mold Removal Lab recommends erring on the side of caution if growth is extensive or if you are unsure about the cleaning methods.
Tools & Materials
- Protective gloves(Nitrile or neoprene; chemical resistant)
- Safety goggles(Wraparound protection)
- N95 respirator(Or equivalent; optional if area is well-ventilated)
- Stiff-bristled brush(For thorough scrubbing)
- Bucket(Mixed cleaners and rinse water)
- Mild detergent or concrete cleaner(Outdoor-safe; label-specified dilution)
- Spray bottle(For targeted cleaner application)
- Garden hose with spray nozzle or low-pressure washer(Low pressure recommended to avoid surface damage)
- Plastic sheeting or tarps(Protect adjacent plants and lawn)
- Concrete sealer or protective coating(Apply after drying to reduce future mold uptake)
- Camera or notebook(Document stains and progress)
Steps
Estimated time: 60-120 minutes total active work; drying and sealing may extend the timeline by 24-48 hours
- 1
Assess the area and safety
Identify the extent of mold growth and moisture sources. Ensure the area is dry and weather-appropriate for cleaning. Put on protective gear before touching any surface.
Tip: Test a small patch first to observe how the surface reacts to cleaner. - 2
Prepare the workspace
Clear the area and lay down plastic sheeting to protect nearby plants and soil from runoff. Gather your tools and read label directions on cleaners.
Tip: Keep pets and kids away during the cleaning process. - 3
Choose and apply cleaner
Mix a mild detergent with water or use a concrete cleaner designed for outdoor use. Apply to the moldy patch using a spray bottle or brush, avoiding excess runoff.
Tip: Do not mix cleaners with bleach in open outdoor spaces. - 4
Scrub the surface
Scrub with a stiff-bristled brush using circular motions to lift mold from the concrete pores. Apply additional cleaner as needed.
Tip: Keep the brush moving to avoid gouging the surface. - 5
Rinse thoroughly
Rinse the area with clean water until no cleaner residue remains. If a pressure washer is used, set it to low pressure to prevent surface damage.
Tip: Inspect for remaining stains after rinsing and repeat if necessary. - 6
Dry completely and seal
Allow the concrete to dry fully in sun or with airflow. Apply a concrete sealer to reduce future moisture uptake and mold growth.
Tip: Seal only after the surface is dry to avoid trapping moisture. - 7
Monitor and maintain
Check the area after heavy rains and in the weeks following cleanup. Address drainage issues and re-seal as part of ongoing maintenance.
Tip: Document any regrowth early to intervene quickly.
FAQ
Is bleach safe for outdoor concrete mold cleanup?
Bleach can discolor concrete and harm plants; it is not the preferred option for outdoor mold on concrete. If used, dilute heavily and rinse thoroughly, but many outdoor cleaners are safer and more effective.
Bleach isn’t usually the best choice for outdoor concrete, as it can damage plants and the surface. Safer cleaners are recommended and easier to rinse away.
How long does it take to see results after cleaning?
Results vary with the extent of mold and weather conditions. You may see immediate whitening, but complete drying and sealing may take a day or two. Follow-up cleaning might be needed for stubborn patches.
You’ll often see immediate improvement, but full drying and possible follow-up cleanings can take a day or two.
Can mold return after cleaning outdoor pavement?
Yes, if moisture sources persist. Repair drainage, improve sun exposure, and seal the surface to reduce future growth. Regular maintenance helps keep mold at bay.
Mold can come back if moisture isn’t controlled or sealing isn’t done, so address water sources and re-seal when needed.
When should I hire a professional for concrete mold?
Consider a pro for extensive mildew growth, structural staining, or if mold recurs after DIY cleaning. Professionals can assess moisture sources and apply advanced treatments safely.
Call a pro if growth is widespread or keeps coming back after cleaning.
Does mold on sidewalks near plants require special care?
Yes, protect plants from cleaners and runoff. Use containment and choose cleaners labeled for outdoor use near vegetation. Rinse well to minimize chemical exposure.
Be careful with runoff near plants and rinse so chemicals don’t harm your garden.
What is the best long-term prevention method?
Address chronic moisture by improving drainage, clearing shading, and sealing concrete after cleaning. Regular inspections help catch regrowth early.
Improve drainage and seal the surface after cleaning to reduce future mold growth.
Watch Video
The Essentials
- Identify moisture sources and fix them before or during cleanup
- Use outdoor-safe cleaners and test patches first
- Scrub, rinse, and dry thoroughly to minimize regrowth
- Seal concrete after cleaning to reduce moisture uptake
- Monitor the area and address drainage to sustain mold-free surfaces