Concrete Countertop Mold: Safe Removal and Prevention
Identify mold on concrete countertops, safely remove it, and prevent recurrence with practical, homeowner-friendly steps from Mold Removal Lab.

To address concrete countertop mold, you’ll identify moisture sources, safely clean or remove the affected surface, and seal the countertop to prevent regrowth. Start with PPE and containment, choose a mold-safe cleaner appropriate for concrete, and follow a step-by-step remediation plan. For best results, seek professional assessment if growth is extensive.
What is concrete countertop mold and why it forms
According to Mold Removal Lab, concrete countertops can host mold when moisture accumulates behind or within the slab. The phrase concrete countertop mold describes colonies that grow on unsealed or poorly sealed concrete surfaces. Concrete's natural porosity absorbs water from spills, cleaners, and humidity, creating damp pockets where mold spores can settle. Without timely remediation and proper sealing, mold can spread into micro-cracks and the porous matrix, presenting health risks and unpleasant odors. Recognizing the signs—discoloration, fuzzy growth, or a musty smell—helps homeowners act before the problem worsens. This guide walks you through safe, practical steps to identify, clean, and prevent mold on concrete countertops, with emphasis on moisture control and proper sealing. Maintaining a dry, well-ventilated environment is essential because moisture drives mold growth on porous concrete surfaces. The Mold Removal Lab team stresses that early action keeps kitchen surfaces safer and reduces potential health concerns for households, especially those with sensitivities to mold.
Health risks and safety basics for homeowners
Mold exposure can trigger allergic reactions, respiratory irritation, and other symptoms in sensitive individuals. When working with mold on concrete countertops, prioritize personal safety and air quality. Always wear a properly fitted mask (NIOSH-approved if possible), goggles, and chemical-resistant gloves. Work in a well-ventilated area and use containment to prevent spores from migrating to other rooms. Do not mix cleaners or use harsh solvents that could damage the countertop finish or release harmful fumes. Begin with milder, pH-neutral cleaners and progress only if you still detect active growth. If anyone in the home has asthma or severe allergies, consider delaying extensive remediation and consult a professional promptly. The key is to control moisture and limit exposure while you assess the situation.
Assessing the extent: determine if cleaning is enough or replacement is needed
Before diving into any remediation, evaluate how far the mold has penetrated the concrete. Visible growth in seams, micro-cracks, or beneath the surface indicates a deeper moisture problem that a simple wipe-down may not fully solve. Use a flashlight to inspect grout lines and underside edges where water tends to collect. If moisture sources persist (leaks, high humidity, or frequent spills), remediation alone may not suffice, and sealing or resurfacing might be required. Keep notes of locations and the type of staining observed, as this helps guide your cleaning plan and future moisture control. When in doubt, consult a mold professional to confirm the extent and to outline a safe remediation approach. Mold Removal Lab emphasizes documenting moisture sources as part of any remediation plan to prevent reoccurrence.
Cleaning options: choosing the right approach for concrete countertops
For sealed, non-porous concrete countertops, you can start with mild, non-abrasive cleaners such as a gentle dish soap and water, or a vinegar-water solution for routine maintenance. Avoid bleach on colored or sealed concrete, as it can discolor or degrade finishes over time. After cleaning, rinse thoroughly and dry completely to minimize residual moisture. For unsealed or porous concrete surfaces, you may need a more targeted approach that addresses penetrating stains and embedded mold. In these cases, a hydrogen peroxide solution can be effective on contact, followed by careful drying and re-sealing. Always test a small, inconspicuous patch first to ensure the cleaner does not affect the countertop’s color or texture. The goal is to remove organic material without introducing new damage to the concrete or its seal.
Deep cleaning for porous concrete countertops: steps and products
Porous concrete requires more focused treatment because mold can inhabit tiny pores and capillaries within the material. A mild poultice made of baking soda or a masonry-safe cleaner can help draw out contaminants from pores. Apply the poultice, cover with plastic to keep it damp, and allow it to work for a noted period before removing and rinsing. After cleaning, a thorough drying is essential; use fans or a dehumidifier to expedite moisture removal. Once the surface is dry, consider applying a compatible sealer designed for masonry to reduce future moisture uptake. If staining or mold persists after initial cleaning, repeat the process or consult a professional for more advanced remediation techniques. Mold Removal Lab notes that persistence of visible growth often signals a more serious moisture issue that requires attention beyond surface cleaning.
Sealing and protecting concrete countertops after mold
Sealing is a critical step in preventing recurring mold on concrete countertops. Choose a sealer compatible with your countertop finish—penetrating sealers guard against moisture ingress, while film-forming sealers provide a protective surface layer. Proper curing and ventilation are important during the sealing process to ensure a uniform, durable finish. Reapply sealer according to the manufacturer’s guidance when you notice the surface losing its water-repellent properties. Regular maintenance, including gentle cleaning and prompt drying of spills, helps preserve the seal and minimize mold-friendly environments. Mold Removal Lab recommends periodic checks for seal integrity, especially after cleaning or exposure to heat and moisture.
Moisture control and kitchen practices to prevent mold recurrence
Effective moisture control starts with fixing leaks and reducing humidity. Promptly dry any spills, and avoid leaving standing water on counters. Improve air circulation by using range hoods, exhaust fans, and, when feasible, a dehumidifier in damp areas. Regularly inspect plumbing under sinks for signs of leaks and address them quickly. Use coasters or mats under plants and appliances to minimize moisture on the countertop surface. A clean, dry countertop is less inviting to mold spores, and a good seal further reduces water penetration. The Mold Removal Lab team emphasizes that consistent maintenance makes a big difference over time.
When to hire a pro and what to expect
If mold growth is widespread, behind the backsplash, or has penetrated deep into the concrete, professional remediation may be necessary. A mold remediation specialist can assess moisture sources, determine the extent of contamination, and recommend a tailored remediation plan that minimizes risk to occupants. A typical professional approach includes containment, targeted cleaning, moisture testing, and appropriate sealing. For severe cases, replacement of damaged sections might be warranted. The Mold Removal Lab team recommends seeking expert advice when growth exceeds simple cleaning, or when your home has vulnerable occupants.
Authority sources and practical references
For additional guidance, consult reputable sources such as the U.S. Environmental Protection Agency (EPA) mold guide, the Centers for Disease Control and Prevention (CDC) mold information, and OSHA mold safety resources. These organizations offer general mold prevention strategies, health considerations, and safety practices that complement homeowner remediation efforts. Remember, every situation is unique, and if you are unsure about safety or scope, consult a qualified professional.
Tools & Materials
- Personal protective equipment (PPE)(Respirator or N95 mask, gloves, goggles)
- Mild detergent(Dish soap or masonry soap)
- Non-abrasive sponge or microfiber cloth(For gentle cleaning on sealed surfaces)
- Stiff-bristle brush(For scrubbing porous surfaces)
- Spray bottle(For applying cleaners and water)
- Hydrogen peroxide (3%)(Effective on simple mold on porous surfaces)
- White vinegar(Optional for routine cleaning)
- Baking soda (bicarbonate)(Poultice option for deep cleaning)
- Plastic sheeting and tape(Containment during remediation)
- Masonry sealer (penetrating or film-forming)(Apply after cleaning to reduce moisture uptake)
- Bucket(For mixing solutions)
- Dehumidifier or fan(Drying aid after cleaning)
- Moisture meter (optional)(Assess moisture levels after remediation)
Steps
Estimated time: 4-6 hours depending on extent of mold growth and moisture levels
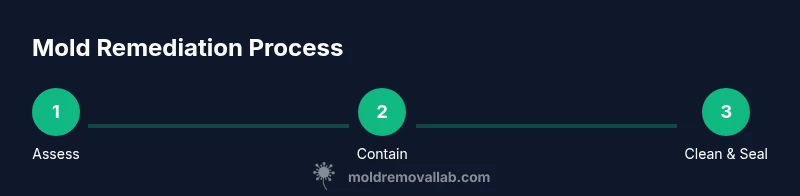
- 1
Assess area and protect yourself
Identify all affected zones and put on PPE before starting. Shield nearby areas to prevent mold spores from migrating. Document the moisture sources you find for future prevention.
Tip: Start with the least invasive method and proceed if growth remains. - 2
Contain the work area
Use plastic sheeting to seal off the workspace and minimize cross-contamination. Keep doors closed and airflow controlled during cleaning.
Tip: Containment reduces spread to other rooms. - 3
Dry the counter and fix moisture sources
Address leaks, spills, or humidity issues before cleaning. Use towels or a squeegee to remove standing water and allow the surface to dry thoroughly.
Tip: Drying first prevents mold from reactivating during cleaning. - 4
Clean sealed surfaces with mild cleaners
For sealed concrete, apply a mild cleaner with a soft sponge, then wipe clean and dry. If mold remains, proceed to a stronger, biocidal option suitable for masonry.
Tip: Test a small area first to ensure no damage. - 5
Treat porous areas with appropriate agents
Apply hydrogen peroxide or a masonry-safe cleaner to porous sections. Gently scrub and rinse; repeat if needed. Dry completely before sealing.
Tip: Avoid oversaturation which can push moisture deeper into the concrete. - 6
Seal the surface after cleaning
Choose a penetrating or film-forming sealer compatible with your countertop. Apply as directed and allow proper curing before exposure to moisture.
Tip: A good seal helps prevent future mold growth. - 7
Verify dryness and monitor
Use a moisture meter if available and observe the surface over several days. Re-seal if moisture returns or wear becomes evident.
Tip: Regular checks catch problems early.
FAQ
Is it safe to clean mold on concrete countertops myself?
Yes, for small, isolated spots on sealed concrete. Use PPE, a mild cleaner, and avoid harsh chemicals that could damage finishes. If mold covers a large area or you have health concerns, consult a professional.
It's safe to handle small areas yourself with proper safety gear, but bigger outbreaks deserve professional help.
What’s the difference between sealed and unsealed concrete regarding mold?
Sealed concrete resists moisture better and is easier to clean. Unsealed concrete is more porous, allowing mold to penetrate and persist. Sealing is essential after cleaning to prevent regrowth.
Sealed surfaces are easier to keep mold-free; unsealed ones require more maintenance and sealing after cleaning.
How do I know if mold has penetrated the concrete?
Visible mold on the surface plus persistent musty odors or staining that returns after cleaning suggests deeper penetration. A moisture assessment and professional inspection can confirm the extent.
If stains keep coming back or you smell mold after cleaning, penetration is likely.
What sealers work best to prevent mold on concrete countertops?
Penetrating sealers reduce moisture ingress, while film-forming sealers add a protective layer on top. Choose one compatible with your countertop finish and maintain according to the product directions.
Go with a durable sealer compatible with your finish and reapply as recommended.
When should I replace a concrete countertop due to mold?
Replacement is considered when mold penetrates deeply or structurally compromises the countertop, or when moisture control cannot be achieved. A professional assessment can guide the decision.
If mold is deeply embedded or the surface is failing, replacement may be necessary.
Watch Video
The Essentials
- Identify moisture sources before cleaning
- Choose cleaners appropriate for sealed vs porous concrete
- Dry thoroughly and seal to prevent recurrence
- Containment reduces cross-contamination
- Consult a pro for extensive mold or complex moisture issues