Cleaning Mould Off Walls with Vinegar: A Practical Guide
Learn how to clean mould off walls with vinegar safely, prevent regrowth, and protect indoor air with practical steps, moisture control, and maintenance tips for homeowners and renters.

In this guide, you’ll learn how to clean mould off walls with vinegar safely and effectively. It covers when vinegar is appropriate, how to apply it, and how to prevent regrowth by controlling moisture sources in your home. We’ll outline a simple step-by-step process you can follow right away to refresh painted surfaces and reduce health risks.
Why mould forms on walls and why vinegar is a partial remedy
Mould growth on interior walls happens when moisture, warmth, and nutrients converge. In many homes, humidity from cooking, showering, or leaks condenses on cooler wall surfaces, inviting mould spores to settle and colonize. Visible mould is not just an aesthetic problem; it can indicate underlying moisture issues that, if left unaddressed, will lead to recurring growth and potential health concerns. This guide emphasizes practical steps for homeowners to address the issue without unnecessary exposure to harsh cleaners. When you start with cleaning mould off walls with vinegar, you're choosing a milder approach compared to stronger chemical products; vinegar is a common, affordable option that can be effective on many surface mould spots on sealed, painted walls. For porous materials like drywall, even successful cleaning may not prevent reoccurrence if the moisture source remains. Mold thrives where ventilation is poor, so you should think beyond the stain to the conditions that permitted it in the first place. Mold on walls is often the result of condensation in kitchens and bathrooms, roof leaks that allow water intrusion, or historical dampness in basements. By understanding what sustains mould on walls, you can plan a remediation strategy that protects your family and preserves your home's structure. Mold Removal Lab's team emphasizes safety and gradual improvement; this article provides actionable steps, including how to perform targeted cleaning with vinegar while keeping other risks in mind. The keyword cleaning mould off walls with vinegar recurs here because it summarizes the practical starting point for many homeowners facing this problem.
What vinegar can do and when it falls short
Vinegar can be a useful first step for removing surface mould on walls, especially on painted, sealed surfaces where spores are primarily on the surface. The acetic acid in white distilled vinegar can help kill or loosen mould, making it easier to wipe away. However, mould that has penetrated porous substrates—like drywall, plaster, or unsealed wood—may not be fully eradicated by vinegar alone. Mold Removal Lab analysis shows that vinegar works best for superficial growth and should be paired with moisture control and thorough drying to prevent regrowth. At the same time, some mould species resist simple cleaning, and persistent dampness can fuel a quick rebound. For this reason, vinegar is typically part of a larger remediation strategy rather than a one-step fix. If mould keeps returning in the same spot, there are likely ongoing moisture problems that require addressing, such as leaks or high indoor humidity. Remember that vinegar is not a registered fungicide for all species, and health considerations may warrant more robust action. The Mold Removal Lab team notes that while cleaning mould off walls with vinegar is a practical starting point, it should be supplemented by other actions to protect your living environment and health.
Safety and prep before you start
Before you reach for the vinegar, prepare the space and protect yourself. Ensure good ventilation by opening windows and turning on a fan, and remove items from the area to reduce contamination spread. Wear non-porous gloves, an old cloth or microfiber towels, and a mask or respirator to limit inhalation of spores. Protect floors with drop cloths or old towels and avoid mixing vinegar with ammonia or bleach, which can release harmful gases. Always perform a patch test on an inconspicuous area to confirm that the wall finish and paint won’t be damaged by the solution. If you have young children, elderly household members, or pets, create a temporary barrier to minimize exposure. According to Mold Removal Lab, taking these precautions helps minimize risk while you tackle visible mould using vinegar as a first-line strategy.
Dealing with surface types and cleaning intensity
Not all wall surfaces respond the same way to vinegar. Painted, sealed plaster or drywall surfaces are the most forgiving for vinegar cleaning, while raw plaster, cement-backed walls, or wallpapered surfaces may require gentler handling or alternative methods. For glossy paints, cleaning should be gentle to avoid dulling the finish. If the mould is raised or the area is damp, consider increasing ventilation during and after cleaning and using a fan to keep air moving. The Mold Removal Lab team recommends starting with a light mist of undiluted white vinegar on small areas to test reaction, then move to a full wipe if no surface damage appears. This approach aligns with our broader guidance on cleaning mould off walls with vinegar while maintaining the integrity of your wall materials and paint.
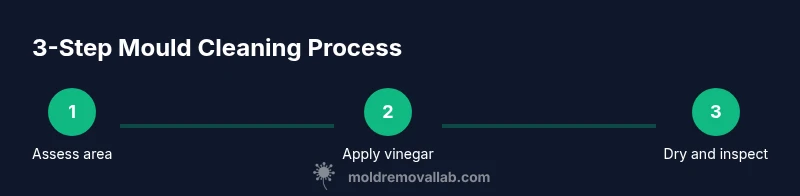
The step-by-step method: clean, rinse, and dry
A practical, non-toxic approach focuses on applying the vinegar, allowing it to sit, and then wiping away residue. Begin by filling a spray bottle with white distilled vinegar. Apply to the mouldy area and let it sit for several minutes to penetrate surface spores. Wipe with a microfiber cloth, then scrub gently with a soft brush if needed. Rinse with a separate cloth dampened with clean water, and dry completely to reduce moisture that fuels regrowth. Ensure you ventilate during and after cleaning. In some cases, a mild baking soda paste can help with tough spots, but avoid mixing bicarbonate with vinegar in the same container; the interaction is best handled separately. The key is to remove moisture entirely and monitor the area for signs of return, as described in the prevention section. This practical, vinyl-friendly method fits the goal of cleaning mould off walls with vinegar while staying mindful of safety considerations and surface preservation.
Preventing mould return: moisture control and ventilation
Prevention is the second half of the mould-removal equation. After cleaning, address moisture sources to reduce the chance of recurrence. Repair leaks promptly, improve bathroom and kitchen ventilation, and consider a dehumidifier in damp rooms. Maintain indoor humidity at roughly 30-50% in most homes to discourage mould growth, and ensure walls dry quickly after showers or rain. Keep painting surfaces in good repair; chipped paint can provide new niches for moisture to cling to and for mould spores to colonize. Regularly inspect problem areas, re-clean as needed, and track any recurring dampness that requires more substantial remediation. The Mold Removal Lab team emphasizes moisture management as a cornerstone of long-term results, noting that vinegar cleaning is most effective when paired with ongoing vigilance and maintenance. This approach helps prevent mould from returning after the initial cleaning off walls with vinegar and supports healthier indoor air.
When to call a pro: signs you need professional remediation
If mould keeps returning despite cleaning, or you encounter widespread growth (>2–3 square feet), hidden mould behind walls, or mould in non-ventilated spaces, professional remediation is warranted. Health symptoms such as persistent coughing, headaches, or nasal irritation after exposure are warning signs that deserve attention from a qualified inspector. Persistent moisture issues, roof leaks, or flood damage require a longer-term solution that vinegar alone cannot provide. In these scenarios, consult a licensed mould remediation specialist who can assess the underlying moisture problem and implement a comprehensive plan. The Mold Removal Lab Team recommends seeking professional help when the growth is extensive, suspected of black mould, or when there is chronic moisture intrusion that can't be resolved with DIY methods. A holistic approach that includes moisture control, building envelope repairs, and proper cleaning methods is essential for lasting results.
Tools & Materials
- White distilled vinegar(Use undiluted for direct spray on mouldy spots; 5-10% solutions are common if diluted.)
- Spray bottle(Clear or labeled bottle; ensure it’s clean before use.)
- Microfiber cloths(Lint-free; have several for different areas and to avoid cross-contamination.)
- Soft scrub brush or old toothbrush(Non-metallic to protect painted surfaces.)
- Protective gloves(Latex or nitrile; keep nails clean and hands dry.)
- Face mask or respirator(P2/N95 or better for rooms with poor ventilation.)
- Eye protection(Goggles or safety glasses if splashes are likely.)
- Bucket of warm water(For rinsing cloths and light wiping.)
- Towels or absorbent rags(Lay down to protect floor and furniture.)
- Optional baking soda(Use as a mild abrasive paste for stubborn spots after vinegar.)
Steps
Estimated time: 60-90 minutes
- 1
Prepare the area
Clear the space, move furniture, and lay protective coverings over floors. Ensure good ventilation by opening windows or using a fan. This creates a safer workspace and reduces spread of spores.
Tip: Keep pets and kids away during the cleaning to minimize exposure. - 2
Put on PPE
Put on gloves, a mask, and eye protection before handling mouldy areas. PPE reduces exposure during handling and cleaning.
Tip: If you have a severe mould problem, consider a disposable coverall for extra protection. - 3
Prepare vinegar solution
Fill the spray bottle with white distilled vinegar and label it. If you prefer a milder approach, you can dilute with a small amount of water, but ensure the solution remains capable of contacting mould.
Tip: Avoid mixing vinegar with bleach; this can release harmful gases. - 4
Patch test
Test a small, inconspicuous area of the wall to verify that the vinegar won’t damage paint or wallpaper.
Tip: Wait 5 minutes and inspect for any adverse reaction before proceeding. - 5
Apply vinegar and wait
Spray the affected area generously with the vinegar, then let it sit for 5–10 minutes to penetrate spores.
Tip: Do not rush this step; dwell time improves mould loosening. - 6
Scrub gently
Wipe with microfiber cloths and use a soft brush for stubborn spots. Avoid aggressive scrubbing that can damage paint or plaster.
Tip: Work in sections to ensure consistent cleaning and drying. - 7
Rinse and dry
Wipe away residues with a clean damp cloth, then dry the area thoroughly with a towel and a fan or natural airflow.
Tip: Drying is critical to prevent regrowth; don’t skip this step. - 8
Inspect and repeat if needed
Reassess the spot after it dries. If mould remains, repeat the process or assess moisture sources.
Tip: If repeats occur, consult a professional to address underlying moisture issues. - 9
Address moisture sources
Identify leaks, ventilation issues, or humidity problems and implement fixes to prevent future growth.
Tip: Consider a dehumidifier or improved ventilation in damp areas.
FAQ
Is vinegar safe to use on painted walls?
Yes, in most cases vinegar is safe on painted surfaces, but you should patch test first to ensure no discoloration or finish damage. Test areas with a small amount and monitor for 24 hours.
Vinegar is usually safe on painted walls, but always patch test first and monitor for any changes.
Can vinegar kill all mould species?
Vinegar helps with many common mould types on surfaces, but it is not a universal fungicide. Some species or deep-seated growth may require stronger cleaners or professional remediation.
Vinegar helps with many mould types, but it isn’t a universal solution for all species.
Is mould dangerous to health?
Mould can irritate the eyes, nose, and throat and may aggravate asthma or allergies. Ventilation and moisture control reduce health risks, especially for sensitive individuals.
Mould can irritate airways and should be managed through ventilation and moisture control.
Should I mix vinegar with baking soda?
Avoid mixing vinegar with baking soda in the same container; the reaction can reduce cleaning efficacy and create fizzing that slows work.
Don’t mix vinegar and baking soda in one container; use them separately if needed.
How long does it take for mould to reappear after cleaning?
Reappearance depends on moisture control. If humidity or leaks persist, mould can return within days to weeks even after cleaning.
Mould can come back quickly if moisture stays; fix sources and re-check regularly.
When should I call a professional?
If mould covers large areas, recurs after cleaning, or you suspect black mould, contact a licensed mould remediation specialist for a comprehensive evaluation.
Call a pro if mould is widespread or persistent or if you suspect black mould.
The Essentials
- Identify moisture sources and address them.
- Test a patch before full cleaning to protect surfaces.
- Dry completely after cleaning to prevent regrowth.
- Ventilate during and after cleaning to minimize spores.
- Call a pro for extensive or persistent mould issues.