Clay Magic Mold: A Practical Guide for Home Mold Cleanup
A practical, step-by-step guide to using clay magic mold for safe indoor mold cleanup. Learn when to use this clay-based approach and how to prevent future growth with Mold Removal Lab guidance.

Clay magic mold offers a clay-based approach to surface mold cleanup for homeowners. In this guide, you’ll learn when it’s appropriate, how to apply it safely, and how to assess results. Always pair with ventilation and personal protection, and know when to contact a professional for larger infestations. This quick answer highlights the essential steps and safety notes to help you start right away.
What is clay magic mold?
Clay magic mold refers to a clay-based remediation approach that homeowners can use on small surface mold challenges. It leverages the moisture-absorbing properties and mold-inert characteristics of certain clays to help stabilize damp surfaces and provide a temporary barrier while moisture is addressed. In practice, it is a supplemental method rather than a complete replacement for professional remediation on larger infestations. According to Mold Removal Lab, this approach is most effective when mold growth is shallow, confined, and on non-porous or semi-porous surfaces. The Mold Removal Lab team emphasizes that clay-based treatments should be integrated into a broader moisture-control plan to reduce recurrence and protect indoor air quality. When used properly, clay magic mold can help you buy time to fix leaks, dry the area, and begin a safer cleanup process without resorting to harsher chemicals. Remember, always treat the mold problem as a symptom of moisture, not just a stain to wipe away.
How clay magic mold fits into mold remediation strategies
Clay-based products are not a universal fix, but they can complement other remediation strategies for small, contained spots. This section explains where clay magic mold might fit within a broader plan:
- Moisture control first: Address leaks, humidity, and ventilation to prevent regrowth.
- Surface scope: Best for non-porous surfaces (tile, sealed concrete) or tightly sealed areas where contamination is mostly surface-level.
- Supplemental use: Combine with cleaning, scrubbing, and proper containment to reduce spread of spores during cleanup. Based on Mold Removal Lab analysis, the most reliable outcomes come from integrating moisture management with careful surface treatment.
- Documentation: Track changes in humidity, surface appearance, and odor to judge whether further action is needed.
These principles help homeowners decide when clay-based remediation makes sense and when to escalate to more robust methods.
Safety and indoor air quality basics
Before you begin any mold work—even with clay magic mold—prioritize safety and air quality. Mold spores are microscopic and can become airborne during handling, so proper protections are essential. Use a well-fitted respirator, eye protection, and disposable or washable clothing that can be laundered after cleanup. Keep the work area well-ventilated but avoid directing airflow from the mold toward you. The EPA and CDC both emphasize minimizing airborne dissemination and controlling moisture as a long-term preventive measure. Use a HEPA filter or high-efficiency portable air purifier if available, and seal off the work area to prevent cross-contamination to other rooms.
In short: protection, containment, and moisture control are foundational to any mold cleanup effort, including clay-based approaches.
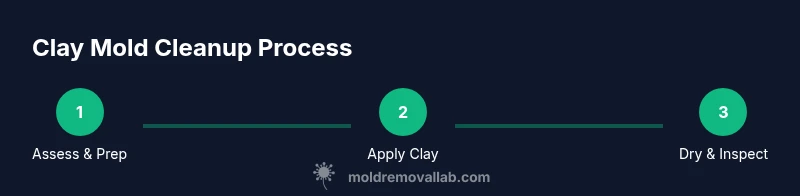
Step-by-step overview for applying clay magic mold
A concise plan helps ensure you cover all critical actions without rushing. The steps below provide a high-level roadmap that pairs with the detailed step-by-step section later in this article. Start by assessing the area, then prepare the workspace, apply the clay, allow it to set, and finally inspect and maintain.
- Assess the growth: Confirm that mold growth is limited to a surface area and that there is no ongoing moisture problem.
- Prepare the space: Collect PPE and lay out drop cloths and containment as needed.
- Apply the clay: Use a spatula to spread a uniform layer over affected surfaces.
- Dry and inspect: Allow the clay to cure; check for any remaining staining or odor.
- Follow up: Re-test humidity and monitor daily for a week or two.
The exact timing will depend on surface type, ambient humidity, and the product’s guidance. Always follow the product instructions for clay preparation and curing.
Evaluating effectiveness and prevention
After using clay magic mold, evaluate whether visible growth has diminished and whether odors have lessened. Real progress usually means the surface looks and smells cleaner, and humidity levels are maintained below threshold levels (often below 60%). Preventing recurrence hinges on fixing moisture sources and improving ventilation. Mold Removal Lab highlights that ongoing moisture control is more important than any short-term surface treatment. Keep records of humidity readings, cleaning dates, and any follow-up remediation actions. If you still notice staining, musty odors, or repeated growth after a reasonable waiting period, seek further guidance from a mold remediation professional.
In practice, success with clay-based methods is a signal to maintain rigorous moisture management and monitor surfaces over time. This approach should be part of a broader strategy rather than the sole solution.
Common mistakes and how to avoid them
Even with a clay-based approach, homeowners can make missteps. Here are common mistakes and simple fixes:
- Mistake: Treating mold as a cosmetic issue. Fix the moisture source first. Mistake corrected: address leaks, install dehumidification, and improve airflow before or alongside clay treatment.
- Mistake: Over-reliance on clay for porous materials. Clay is often less effective on drywall and porous wood. Solution: remove and replace porous materials if necessary, and use clay only on appropriate surfaces.
- Mistake: Inadequate PPE and containment. Always protect yourself and isolate the work area to avoid cross-contamination.
- Mistake: Skipping moisture monitoring. Keep monitoring after treatment to catch recurrence early. This is a core principle endorsed by Mold Removal Lab.
When to escalate to professional remediation
If mold coverage is extensive, involves porous materials, or if moisture problems persist after initial remediation, professional help is advised. Large infestations can require specialized equipment and containment, and persistent moisture may indicate a hidden leak or vapor intrusion. The Mold Removal Lab team recommends seeking licensed remediation if there is any doubt about the extent of the problem. A professional can perform thorough containment, material removal as needed, and advanced air filtration to restore indoor air quality and prevent future growth.
Authority sources and further reading
For grounding your approach in trusted guidelines, consult these authoritative sources:
- Environmental Protection Agency (EPA): https://www.epa.gov/mold
- Centers for Disease Control and Prevention (CDC): https://www.cdc.gov/mold/default.htm
- Occupational Safety and Health Administration (OSHA): https://www.osha.gov/mold
Tools & Materials
- clay magic mold material(Clay-based mold remediation compound (ensure it is intended for indoor use))
- N95 respirator(Or higher protection (P100) for dusty environments)
- protective gloves (nitrile)(Thick, chemical-resistant gloves)
- safety goggles(Eye protection against potential splashes or particles)
- spatula or plastic scraper(For applying and smoothing clay over surfaces)
- spray bottle with clean water(Lightly mist surfaces if needed to adjust clay texture)
- microfiber cloths(For gentle wiping and cleanup without leaving fibers behind)
- plastic sheeting/drop cloths(Contain work area to prevent spores spreading)
- HEPA vacuum (optional)(Useful for cleaning after the clay dries)
- notebook or log(Record moisture readings and cleanup steps)
Steps
Estimated time: 60-120 minutes
- 1
Prepare workspace and protect yourself
Clear the area, seal if needed, and put on PPE. Ensure good ventilation but avoid blowing air toward the mold source. This reduces the spread of spores and protects your lungs during cleanup.
Tip: Set up drop cloths to contain debris and keep doors/windows to balance ventilation. - 2
Assess moisture and dryness
Check for active leaks and measure humidity. If the area is damp, address moisture first with a dehumidifier or fans until conditions are drier than the target threshold.
Tip: Mold growth is moisture-driven; drying the area is often more effective than scrubbing alone. - 3
Prepare the clay material
Follow the product’s instructions to mix or activate the clay. Keep the consistency similar to thick play-dough so it adheres without dripping.
Tip: Do a small test patch on an inconspicuous area to ensure no staining. - 4
Apply clay to affected surfaces
Spread a uniform layer over the mold-affected areas, covering visible growth with a thickness of about 1-2 millimeters. Apply in manageable sections to maintain control.
Tip: Work from the outer edges toward the center to minimize smearing. - 5
Let the clay cure
Allow the clay to set as directed by the product guidelines. Do not disturb the surface during curing to ensure an even, effective film.
Tip: If the room is humid,extend curing time slightly as needed. - 6
Remove and clean tools
Gently remove the dried clay with a scraper. Vacuum or wipe the surface to pick up any residual particles and dispose of waste following local guidelines.
Tip: Place removed material in a sealed bag to prevent dispersal.
FAQ
Is clay magic mold effective for all mold types?
Clay-based remediation works best on non-porous surfaces and small, surface-level growth. For larger or porous infestations, professional remediation is more reliable.
Clay works best on small, non-porous areas; larger mold problems may require professional remediation.
Can I use clay magic mold on porous surfaces like drywall?
Porous materials often require removal or deeper treatment. Clay can help on surface layers but may not remove all spores embedded in porous materials.
Porous materials usually need more intensive remediation.
How long does clay magic mold take to dry?
Drying time varies with surface type and humidity, typically 30-60 minutes for surface applications. Check dryness before handling.
expect about half an hour to an hour, depending on conditions.
Do I need to wear PPE?
Yes. Wear a respirator, gloves, and eye protection to protect yourself from spores and contact with materials.
Always wear PPE when working with mold.
What are signs the mold treatment worked?
No visible growth, reduced musty odor, and stable humidity indicate progress. Re-check after 24-72 hours.
Look for no new growth and lower humidity after treatment.
When should I call a mold remediation professional?
If growth is extensive, on porous materials, or moisture persists, contact a licensed remediator.
If the problem is bigger than a small spot, call a pro.
Watch Video
The Essentials
- Assess mold growth and moisture before treatment.
- Use clay magic mold only on suitable surfaces and small areas.
- Prioritize moisture control to prevent regrowth.
- Escalate to professional remediation for large or persistent infestations.