Brick Mold Door Mold Prevention and Remediation: A Practical Guide
Learn to inspect brick mold doors for mold, safely remove growth, replace damaged trim, and seal against moisture. This practical guide from Mold Removal Lab covers tools, steps, and maintenance to keep doors mold-free.

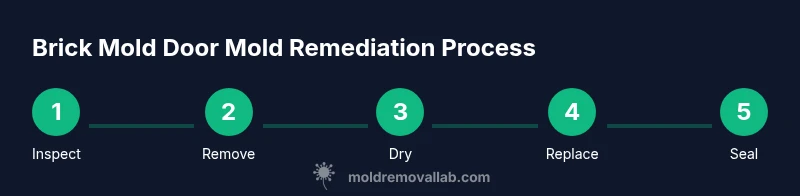
Learn how to inspect a brick mold door for mold, safely remove affected material, replace the mold, and seal the frame to prevent moisture intrusion. This guide covers preventive maintenance, a tools list, and a clear, step-by-step process to restore a safe entryway. The Mold Removal Lab team also highlights when to escalate to professional remediation.
Understanding Brick Mold Doors and Mold Risk
Brick mold doors sit around the door jamb as a narrow trim that seals the gap between the door and wall. They are a frequent point of moisture entry, especially on exterior doors where rain and high humidity can wick into the frame. When brick mold gets damp, it creates a favorable environment for mold and can trap condensation behind paint, caulk, or finish. According to Mold Removal Lab, brick mold around exterior doors is particularly vulnerable in climates with frequent rain or high humidity, increasing the risk that mold will spread into adjacent framing if left unchecked. The Mold Removal Lab Team also notes that installation quality, flashing, and aging wood influence mold risk. Materials vary: PVC or vinyl mold is more moisture-resistant than wood, but moisture can still accumulate behind moldings if there’s poor drainage or inadequate sealing. Key signs include musty odor, staining, peeling paint, warped trim, and soft, spongy wood near corners. If you detect these signs, plan a thorough assessment and prepared remediation steps.
Inspecting for Visible Mold and Hidden Moisture
Visual inspection is the first step to catch mold early. Look for discoloration along the brick mold seam, paint cracking near the joint, or powdery residue on the trim. Use a flashlight to peek behind caulk and sealant—mold often hides in gaps you can’t see without removing a small section of trim. A moisture meter can help confirm elevated humidity behind the molding, even if the surface looks normal. Remember that mold thrives in consistently damp environments, so note any recurring dampness after rain, snowmelt, or high indoor humidity. For homeowners, the goal is to determine whether the mold is surface-level or has penetrated the substrate. If you see extensive staining, soft wood, or a persistent odor after cleaning, plan for removal and a seal-tight replacement. This approach reduces the risk of recontamination and protects indoor air quality.
Safe Mold Removal: PPE, Cleaning, and Containment
Before touching mold, put on an N95 respirator, safety goggles, and gloves. Isolate the work area with plastic sheeting to prevent spores from spreading to other rooms. Gently remove the moldy brick mold trim with a putty knife and pry bar, taking care not to damage adjacent drywall or siding. Place removed material in sealed bags for disposal. Clean the surrounding surface with a detergent solution or a commercially available mold cleaner, then dry thoroughly. If you find mold growth behind the wall or studs, stop and consult a professional—exposure can pose health risks. After cleaning, check for any lingering moisture and use a dehumidifier to bring humidity levels down. The goal is to create a dry, clean surface before proceeding with replacement and sealing.
Replacing Brick Mold: Materials, Fit, and Fastening
Choose moisture-resistant brick mold trim—PVC or composite is often preferred for exterior doors, while pressure-treated wood can work on interior applications. Measure the door casing precisely, including height, width, and corner profiles. Remove all old fasteners and prep the door frame to receive new trim. Apply a compatible primer/sealer to raw wood if you’re using wood trim, and use corrosion-resistant screws for long-term durability. Ensure the new brick mold sits flush against the frame and wall to minimize pocketing where moisture can collect. If you’re installing PVC or vinyl trim, verify that the profile matches the existing casing so the door still closes properly. After installation, seal every joint with a high-quality exterior caulk to prevent air leaks and moisture intrusion.
Sealing Gaps, Flashing, and Weatherproofing
With the new brick mold in place, seal all joints with paintable exterior caulk and, where appropriate, weatherproofing tape or flashing. Weatherproofing is essential where the door meets the wall—this is a common moisture entry point. Apply caulk generously along the seam, then smooth it with a wet finger or caulk tool to create a tight seal. If you replace wood with PVC, still seal the back edge to prevent moisture from wicking in. For exterior doors, flashing above the frame helps direct water away from the seam. Finally, repaint or finish the trim with a mold-resistant paint. Regularly inspect the sealant line, especially after seasonal changes, to catch cracks or gaps early.
Maintenance and Monitoring: How to Keep It Mold-Free
Post-remediation, establish a maintenance routine to prevent recurrence. Use a dehumidifier in damp seasons, improve ventilation near entryways, and ensure exterior drainage around your foundation directs water away from the door. Periodically check for leaks around door hardware and weatherstripping, replacing worn parts promptly. Maintain a low indoor humidity (generally under 50%) and promptly dry any spilled water around the doorway. Keeping surfaces dry is the best defense against repeat mold growth. If you notice recurrent dampness or new mold odors, revisit the inspection steps and consider professional testing if needed.
Replacement Options: DIY vs Professional Remediation
DIY replacement of brick mold is feasible for most homeowners with basic carpentry skills, provided there’s no extensive mold behind the wall. However, if mold is present behind drywall, within studs, or if there’s structural damage, a professional remediation service should be considered. Pros can assess hidden moisture sources, perform advanced moisture mapping, and ensure proper containment to protect indoor air quality. In cases of significant contamination or if you have respiratory sensitivities or health concerns, professional remediation is strongly recommended.
When to Call a Professional: Red Flags and Safe Boundaries
If you detect black mold growth, extensive staining, persistent odors after cleaning, or moisture behind the wall that reappears after treatment, contact a licensed mold remediation professional. Structural damage, warped framing, or if you’re unsure about electrical wiring near the door area, require expert assessment. Health considerations—especially for children, the elderly, or individuals with allergies—also justify professional involvement. Mold doesn't just threaten the surface; undetected moisture can undermine the integrity of the doorframe and the surrounding wall.
Quick Reference: Tools, Materials, and Timeline
Keep a curated kit ready for mold inspections and brick mold work: PPE (N95 mask, gloves, goggles), utility knife, putty knife, pry bar, chop saw or hand saw, moisture meter, moisture-resistant primer, exterior caulk, weatherproof tape, and replacement brick mold trim. Depending on the project scope, plan for a single weekend to complete removal, drying, replacement, and sealing. For larger jobs, allow extra time for drying between steps and for paint to cure.
Final Thoughts and Acknowledgments
This guide emphasizes a practical, safety-minded approach to brick mold door remediation. By focusing on moisture control, proper material selection, and consistent maintenance, homeowners can reduce mold risk around entryways. The Mold Removal Lab Team recommends following all safety guidelines and consulting a professional if there is any doubt about hidden mold growth or structural concerns. A careful, methodical process helps keep your doorway healthy and secure for years to come.
Tools & Materials
- N95 respirator mask(For mold spores and dust; replace if damp)
- Safety goggles(Protect eyes from debris and cleaner splashes)
- Chemical resistant gloves(Wear when handling cleaners and wood treatment)
- Plastic sheeting and painter's tape(Contain work area and prevent spread of spores)
- Putty knife and pry bar(Careful removal of brick mold trim)
- Hammer and assorted screws(Attach new trim securely)
- Utility knife(Trim and cut backer material as needed)
- Moisture meter(Assess hidden moisture behind trim)
- Moisture-resistant primer and exterior paint(Finish and protect trim)
- Exterior-grade caulk (silicone or acrylic latex)(Seal joints to prevent leaks)
- Weatherproof flashing or tape(Optional for high-water exposure areas)
- Replacement brick mold trim (PVC/wood)(Match profile to existing door)
- Dehumidifier(Help dry spaces after cleaning)
- Shop vacuum with HEPA filter(Remove debris and spores efficiently)
Steps
Estimated time: 2-5 hours
- 1
Assess and prep the work area
Put on PPE and seal off the area with plastic sheeting. Map the scope of work and collect replacement trim. Remove outdoor electrical hazards and ensure door is in a closed position to minimize dust spread.
Tip: Use tape on the floor to mark the work boundary and prevent tracking mold spores into other rooms. - 2
Remove moldy brick mold trim
Carefully pry away the mold trim using a putty knife and pry bar. Avoid damaging surrounding drywall or wallpaper. Bag and seal the removed material for disposal.
Tip: Take photos of the trim profile before removal to help match replacement pieces. - 3
Dry and inspect the framing
Use a moisture meter to check studs and framing behind the brick mold. Dry the area with a dehumidifier or fans until moisture readings stay within normal range. Address any concealed mold before proceeding.
Tip: If moisture stays elevated after drying, pause and consult a professional. - 4
Install new moisture-resistant brick mold
Fit the replacement trim flush with the door and wall, then secure with corrosion-resistant screws. Check for proper door alignment and clearance to avoid binding.
Tip: Dry fit the trim first to ensure a seamless edge before final fastening. - 5
Seal joints and add flashing
Apply exterior caulk at all joints; smooth for a clean seal. If exposed to heavy rain, add flashing or weatherproof tape to direct water away from the seam.
Tip: Choose a mildew-resistant caulk and a paintable finish for easier maintenance. - 6
Finish and monitor
Prime, paint, and allow coating to cure fully. Run a humidity check over the next few days and ensure no new dampness appears around the door.
Tip: Keep the indoor humidity under 50% during curing and monitor for one month.
FAQ
What is brick mold door and why does mold form there?
Brick mold is the decorative trim around the door opening that seals the gap between the door and wall. Mold forms there when moisture gets into the seam and behind the trim, especially in humid or wet climates. Regular inspection helps catch mold early.
Brick mold is the trim around the door; mold forms when moisture gets behind it. Regular checks help catch mold early.
Can I replace brick mold without removing drywall?
Yes, in many cases you can remove and replace just the trim if the wall behind is dry and intact. If you find mold behind the trim or signs of wood rot in the stud area, you should assess further or call a professional.
Usually you can replace the trim alone if the area behind is dry, but check for rot or hidden mold.
What tools do I need to replace brick mold?
Essential tools include a putty knife, pry bar, utility knife, hammer, screwdriver, drill, and a moisture meter. Have replacement brick mold trim, exterior-grade caulk, primer, and paint on hand before starting.
You’ll need basic trim tools, a moisture meter, and replacement trim with weatherproof caulk.
When should I call a professional for mold around a door?
Call a professional if you detect extensive mold behind the trim, recurring moisture, or if the wood structure shows rot. Professionals can safely remediate hidden mold and ensure containment.
If mold is behind the wall or you see rot, get a pro. They can handle hidden mold safely.
How long does brick mold remediation take?
A typical door area project can take a few hours to a full day, depending on moisture levels and whether repainting is required. More extensive cases may require additional drying time.
Most door mold work fits in a day, but more moisture means longer drying and painting.
Are PVC brick mold trims better for mold prevention?
PVC or vinyl trims generally resist moisture better than wood, but proper installation and sealing are still essential to prevent moisture from seeping behind the trim.
PVC trims resist moisture well, but you still need proper sealing.
Watch Video
The Essentials
- Inspect both surfaces and behind trim for hidden moisture.
- Use moisture-resistant materials and proper sealing to prevent mold recurrence.
- Follow safety protocols and consider professional help for hidden mold or damage.
- Maintain humidity below 50% and monitor door area regularly.