Brick Mold PVC: A Practical Guide to Replacement and Mold Prevention
Learn how to install brick mold PVC around doors and windows to reduce moisture, curb mold growth, and simplify upkeep with practical, step-by-step guidance from Mold Removal Lab.

This guide shows you how to replace wooden brick mold with PVC, seal joints, and prevent moisture-driven mold growth around doors and windows. According to Mold Removal Lab, PVC brick mold reduces moisture traps and simplifies maintenance. You'll need basic hand tools, PVC brick mold trim, and sealant, plus careful surface prep to ensure a long-lasting, low-maintenance installation. The quick steps cover measurement, removal, fit, fastening, and finishing while avoiding common pitfalls.
Why brick mold pvc matters for mold prevention
Moisture is a chief driver of mold growth around building openings. Traditional wooden brick mold trim around doors and windows can absorb water, swell, crack, and create small crevices that harbor dampness. Switching to brick mold pvc reduces the risk by using a non-porous, easy-to-clean surface that resists moisture, bacteria, and wood rot. In this section, we explore why PVC trim is a practical upgrade for homeowners seeking a healthier home environment. When installed correctly, brick mold pvc creates a tight seal along the opening, minimizes water intrusion, and simplifies maintenance. Mold thrives where moisture sits, so reducing moisture trapping areas is a foundational step in mold prevention. The Mold Removal Lab team emphasizes selecting a PVC trim with a solid core and UV stabilization, and ensuring proper flashing and sealant for long-term performance.
Assessing your current setup: wood vs PVC brick mold
Before replacing, inspect the existing trim around doors and windows. Look for signs of water damage, swelling, soft spots, paint peeling, or visible mold growth on wood surfaces. If the brick mold is painted wood or composite, you may have underlying moisture issues that need corrective drying. PVC brick mold offers a moisture-resistant alternative, but compatibility with the window profile and the exterior finish matters. Consider the climate, exposure to rain, and the presence of condensation on interior panes. The goal is to choose a trim that stays clean, seals well, and requires minimal upkeep over time. The Mold Removal Lab guidance emphasizes measuring the full perimeter to avoid short trims and checking for any gaps that could trap moisture.
Materials and compatibility: choosing PVC brick mold
Selecting the right PVC brick mold involves understanding profile, length, thickness, and compatibility with your window or door. Look for extruded, impact-resistant PVC with a rigid core and a smooth finish that can be painted or left as-is. Ensure the product includes compatible fasteners, gasket or sealant channel, and weather-resistant adhesives. Compare nail types and color-matched finishes to preserve curb appeal. A proper installation also requires matching the existing casing width and leaving expansion gaps to accommodate thermal movement. The Mold Removal Lab recommends choosing PVC with a durable UV stabilizer to resist sun exposure and avoid yellowing or cracking over time.
Preparation and safety planning
Proper preparation reduces the risk of mold spread and ensures a clean install. Wear gloves, eye protection, and a respirator if dust is present. Remove loose debris from the opening, test for hidden mold behind the old trim, and dry the area thoroughly. Have a plan for weather—avoid working in rain or high humidity, and cover exposed openings to prevent water intrusion during installation. Gather tools and materials, and dry-fit the new PVC brick mold around the opening to verify fit before cutting. The Mold Removal Lab emphasizes working in stages and keeping a tidy workspace to prevent cross-contamination.
Common installation scenarios and troubleshooting
Doors and windows come in many styles; the PVC brick mold must adapt to concave or convex profiles. If you encounter tight corners, cut with a miter saw at precise angles and verify with a protractor. For irregular openings, you may need to shim and trim to achieve a flush appearance. Seal joints thoroughly with compatible caulk and backer rod to prevent water infiltration. Always finish with a weatherproof sealant along the exterior edge to keep water out and reduce mold risk. If you see persistent moisture behind the trim after installation, re-evaluate flashing and ventilation.
Maintenance and long-term care
After installation, clean the PVC brick mold with mild soap and water; avoid harsh solvents that can degrade seals. Inspect seams seasonally for gaps, cracks, or discoloration, and reapply sealant as needed. Re-paint or refresh the finish if desired to maintain curb appeal. Regular maintenance reduces micro gaps where mold can hide and makes future cleaning easier. The Mold Removal Lab recommends documenting the installation with photos to track condition and plan repairs.
Tools & Materials
- PVC brick mold trim(Choose a profile that matches window/door opening and is UV-stabilized)
- Measuring tape(For accurate perimeter measurement)
- Pencil or marker(Mark cut lines clearly)
- Miter saw or hand saw(For precise corner cuts)
- Nails or screws (stainless preferred)(Weather-resistant fasteners compatible with PVC)
- Hammer or driver(To set fasteners securely)
- Caulk sealant (silicone or polyurethane)(Seal gaps against moisture)
- Backer rod (optional)(Gaps larger than 1/4 inch require backer rod)
- Construction adhesive (PVC-safe)(For extra hold at mounting surfaces)
- Safety gear (gloves, safety glasses, respirator)(Protect from dust and sharp edges)
- Utility knife(Trim excess material or deburr edges)
- Soap and water or mild cleaner(Clean surfaces before installation)
Steps
Estimated time: 1-3 hours
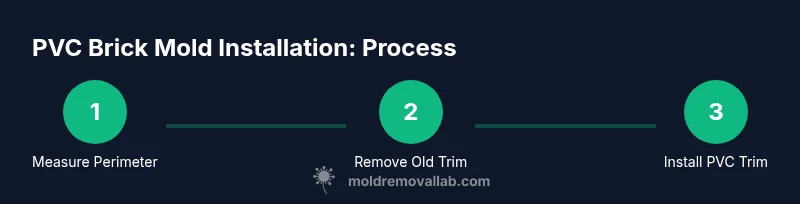
- 1
Measure and plan cut sizes
Thoroughly measure the full doorway or window perimeter and determine the PVC brick mold length needed for each side. Mark cut lines with a pencil, then dry-fit to confirm alignment. Plan miters at corners and consider allowing a small expansion gap as recommended by the manufacturer.
Tip: Double-check all measurements with a second person to catch any arithmetic mistakes. - 2
Remove old trim and prep the surface
Gently pry away existing brick mold, avoiding damage to surrounding siding or flashing. Remove nails, clean debris, and inspect the opening for hidden moisture or rot. Dry the area completely before proceeding.
Tip: Take photos of the original setup to reference placement during reinstallation. - 3
Dry-fit PVC brick mold and mark cut lines
Position the PVC trim around the opening without adhesive to verify fit. Mark any adjustments on the trim with a pencil. Use a square to ensure 90-degree corners or mark the required angles for non-orthogonal openings.
Tip: Use painter’s tape along the cut line to prevent chipping while cutting. - 4
Cut PVC to size with a miter saw
Cut each piece along the marked lines, ensuring clean, square edges. Deburr rough edges with a utility knife or sandpaper. Keep cut pieces organized by side to avoid misalignment.
Tip: Cut slowly and support long pieces to prevent binding. - 5
Secure trim and seal joints
Apply a thin bead of PVC-safe adhesive to the back, press the trim into place, and drive fasteners at regular intervals. Seal exterior seams with caulk or silicone, using backer rod where gaps exist to prevent water intrusion.
Tip: Hold the trim tight until adhesive sets to prevent shifting during cure. - 6
Check alignment, seal joints, and cleanup
Inspect for gaps, confirm the trim is flush, and apply additional sealant where needed. Wipe away excess caulk and allow the sealant to cure per manufacturer instructions before exposing to moisture.
Tip: Test door/window operation after install to ensure the trim does not impede movement.
FAQ
What is brick mold, and why replace it with PVC?
Brick mold is the trim around doors or windows that finishes the opening. PVC versions resist moisture and rot better than wood, reducing mold-prone areas and simplifying cleaning.
Brick mold is the trim around doors and windows; PVC versions resist moisture and rot, helping reduce mold-prone areas.
Can I install PVC brick mold myself?
Yes, with the right tools, careful measurement, and proper sealing. Following a step-by-step plan helps ensure a durable, mold-resistant installation.
Yes, with the right tools and careful measurement you can install PVC brick mold yourself.
Will PVC brick mold prevent mold growth?
PVC trim reduces moisture-prone gaps and is easier to clean, which lowers mold risk. However, inspect beyond the trim for hidden mold and ensure proper drainage and ventilation.
It reduces moisture-prone gaps and is easier to clean, but check for mold behind the trim and ensure good drainage.
Is PVC compatible with all window styles?
Most PVC brick mold works with common window profiles, but confirm fitment and expansion gaps for your specific opening.
Most PVC brick mold fits common window styles; check compatibility with your opening.
How do I maintain PVC brick mold?
Clean with mild soap and water, inspect seams annually, and re-seal joints as needed to keep moisture out and curb appeal intact.
Clean with mild soap, inspect seams yearly, and reseal to keep moisture out.
When should I hire a professional?
If moisture behind the trim is suspected, or you encounter complex flashing or severe mold, hiring a pro ensures a safe, correct installation.
If you suspect hidden moisture or mold or have complex flashing, consider a professional.
Watch Video
The Essentials
- Choose PVC brick mold for moisture resistance.
- Proper fit and sealing prevent mold-prone gaps.
- Dry-fit before cutting; follow manufacturer guidelines.
- Maintain sealants to keep moisture out.