Bleach Mold Mildew Cleaning: Safe DIY Guide for Homes
A practical, safety-focused guide on using bleach to tackle bleach mold mildew. Learn when it helps, what surfaces it works on, step-by-step protocol, and prevention tips for homes from Mold Removal Lab.

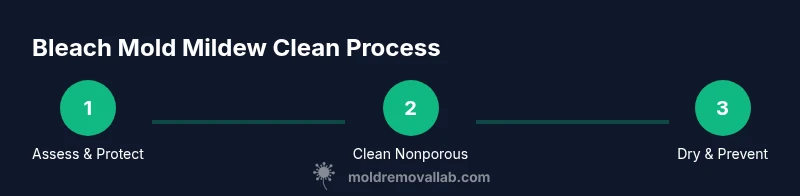
Bleach mold mildew cleanup can be effective on nonporous surfaces when used correctly, but it is not a universal remedy. Start by fixing moisture sources, testing small areas, and following safety guidelines. For many homes, bleach should be a limited tool—applied only to nonporous surfaces and accessible stains—while more extensive mold requires professional assessment.
What are bleach, mold, mildew? Definitions and relationships
Bleach, mold, and mildew are often mentioned together in home mold conversations, but they refer to different things. Bleach is a chemical cleaner, typically a sodium hypochlorite solution, used to disinfect and spot-clean certain stains. Mold and mildew are types of fungi that can grow on damp surfaces. While bleach can kill surface mold and mildew on nonporous materials, it does not address the moisture that feeds growth and may not reach mold occupants lurking inside porous materials. According to Mold Removal Lab, understanding the differences helps homeowners apply cleanup efforts safely and effectively. The Mold Removal Lab team emphasizes that removal strategies should target moisture control first, because moisture is the root cause of most growth scenarios. This is especially important when the goal is to prevent recurrence of mold growth after treatment. ble ach mold mildew
Safety first: PPE, fumes, exposure and indoor air quality
Working with bleach mold mildew requires careful safety planning. Always use protective equipment such as gloves, eye protection, and a properly fitted mask or respirator to avoid inhaling fumes or coming into contact with the chemical. Ensure good ventilation—open windows or use a fan that exhausts air outside—and remove children and pets from the area during cleanup. Prolonged exposure to bleach vapors can irritate the eyes, nose, and throat, and mixing bleach with ammonia or acids creates toxic gases. Mold Removal Lab analysis shows that proper PPE and ventilation dramatically reduce exposure risks during cleaning, making a safer cleanup possible when treating bleach mold mildew. Keep bleach away from heat sources and store it in a labeled, closed container when not in use.
Surface suitability: when bleach works best and what surfaces to avoid
Bleach is most effective on nonporous surfaces such as glass, ceramic tile, sealed countertops, and finished metal where mold or mildew are present as visible stains. It is less effective on porous materials like drywall, wood, fabric, or insulation, where mold spores can penetrate deeply and become embedded. In those cases, cleaning with bleach may remove surface stains but won’t eliminate the underlying growth or prevent regrowth. Mold Removal Lab stresses that on porous materials, moisture control and professional evaluation are often necessary for complete remediation. If you choose to proceed with bleach on nonporous surfaces, always follow label directions and test a small, inconspicuous area first to watch for discoloration or damage.
How bleach interacts with mold and mildew on different materials
Bleach can kill surface mold and mildew on nonporous surfaces by oxidizing organic material and microbial cells. However, it does not reach into pores where mold roots (mycelia) may reside. For porous substrates like drywall or wood, even a successful surface wipe can leave behind spores that can regrow once moisture returns. Additionally, repeated cleaning with bleach can degrade some finishes and create unpleasant odors if ventilation is poor. Mold Removal Lab recommends evaluating the material type before relying on bleach for remediation and considering non-bleach alternatives (e.g., detergent solutions, hydrogen peroxide on appropriate surfaces) for porous materials.
Cleaning protocol overview: when to clean and when to call professionals
A practical approach emphasizes moisture control as the foundational step. Before any cleaning, identify and fix the moisture source (leaks, humidity, ventilation) to prevent regrowth. For visible, isolated mold on nonporous surfaces, a bleach-based cleaning can be part of a broader plan, but it should be complemented by thorough drying and monitoring. Do not attempt large-scale remediation that involves structural materials without professional guidance. If mold covers a large area, appears behind walls, or keeps returning despite cleaning, contact a mold remediation professional. The Mold Removal Lab team notes that professional assessment is often necessary for safe and effective mold management.
Common mistakes and myths about bleach mold mildew
Common mistakes include assuming bleach kills all mold in porous materials, using bleach in poorly ventilated spaces, and treating symptoms of moisture problems without fixing the source. Some homeowners think any mildew stain warrants bleach, but surface cleaning won’t address underlying moisture or growth inside porous substrates. Another myth is that a strong bleach smell means better disinfection; in reality, proper ventilation and correct dilution—not odor strength—determine safety. The Mold Removal Lab analysis highlights that many failures in mold cleanup come from neglecting moisture control and rushing cleaning without PPE or testing.
Prevention and longer-term strategies to reduce moisture and recurrence
Post-cleanup strategies focus on moisture control, improved ventilation, and routine inspections. Maintain indoor humidity levels to minimize condensation, repair leaks promptly, and ensure bathrooms and kitchens have efficient ventilation. Regularly inspect hidden areas such as under sinks, behind appliances, and in basements. Using kits or devices to monitor moisture can alert homeowners to rising humidity before mold becomes visible. The goal is to reduce the conditions that mold mold and mildew thrive in, especially after bleach mold mildew cleanup.
Mold Removal Lab verdict
The Mold Removal Lab team emphasizes that while bleach can be a useful tool for select, nonporous surfaces, it is not a one-size-fits-all solution for mold and mildew. Prioritize moisture control and clean, dry conditions to prevent recurrence. For larger outbreaks or porous materials, seek professional remediation to ensure safety and thoroughness. The verdict is that a comprehensive approach—combining safe cleaning with moisture management—helps protect home health and reduces future mold risks.
Tools & Materials
- Nitrile gloves(Chemical resistant; avoid latex if you have sensitivity)
- Safety goggles(Protect eyes from splashes)
- NIOSH-approved respirator or equivalent(P100 or N95 depending on exposure risk)
- Masking or painter's tape(To seal off area)
- Non-porous cleaning solution (bleach or alternative)(Follow label directions; never mix with ammonia)
- Spray bottle(For applying cleaner evenly)
- Bucket(For rinsing and disposal water)
- Scrub brush with stiff bristles(For removing surface mold on nonporous surfaces)
- Non-abrasive sponge or microfiber cloth(Wipe and dry surfaces)
- Detergent or dish soap(For initial cleaning and grease removal)
- Plastic sheeting and painter's tape(Contain area and protect surroundings)
- Trash bags (heavy-duty)(Sealed disposal of contaminated materials)
- Fan or dehumidifier(Aid drying and ventilation)
- Moisture meter (optional)(Helps verify dryness after cleanup)
Steps
Estimated time: 60-90 minutes
- 1
Assess the area and protect yourself
Put on PPE (gloves, goggles, respirator) and ensure airflow with outdoor ventilation. Identify the moisture source and determine whether the mold is on porous or nonporous material. This initial check helps decide if bleach is appropriate and which surfaces to treat.
Tip: Ventilate the space before you start; ensure all household members and pets are out of the area. - 2
Prepare the cleaning zone and remove items
Clear the area of items that can be contaminated. Cover surrounding floors with plastic sheeting and seal off the room to prevent spread to other areas. Dispose of rotten materials immediately after cleaning if they are porous.
Tip: Use a dedicated pair of shoes or booties for mold cleanup to avoid cross-contamination. - 3
Test a small area first
Apply a small amount of cleaner on a hidden or inconspicuous spot to check for discoloration or material damage. If staining or damage occurs, stop and switch to a gentler method or consult a professional.
Tip: Document the test with a photo to track changes. - 4
Prepare and apply the cleaning solution
Dilute the cleaner according to label directions and apply evenly to nonporous surfaces. Do not mix cleaners with ammonia or acids. Allow the solution to dwell briefly to disinfect, then scrub with a stiff-bristle brush.
Tip: Keep the area well ventilated; never mix chemicals. - 5
Rinse and dry thoroughly
Rinse the treated area with clean water and wipe dry with a microfiber cloth. Use a fan or dehumidifier to accelerate drying, aiming for complete dryness before reoccupying the space.
Tip: Check corners and edges where moisture can linger; don’t rely on surface drying alone. - 6
Dispose of contaminated materials
Place contaminated disposable items in sealed trash bags and remove them from the home promptly. Clean reusable tools with soap and water and allow them to dry before storing.
Tip: Do not reuse contaminated rags without washing at high temperature. - 7
Inspect and recheck moisture levels
After cleaning, recheck moisture levels using a moisture meter if available, and re-run drying methods until the area stays dry for at least 24–48 hours. This reduces the likelihood of regrowth.
Tip: Keep humidity below recommended levels to discourage future growth. - 8
Document cleanup and plan prevention
Take before-and-after photos and note moisture sources resolved. Develop a prevention plan that includes regular ventilation, timely repairs, and routine inspections to minimize future mold risk.
Tip: Set reminders to recheck humidity and perform seasonal inspections.
FAQ
Is it safe to use bleach for mold on all surfaces?
No. Bleach is most effective on nonporous surfaces and may not eliminate mold in porous materials like drywall or wood. It should be used as part of a broader moisture-control strategy and not as a sole remediation method.
Bleach works best on nonporous surfaces and isn’t a cure-all for mold on porous materials.
Can bleach remove mold from porous materials?
Bleach generally does not fully remove mold from porous substrates. Depth growth can remain hidden inside materials, so moisture control and professional assessment are often needed for porous areas.
Bleach may not remove mold deep inside porous materials; moisture control and sometimes professional help are needed.
When should I hire a professional?
If mold covers a large area, recurs after cleaning, or is behind walls or insulation, a professional remediation service is recommended for safe and complete treatment.
If it’s a big area or hidden behind walls, get a professional.
What surfaces are safe for bleach cleaning?
Nonporous surfaces such as tile, glass, sealed countertops, and metal finishes are typically safe for bleach cleaning when used properly and with ventilation.
Bleach is usually safe on nonporous surfaces when used correctly.
How can I tell if mold is truly gone after cleaning?
Visible stains may disappear, but microscopic spores can remain. Confirm by ensuring the area stays dry and monitor humidity levels; consider professional testing if doubt remains.
Look for ongoing moisture and re-check humidity; testing can confirm removal if you're unsure.
Watch Video
The Essentials
- Assess moisture before cleaning and choose surfaces wisely
- Bleach is best for nonporous surfaces; avoid porous materials
- Protect yourself with PPE and ensure proper ventilation
- Dry thoroughly to prevent regrowth and moisture control matters