Cleaning Mold Bleach: Safe, Effective Home Remediation
Learn how to use cleaning mold bleach safely with practical steps, safety tips, and alternatives for mold remediation at home. Mold Removal Lab guides homeowners.

According to Mold Removal Lab, cleaning mold with bleach is effective only on non-porous surfaces and when moisture is controlled. This guide outlines safe, evidence-based methods, proper dilution, ventilation, and when to avoid bleach and seek professional remediation. By following the steps and safety tips, homeowners can reduce mold growth and protect indoor air quality.
What cleaning mold bleach is and when to use it
Bleach is a chemical disinfectant labeled for cleaning. It can kill surface mold on non-porous surfaces like tile, glass, and enamel if moisture problems are addressed. On porous materials—such as drywall, wood, or fabric—bleach often cannot penetrate deeply; mold may remain hidden, and the underlying material can be damaged if aggressively treated. Practical mold remediation with bleach is most appropriate for small, localized growth on non-porous areas after removing the moisture source, cleaning debris, and ensuring the area dries thoroughly. The Mold Removal Lab team emphasizes moisture control as the deciding factor: if dampness persists, remediation should pause and moisture sources corrected before continuing.
Safety and PPE: protecting yourself during cleanup
Before any cleaning, set up good ventilation by opening windows and using a fan to blow air to the outside. Wear chemical-resistant gloves, eye protection, and a properly fitted mask or respirator. Keep pets and children away from the work area. If you have asthma or chemical sensitivities, consider postponing and consult a professional. Never mix bleach with ammonia or acids, as dangerous fumes can form. Always follow product label directions and stop if you experience irritation or headaches.
Surface types and testing to decide if bleach is appropriate
Start by visually assessing the surface. Non-porous surfaces respond better to bleach, while porous materials may only have surface mold removals. For porous materials, remove the contaminated portion when possible and consult remediation guides. When in doubt, test a small, inconspicuous patch first to observe color change, texture, and odor. Use a mold test kit only as a supplementary tool; proper moisture control remains the primary remedy.
How to mix and apply bleach correctly
Use only household bleach labeled for cleaning and mix with clean, cool water in a well-ventilated area as directed on the label. Apply with a clean sponge or brush, scrub the surface gently, and rinse with clean water after a short contact time. Dry the area completely—excess moisture will encourage regrowth. Do not saturate porous materials; if they show extensive growth, discard or seal off the area and seek professional help. Remember never to mix bleach with ammonia or acids.
Common mistakes that fail and how to avoid them
Common mistakes include scrubbing aggressively on porous materials, skipping moisture control, and assuming cheap products are always effective. Bleach can create fumes and skin irritation; use PPE and work in a well-ventilated space. Do not mix cleaners; rely on label instructions and avoid prolonged humidity. For large infestations or hidden mold behind walls, professional remediation is the safer option.
Alternatives to bleach for mold remediation
Hydrogen peroxide and white vinegar are popular home remedies, but they may not eliminate all mold species or penetrations. Some products contain specialized mold cleaners formulated for different surfaces; read labels and test small areas first. For extensive growth, consider professional products and guidance. Always prioritize moisture control and drying to prevent recurrence.
Aftercare: drying, moisture control, and preventing regrowth
After cleaning, dry the area fully, fix leaks, and improve ventilation to limit future growth. Consider using dehumidifiers, exhaust fans, or air purifiers to manage humidity levels. Regular inspections after rain or plumbing events help catch issues early. Document any persistent mold growth and seek professional assistance if growth recurs or covers a large area.
Tools & Materials
- Household bleach (labeled for cleaning), unscented(Use in well-ventilated area; never mix with ammonia or acids.)
- Disposable gloves (nitrile or rubber)(Protect skin; extend to forearms.)
- Safety goggles or face shield(Protect eyes from splashes.)
- N95 respirator or equivalent(Mask to reduce inhalation of fumes.)
- Soft scrub brush or sponge(Gentle scrubbing to lift surface mold.)
- Clean cloths or disposable towels(Wipe and dry surfaces; replace as needed.)
- Water spray bottle(Mist to moisten surfaces for cleaning.)
- Sealable plastic bags(Contain contaminated materials for disposal.)
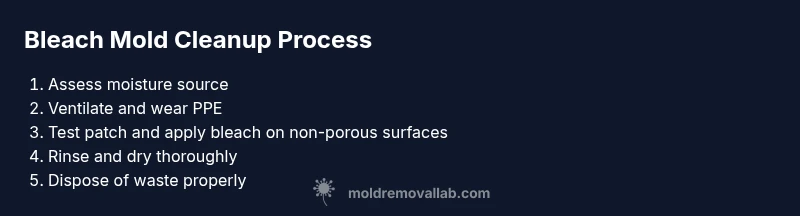
Steps
Estimated time: 60-90 minutes
- 1
Inspect moisture source and assess mold
Identify the moisture source (leak, humidity, condensation) and check the extent of mold growth. Document areas with visible growth and areas that feel damp to the touch. This helps determine whether bleach is appropriate and which surfaces to treat.
Tip: Address moisture before cleaning to prevent regrowth. - 2
Protect yourself and ventilate the space
Put on PPE (gloves, goggles, respirator) and ensure good ventilation. Open windows or run a fan to push air outside. This reduces exposure to fumes and skin irritation during cleaning.
Tip: Keep doors to unaffected rooms closed to limit cross-contamination. - 3
Prepare the bleach solution and test a spot
If using bleach on non-porous surfaces, prepare the solution per label and apply to a small test patch to observe for discoloration or adverse reaction before proceeding.
Tip: Do not mix with ammonia or acids; always follow label directions. - 4
Scrub and rinse the contaminated area
Scrub the surface gently with a scrub brush or sponge to lift mold, then rinse with clean water. Avoid soaking porous materials; if water penetrates deeply, stop and consider alternative remediation.
Tip: Wipe the area dry with a clean cloth to remove residual moisture. - 5
Dry thoroughly and recheck for moisture
Use towels and fans to dry completely and re-check for dampness. A damp environment invites regrowth, so ensure dryness before closing up.
Tip: Measure humidity with a gauge if possible and maintain below 60% humidity. - 6
Dispose of waste and clean tools
Seal contaminated materials in bags and discard according to local guidelines. Clean and store tools for future use, ensuring no cross-contamination with clean areas.
Tip: Wash hands and exposed skin after handling moldy materials.
FAQ
Is bleach the best option for mold cleanup?
Bleach can be effective on non-porous surfaces when moisture is controlled, but it is not a universal solution. It may not reach mold inside porous materials and can be unsafe if misused. Consider surface type and extent of growth before choosing bleach.
Bleach works on non-porous surfaces when moisture is controlled, but it isn't always the best option for every mold situation.
Can bleach be used on porous materials like drywall or wood?
Bleach has limited penetration on porous materials; mold can live behind the surface. For porous materials, safer options include removing contaminated material or using products designed for porous surfaces, and always address moisture first.
Bleach isn’t ideal for porous materials because it can’t reach hidden mold.
How long should surfaces stay wet with bleach?
Always follow the product label for contact time and ensure the area is well-ventilated. Do not rely on a fixed duration; extend only as recommended by the label and environmental conditions.
Follow the label for how long to keep surfaces wet; ventilate well.
When should I hire a professional?
For large areas, hidden mold behind walls, persistent odor, or ongoing moisture problems, a professional remediation service is the safest option. They can assess structural issues and ensure thorough drying.
If mold covers a lot of area or is behind walls, call a professional.
Are there health risks with bleach and mold exposure?
Bleach fumes can irritate the eyes, nose, and lungs, especially in poorly ventilated spaces. Use PPE and ensure ventilation; avoid mixing with other cleaners.
Bleach fumes can irritate skin and lungs; ventilate well.
Can bleach remove the odor associated with mold?
Bleach can kill mold on surfaces but odor may persist if moisture remains. Address moisture and clean hidden sources to reduce odors; consider air purifiers for ongoing improvement.
Bleach kills surface mold, but odors may linger if moisture isn't controlled.
Watch Video
The Essentials
- Bleach is best on non-porous surfaces when moisture is controlled
- Ventilate and wear PPE to stay safe during cleanup
- Moisture control is the critical step to prevent regrowth
- Consider alternatives or professionals for porous surfaces or large infestations