How to Remove Black Mould on Windows
Practical, tested steps to identify, clean, and prevent black mould on windows. Learn safe methods, moisture control tactics, and when to hire a pro for lasting results.

By the end of this guide, you will safely remove black mould on windows and stop it from returning. You’ll learn exact steps, appropriate PPE, and how to dry and ventilate properly. We’ll help you decide when DIY is appropriate and when professional remediation is advisable, plus moisture-control tactics to keep panes, sills, and frames mold-free over time.
What causes black mould on windows
According to Mold Removal Lab, persistent moisture from condensation, poor ventilation, and leaks around window frames create the ideal conditions for black mould on windows. The Mold Removal Lab team found that even small daily humidity fluctuations can sustain colonies on sills, jambs, and glazing beads. In winter, temperature swings and restricted airflow worsen growth, particularly in bathrooms, kitchens, and rooms facing north walls. Spores can travel via indoor air and settle on cold surfaces where condensation forms. A routine check for damp patches, peeling paint, or crumbly caulk around windows is a practical first step. With gradual observation over a few weeks, you can identify patterns — does mould appear after showers, when the heat is on, or after rainfall? Addressing root causes—air leaks, inadequate insulation, and high indoor humidity—reduces ongoing exposure and protects the rest of the home.
How to assess severity on your windows
Not every presence of black mould on windows requires the same response. Start with a visual assessment: size of affected area, texture (fuzzy vs. shiny), and color intensity. If the patch covers more than a square foot, or if there is visible swelling in wood trim or soft materials like curtains in contact with the frame, you should escalate to more thorough testing or professional remediation. The Mold Removal Lab team recommends treating even small patches promptly to prevent microcolonies from expanding. Use a moisture meter to measure condensation levels at the sill and interior edge of the gasket. If readings stay above typical indoor humidity, you have a ventilation or infiltration problem that needs fixing. Keep a simple log: date, room, window type, humidity, and what cleaning method you used. This helps you track whether interventions reduce mould regrowth over time.
Safety first: PPE and ventilation
Protecting yourself is the first step when dealing with black mould on windows. Always wear a disposable respirator rated at least N95 (or a reusable half-face mask with P100 filters), chemical-resistant gloves, protective goggles, and long sleeves. Open nearby windows or use a mechanical exhaust fan to create directional airflow during cleaning. If there is active water leakage, address that root cause before you start; cleaning mould in the presence of ongoing moisture will only provide a temporary fix. Use a secondary room or containment barrier if the area is larger than a small patch. Moisture control after cleaning—dehumidifiers, fans, and constant monitoring—prevents rapid re-growth.
Cleaning options: DIY methods and when to avoid
DIY mould cleanup is feasible for small, surface-level patches on nonporous window frames. Common household products include white vinegar, baking soda, hydrogen peroxide, and mild dish soap. Vinegar alone can kill many mould species on nonporous surfaces, but it may be less effective on porous wood or particleboard components around windows. Hydrogen peroxide is a stronger oxidizer and can be useful for encrusted mould on glazing beads. Bleach is often discussed, but it is not always the best option indoors near wood or on porous materials because it can degrade finishes and produce harmful fumes in poorly ventilated spaces. For large patches, or if the mould smells musty or you have respiratory issues, consider professional remediation. Always test a small, inconspicuous area first to ensure surface safety, and never mix cleaners.
A practical remediation plan for window mould (overview)
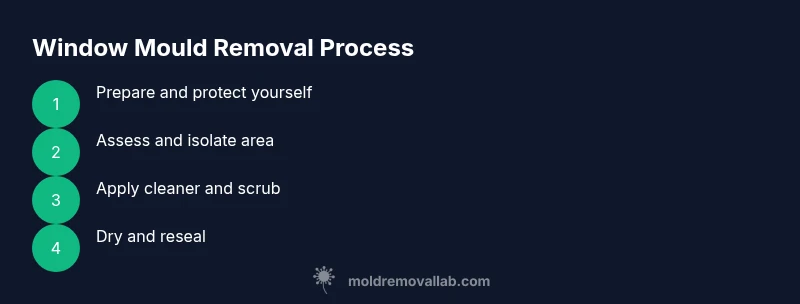
A structured plan reduces guesswork and helps prevent re-growth. Step one focuses on containment and safety. Step two targets moisture sources—condensation, leaks, and ventilation deficits. Step three covers mould removal with appropriate cleaners for the surface type. Step four emphasizes drying and preventing new moisture ingress. Step five involves re-sealing any gaps and replacing degraded caulk or foam. Throughout, monitor humidity levels and ventilate after cleaning. The aim is not only to remove visible mould but also to minimize microscopic spores that can seed future colonies on windows or surrounding walls.
Moisture management and condensation control for windows
Windows are a common choke point for moisture; a slightly cooler surface collects more humidity, especially in climates with high ambient moisture. Practical guidance includes using a dehumidifier in rooms containing windows, keeping relative humidity below 50-60%, and addressing cold bridges with weatherstripping or insulation. Daily habits such as warming the interior pane with gentle heat before heavy condensation forms can reduce damp patches. Ensure proper airflow by using exhaust fans in baths and kitchens and keeping blinds or curtains off the glass to prevent damp pockets. Regularly cleaning window sills and tracks helps remove standing moisture that mould uses to take hold. Based on Mold Removal Lab analysis, moisture control is the most effective long-term solution to prevent black mould on windows.
Cleaning agents: pros, cons, and safe usage
Different products work best on different window surfaces. White vinegar is a cost-effective, mild antimicrobial; spray it on, let it sit for 60 minutes, then wipe with a microfiber cloth. For tougher mould on glass, hydrogen peroxide 3% can be applied and left to fizz for 10 minutes before wiping; it is generally safe for most glazing materials. Baking soda paste helps with odour and texture on sills but needs thorough rinsing to avoid film. Do not mix cleaners—particularly bleach and ammonia—because of dangerous vapors. For porous wood frames, clean the surface with a non-ammonia detergent, then thoroughly dry and seal any porous material to limit future moisture uptake. After cleaning, re-check with a moisture meter to confirm humidity is sufficiently low.
Drying, sealing, and reassembling window components
After mould removal, thorough drying is essential. Use fans and a dehumidifier to bring moisture down quickly, and keep windows open when weather permits to promote air exchange. Re-seal gaps with mildew-resistant caulk or expanding foam, and consider upgrading condensation-prone glazing with low-emissivity glass or improved weatherstripping. Ensure window frames and sills are completely dry before reinstalling hardware or re-applying finishes. A quick test: spray a little water on the cleaned area; if no damp patches appear within 24 hours, you have achieved adequate drying.
Long-term prevention: design, maintenance, and routine checks
Annual inspections of sealants, caulk, and weatherstripping can catch early signs of moisture intrusion. Use vented exhausts, keep interior humidity under control, and ensure bathrooms and kitchens have efficient exhaust fans that vent outdoors. Consider upgrading to double-glazed or energy-efficient units if condensation is persistent. Keep indoor plants away from windows that regularly show damp patches. A maintenance routine that includes quarterly checks for mould-prone surfaces and a simple moisture log helps you detect patterns and respond quickly before mould becomes a broader issue.
Documentation, insurance, and landlord considerations
If you are renting, document mould growth with dated photos and notes about the affected area and any repairs you request. Insurance policies sometimes cover remediation if mould results from covered water leaks; read policy language to understand exclusions. When you have evidence of moisture problems around windows, present a plan for remediation with timelines. Keeping a written record supports claims and ensures your rights are protected. Returning to a safe home involves both cleaning and addressing root causes.
Common mistakes and myths debunked
Many homeowners assume all mould is dangerous in the same way; not all mould requires the same level of remediation. The key is to identify growth patterns on windows and focus on moisture sources. Bleach is not a universal cure for black mould on windows, especially on porous materials. Also, sealing nails and caulk that are water-damaged is essential; simply painting over mould often fails and leads to re-growth. Another myth: mould disappears after a quick wipe; spores can remain latent and rebound if moisture returns. Finally, never ignore a musty odor; it indicates hidden growth behind trims or drywall.
When to call a professional and what to expect
For extensive or recurring mould on windows, or if you have allergies or respiratory issues, professional remediation is advised. A licensed contractor will perform a thorough assessment, containment, cleaning with specialized equipment, moisture control, and a re-check plan. They will also identify and repair structural causes and guide you on humidity targets, air exchange, and window sealing. Expect a documented report, a scope of work, and a follow-up moisture check to verify success. The Mold Removal Lab team recommends seeking professional help when mould coverage is extensive, persistent, or accompanied by health symptoms.
Tools & Materials
- Nitrile gloves(Disposable, size large or extra-large)
- Protective mask (N95 or P100)(Fit-tested if possible)
- Goggles or face shield(Splash protection)
- Microfiber cloths (lint-free)(Multiple for cleanup and drying)
- Spray bottle for cleaners(Label concentrations clearly)
- White vinegar(For mild mould on nonporous surfaces)
- Hydrogen peroxide 3% solution(For tougher patches on glass)
- Baking soda(Odour control and gentle scrubbing)
- Non-abrasive scrub brush or sponge(Gentle on glass and frames)
- Trash bags(Seal mouldy materials before disposal)
- Dehumidifier or fan(Helps drying and humidity control)
- Weatherproof sealant or mildew-resistant caulk(Only after surfaces are completely dry)
- Tissue or PPE disposal bags(For contaminated waste)
Steps
Estimated time: Total time: 60-120 minutes for cleaning plus 24-48 hours drying
- 1
Prepare and protect yourself
Put on PPE, clear the area, and lay out cleaning supplies. Ensure pets and children are out of the space. Ventilate the zone to reduce inhalation of mould spores during the cleaning process.
Tip: Double-check your respirator fit and avoid touching your face while handling mouldy materials. - 2
Inspect and isolate
Identify the extent of growth and seal off the area to prevent spores from spreading to adjacent rooms. Remove or cover items near the window that could absorb moisture or become contaminated.
Tip: Use painter's tape to mark the boundary and avoid cross-contamination. - 3
Apply cleaning solution
Choose a non-porous surface cleaner (vinegar or hydrogen peroxide). Apply generously and let sit for the recommended contact time to break down the mould filaments before scrubbing.
Tip: Never mix cleaners; start with a test spot to confirm surface safety. - 4
Scrub and rinse
Scrub mouldy patches with a non-abrasive brush or sponge. Wipe away loosened mould with a microfiber cloth and rinse with clean water. Repeat as needed for stubborn spots.
Tip: Rinse tools frequently to avoid re-distributing spores. - 5
Dry thoroughly
Use a fan or dehumidifier to accelerate drying. Keep the area well-ventilated for at least 24-48 hours to prevent regrowth.
Tip: Check for remaining damp pockets behind trim or caulk; address moisture sources if found. - 6
Re-seal and monitor
Replace degraded caulk or seals and ensure the area is completely dry before resealing. Monitor humidity and visual signs over the next several weeks to catch early regrowth.
Tip: Set a monthly reminder to inspect the window area for condensation.
FAQ
What causes black mould on windows?
Black mould on windows is usually driven by moisture from condensation, leaks, and poor ventilation around window frames. Spore-laden air meets cold surfaces and damp areas, forming visible colonies. Addressing the moisture source is the most effective prevention.
Mould on windows is mostly caused by moisture and poor airflow. Fix the moisture source, and you reduce future mould growth on windows.
Is black mould on windows dangerous to health?
Mould exposure can irritate the eyes, skin, and lungs, especially for people with asthma or allergies. Not all mould is equally hazardous, but persistent growth near living areas warrants careful cleaning and moisture control. If you have health concerns, consult a professional.
Mould can irritate breathing and eyes; people with allergies should be extra cautious and consider professional help for large areas.
Can I remove black mould on windows myself?
For small, non-porous patches, DIY cleaning with safe cleaners is reasonable. Porous wood or extensive growth near frames should prompt professional remediation. Always wear PPE and ventilate the space.
Small patches can be cleaned at home, but bigger or porous areas are best left to pros.
How long does it take to dry after cleaning?
Drying time varies with humidity and airflow, typically 24-48 hours. Use a dehumidifier or fan to speed up drying and prevent quick re-growth.
Most spots dry within a couple of days with good airflow; keep humidity low during that period.
Should I use bleach to kill mould on windows?
Bleach can be effective on non-porous surfaces but is not ideal for wood frames and may release harmful fumes in enclosed spaces. Prefer milder cleaners for porous materials and ensure thorough drying afterward.
Bleach isn’t always the best choice, especially on wood; pick a safer alternative and dry well.
When should I call a professional?
Call a professional if mould covers large areas, recurs after cleaning, or if you have health risks. A pro will assess moisture sources, perform containment, and provide a moisture-control plan.
If growth is extensive or keeps coming back, it’s time to bring in a pro.
Watch Video
The Essentials
- Act quickly on signs of mould around windows.
- Moisture control is the most effective long-term prevention.
- Choose cleaning agents suited to surface type and avoid mixing chemicals.
- Dry thoroughly and reseal to prevent re-growth.
- Seek professional help for extensive growth or health concerns.