Mold on Window Frame: A Practical Remediation Guide
Learn practical, safe methods to identify, clean, and prevent mold on window frames. This step-by-step guide covers solutions, moisture control, and maintenance to keep your home healthy and mold-free.

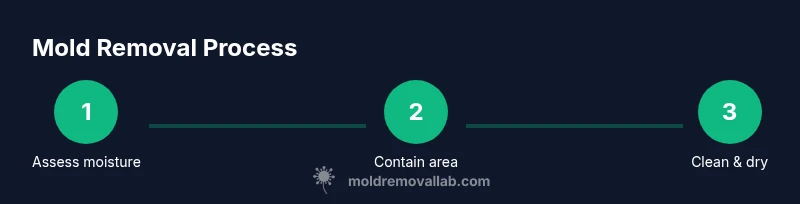
You can safely remove mold on a window frame by identifying the moisture source, isolating the area, and cleaning with an appropriate solution, followed by thorough drying and ongoing moisture control. For wood frames, use hydrogen peroxide or a mild detergent; for non-porous frames, a diluted bleach solution is effective. Always wear PPE and ventilate well.
What mold on window frame is and why it matters
Mold on window frame is a common sign of moisture intrusion that can affect indoor air quality and, over time, damage framing materials. Mold can appear as black, green, or white spots on wood, PVC, or painted surfaces. While many mold species are not immediately dangerous, prolonged exposure can irritate the eyes, skin, and lungs, especially for sensitive individuals. The Mold Removal Lab team emphasizes that fundamentally, moisture control stops mold growth. If you notice persistent staining or a musty odor around a window, start by identifying the moisture source—condensation, leaks, or poor ventilation—and act quickly to remove the mold and dry the area. According to Mold Removal Lab, moisture control is the key to stopping mold growth around window frames.
Common moisture sources behind window frame mold
Window frames can harbor mold when humidity is high or when leaks allow water to seep behind trim and into wall cavities. Condensation from warm indoor air hitting a cold window creates a persistent surface layer of moisture, especially in bathrooms, kitchens, or rooms with poor insulation. Leaks from roof valleys, gutter overflow, or window seals can also introduce standing water behind the frame. Poor ventilation traps humid air inside, feeding mold growth even after initial cleaning. The Mold Removal Lab analysis shows that addressing moisture intrusion, not just cleaning the visible mold, dramatically reduces recurrence around window frames.
Quick assessment: test for active mold and moisture
A practical assessment starts with a visual check for actively growing mold and dampness. Look for fuzzy or slimy patches, a musty smell, and signs of staining that persist after cleaning. Use a moisture meter to compare the wood or framing substrate to baseline readings; consistently high readings indicate ongoing moisture. If you notice mold growth exceeding a few square inches, or if the area remains damp after cleaning, plan for more aggressive moisture control and consider professional evaluation. For most homes, a small, contained area cleaned with proper PPE and a drying strategy is sufficient to begin remediation.
Safety and preparation before cleanup
Safety comes first: wear an N95 respirator, eye protection, and chemical-resistant gloves. Seal off the work area with plastic sheeting to contain spores, and set up a fan or dehumidifier to promote drying away from living spaces. Remove or cover nearby furnishings to prevent contamination. If the underlying material is porous and shows deep staining or structural damage, plan for replacement rather than only cleaning. Always ventilate the space and wash hands and clothing after handling moldy materials, even if you wore PPE.
Cleaning methods for different surfaces
Different surfaces require different cleaning approaches. For non-porous frames (like PVC or metal), a diluted bleach solution (3-6% sodium hypochlorite) can be effective, but never mix bleach with ammonia. For porous or semi-porous wood, hydrogen peroxide (3%) or a mild detergent solution is often safer and less destructive; avoid aggressive solvents that can damage finishes. Spot-test a small area first to ensure colorfastness, then scrub with a soft-bristle brush or microfiber cloth. After cleaning, rinse with clean water and dry thoroughly. If paint is blistering or mold has penetrated the wood, consider priming with a mold-killing primer or replacing the affected trim.
Step-by-step cleaning plan overview
Begin by clearing the area and putting on PPE. Apply your chosen cleaner to the mold-affected zones, focusing on the edges and corners where moisture hides. Scrub gently to avoid damaging coatings, then rinse with clean water and dry completely. Reassess the area for any remaining mold; if present, repeat cleaning or switch to a more targeted solvent. Finally, address moisture sources to prevent regrowth—repair leaks, improve ventilation, or install a dehumidifier. The goal is to create a dry, inhospitable environment for mold for the long term.
Drying, inspection, and preventing regrowth
After cleaning, ensure the area dries completely within 24-48 hours. Use fans and a dehumidifier to accelerate drying, remove any damp materials, and inspect for hidden moisture behind trim or in wall cavities. Apply a mold-resistant paint or sealant to the repaired surfaces, and consider replacing porous framing sections if damage is visible. Regular checks after periods of high humidity can catch early signs of regrowth before it spreads.
When to call a professional
If the mold covers a large area (typically more than 10 square feet), if you notice mold growth in HVAC ducts, or if moisture issues persist despite cleaning, seek professional remediation. Pro technicians can safely contain mold, assess structural damage, and treat underlying moisture problems with specialized equipment. In cases of suspected black mold or mycotoxins, professional evaluation is strongly advised to protect health.
Long-term prevention and maintenance tips
Prevention hinges on moisture control. Keep indoor humidity below 50%, fix any leaks promptly, and dry surfaces after rainfall or heavy condensation. Use exhaust fans in bathrooms and kitchens, and consider weather-stripping or window upgrades to reduce condensation. Regularly inspect window frames for staining or soft spots and repaint or reseal as needed. A small, proactive maintenance routine is far more effective than a large cleanup after mold has taken hold.
Tools & Materials
- N95 respirator or equivalent(Protects against mold spores during cleanup)
- goggles or face shield(Eye protection; mold particles can irritate eyes)
- chemical-resistant gloves (nitrile or neoprene)(Protect skin from cleaners and mold contact)
- spray bottle(Hold cleaners for targeted application)
- bucket and mild detergent(For cleaning frames and sills)
- soft-bristle brush or microfiber cloth(Gently scrub mold without scratching surfaces)
- microfiber cloths or rags(Drying and wiping to prevent rewetting)
- distilled water or clean tap water(For rinsing and diluting cleaners)
- bleach solution (3-6% sodium hypochlorite)(Effective on non-porous surfaces; avoid mixing with ammonia)
- hydrogen peroxide 3%(Alternative for porous surfaces like bare wood)
- dehumidifier or fan(Promotes rapid drying and moisture reduction)
- sealed plastic bags for disposal(Contain moldy materials during cleanup)
Steps
Estimated time: 1-2 hours
- 1
Assess moisture and prep
Begin by visually inspecting the window frame and surrounding area for signs of moisture or leaks. Document any stains and identify the likely source (condensation, leaks, or poor ventilation). This helps you tailor your cleanup and prevent recurrence.
Tip: Take photos before and after to track progress and for insurance or contractor reference. - 2
Protect and isolate the work area
Contain the cleanup zone with plastic sheeting to prevent spore spread. Set up ventilation away from living spaces and gather tools within easy reach. PPE should be worn during the entire process.
Tip: Seal edges with painter’s tape to minimize cracks for airflow control. - 3
Apply cleaning solution
Apply your chosen cleaner to moldy surfaces, focusing on the edges where moisture accumulates. For wood, a peroxide solution or detergent works well; for non-porous frames, a diluted bleach solution is effective.
Tip: Test a small area first to ensure there is no surface damage or discoloration. - 4
Scrub and remove mold
Gently scrub with a soft-bristle brush or microfiber cloth, working in gentle circular motions. Avoid excessive scrubbing that can damage paints or finishes. Rinse the area with clean water as you go.
Tip: Use a separate cloth for the most contaminated areas to avoid cross-contamination. - 5
Rinse and dry thoroughly
Rinse off cleaner residues and dry the frame completely using towels and a dehumidifier or fan. Ensure all moisture is removed from crevices and behind trim where damp can linger.
Tip: Direct airflow into hidden cavities to speed up drying and prevent regrowth. - 6
Inspect and seal vulnerable spots
Check for remaining odor, residual stains, or signs of persistent dampness. Re-seal or primer over cleaned wood if needed, and apply a mold-resistant sealant where appropriate.
Tip: Consider repainting with mold-resistant paint to reduce future growth. - 7
Prevent recurrence
Address root moisture sources: fix leaks, improve attic and window insulation, and install better ventilation or a dehumidifier. Regular checks after high humidity periods help keep mold at bay.
Tip: Set a reminder to re-check windows after heavy rain or seasonal transitions.
FAQ
Is mold on a window frame dangerous to health?
Exposure can irritate eyes, skin, and lungs, especially for sensitive individuals. If growth is extensive or recurring, seek professional evaluation. Keep the area well-ventilated during cleanup.
Mold can irritate the eyes, skin, and lungs, especially if exposure is frequent. For large areas, consider professional help.
Can I remove mold on a window frame myself?
Small, non-porous mold is often manageable with PPE and household cleaners. Porous wood may require sealing after drying, and larger infestations should be handled by a professional remediation service.
Yes for small areas, but large infestations should be handled by a pro.
What cleaners work best for mold on window frames?
Hydrogen peroxide is effective on porous surfaces like wood. Diluted bleach works on non-porous surfaces, but never mix with ammonia. Always test a small area first and follow with thorough drying.
Peroxide for wood, bleach for non-porous frames, and dry completely afterward.
How can I prevent mold from returning on window frames?
Control moisture by fixing leaks, improving insulation, using exhaust fans, and keeping humidity below 50%. Regular inspections help catch moisture before mold reappears.
Keep moisture down with good ventilation and regular checks.
When should I call a professional mold remediation service?
Call a pro if mold covers a large area, if there are ongoing leaks after cleanup, or if indoor humidity remains high despite cleaning. They can safely contain mold and address structural moisture issues.
Call a pro if the mold is large or if humidity stays high after cleaning.
Watch Video
The Essentials
- Identify and fix the moisture source first.
- Use surface-appropriate cleaners and PPE during cleanup.
- Dry completely to prevent mold regrowth.
- Implement ongoing moisture control to protect framing.