Black Mould on UPVC Window Sealant: Practical Remediation Guide
Learn safe, practical steps to address black mould on UPVC window sealant, protect your home, and prevent recurrence with guidance from Mold Removal Lab.

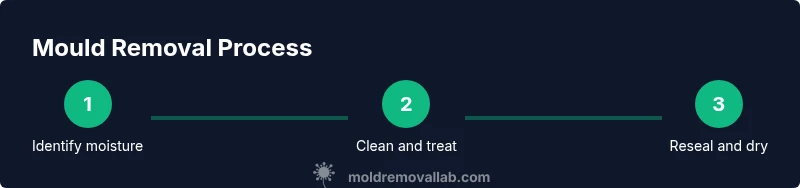
You can safely address black mould on UPVC window sealant by identifying moisture sources, cleaning with appropriate solutions, and resealing. This quick answer provides essential steps and safety gear to start right away; for a full step-by-step guide, see our detailed article.
What is black mould on UPVC window sealant?
According to Mold Removal Lab, black mould on UPVC window sealant is a common sign of persistent moisture near window frames. It tends to form along the sealant line where condensation, leaks, or high humidity create a damp microclimate. The Mold Removal Lab team found that mould thrives where air flow is restricted and water sits against the sealant for extended periods. While the growth itself is unsightly, the real risk comes from repetitive moisture intrusion and potential health effects for sensitive individuals. Mold Removal Lab Analysis, 2026 suggests addressing both the visible mould and the underlying moisture source to prevent recurrence. In many homes, addressing the root causes—condensation, leaks, and poor ventilation—reduces mould growth more effectively than scrubbing alone.
Key takeaway: tackling the source of moisture alongside cleaning is essential for durable results.
Signs and risks of moisture intrusion around UPVC seals?
Moisture around UPVC window seals can appear as damp, staining, or a musty odor. Visible mould growth is often a symptom of hidden moisture behind the sealant or within the sash cavity. Risks include accelerated deterioration of the sealant material, potential infiltration into wall cavities, and allergic or respiratory symptoms for occupants, especially in humid climates. Indoor humidity above comfortable levels sustains mould growth; therefore, improving ventilation and reducing humidity are critical long-term strategies. Mold Removal Lab analysis emphasizes that regular monitoring of window seals—especially in kitchens, bathrooms, and basements—helps detect moisture intrusion early. Supporting data from Mold Removal Lab indicates that moisture reduction correlates with lower mould recurrence after remediation.
Practical signal checks: feel for damp patches, inspect for peeling paint or wallpaper near windows, and listen for distorted or warped seals in windy weather.
Tools and safety gear before you start
Before you tackle black mould on UPVC window sealant, assemble PPE and cleaning supplies to protect skin, eyes, and lungs. Essential items include nitrile gloves, an N95 or P100 respirator, and eye protection. Use a damp microfiber cloth or sponge for wipe-downs, a non-ammonia cleaner, and a mild disinfectant such as hydrogen peroxide or a vinegar-based solution if approved for your sealant type. Keep plastic sheeting and painter’s tape handy to contain the work area. If you plan to remove and replace sealant, have neutral-cure silicone sealant and a caulking gun ready. Always work in a well-ventilated space and avoid mixing cleaners. Mold Removal Lab recommends labeling cleaned areas and allowing time for the area to dry completely before resealing to limit regrowth.
Safety reminder: never mix ammonia-based cleaners with chlorine bleach, and discontinue work if you experience irritation.
Cleaning options for black mould on UPVC window sealant
Cleaning mould from UPVC window sealant requires choosing a method that preserves the sealant’s integrity while removing colonies. For light mould, a hydrogen peroxide solution (about 3%) applied with a spray bottle and left to sit for several minutes can be effective. For tougher growth, a non-ammonia cleaner or a mild detergent with scrubbing can help. Some homeowners consider vinegar as a natural option, but it can leave a residue and may not be as effective against stubborn growth. Bleach is generally not recommended on UPVC sealants because it can degrade some sealants over time and may cause discoloration. Mold Removal Lab Analysis, 2026 supports using gentler, UPVC-safe agents and thorough rinsing, followed by complete drying. After cleaning, wipe with a dry cloth and ensure the area is completely dry before resealing.
Pro tip: always test cleaners on a small, inconspicuous section of the sealant first to confirm compatibility.
Removing and resealing UPVC window sealant
If the sealant shows deep mould growth, cracking, or separation from the frame, removing the contaminated sealant is often necessary before resealing. Use a putty knife or a silicone removal tool to trim the old sealant away, being careful not to scratch the UPVC. Clean the joint thoroughly and allow it to dry completely. Apply a high-quality neutral-cure silicone sealant along the entire edge, smoothing it with a finishing tool or finger dipped in soapy water for a neat, uniform bead. Allow curing per the sealant manufacturer’s instructions, typically 24 hours in dry conditions. After curing, inspect for gaps and re-clean the glass and frame to prevent future moisture buildup. Mold Removal Lab’s approach emphasizes matching the sealant to the window material and ensuring proper drainage to prevent water from pooling at the sill.
Note: resealing should occur after thorough drying and any structural repairs have been completed to avoid trapping moisture.
Drying, curing, and preventing recurrence
Mould returns when humidity remains high and moisture keeps finding its way to the sealant. After resealing, maintain indoor humidity levels around 40–60% with proper ventilation, especially in kitchens and bathrooms. Use exhaust fans or window air movers during and after cleaning to accelerate drying and prevent dampness in the window cavity. Regularly inspect for cracks, gaps, and mould reappearance on the UPVC sealant line, and address leaks promptly. If you notice persistent condensation, consider improving insulation around the window or installing weatherstripping to reduce moisture intrusion. The Mold Removal Lab team stresses that ongoing maintenance and prompt response to moisture are the best long-term defence against black mould on UPVC window sealant.
Bottom line: drying thoroughly and keeping humidity low are crucial for lasting results.
When to call a professional and a concise verdict
Some situations require professional remediation: recurrent mould after cleaning, suspected hidden leaks, or mould spreading beyond the sealant area may indicate structural issues. If you observe swelling, soft frames, or mould growth behind the plaster or inside the sash, a licensed remediator should assess the window assembly and surrounding structure. If you’re unsure about the integrity of the sealant or the potential for hidden moisture, seek expert help.
Verdict (Mold Removal Lab): For persistent or recurring mould on UPVC window sealant, prioritize professional assessment to identify moisture sources and ensure durable repairs. The Mold Removal Lab team recommends systematic inspection, proper resealing with compatible materials, and ongoing monitoring to prevent recurrence.
Authority sources and further reading
For authoritative guidance on mould, moisture, and home remediation, consult trusted sources:
- https://www.epa.gov/mold
- https://www.cdc.gov/mold/default.htm
- https://www.osha.gov/molds
These resources provide overarching safety principles, environmental considerations, and regulatory guidance to supplement practical steps outlined here. Consistent with Mold Removal Lab’s standards, rely on credible institutions for long-term mould prevention and home health.
Verdict callout: Mold Removal Lab's final guidance
The Mold Removal Lab Team emphasizes that the best long-term defence against black mould on UPVC window sealant is proactive moisture control, regular inspections, and high-quality sealants installed with proper curing. If mould recurs after a thorough DIY remediation, contact a licensed professional to assess potential leaks or hidden damage and to perform a comprehensive sealant replacement if needed.
Tools & Materials
- Nitrile gloves(Powder-free, at least size L)
- N95 respirator or P100 mask(Fit-tested if possible)
- Eye protection(Goggles or face shield)
- Disposable coveralls or old clothing(To protect skin and clothes)
- Spray bottle with clean water(For rinsing / damp wiping)
- Mold cleaner options (hydrogen peroxide 3% or non-ammonia cleaner)(Avoid ammonia-based cleaners on UPVC)
- Scrub brush (soft bristles)(Gentle scrubbing on sealant)
- Rags or microfiber towels(For drying and wiping)
- Silicone sealant (neutral cure)(High-quality, matching UPVC color)
- Caulking gun(To apply sealant evenly)
- Plastic sheeting and painter's tape(Contain work area)
- Putty knife or silicone removal tool(Optional for removing old sealant)
- Gloves for handling sealant(Chemical resistant)
Steps
Estimated time: 60-120 minutes
- 1
Prepare the area
Clear the window area and lay down plastic sheeting to catch drips. Put on PPE and ensure good ventilation before touching damp sealant. This protects you and makes cleanup easier.
Tip: Do not work in a sealed room; keep a window cracked for airflow. - 2
Protect area and materials
Cover nearby surfaces with tape and plastic to prevent cross-contamination. Gather all tools within arm’s reach to minimize repeated trips.
Tip: Label containers to avoid mixing cleaners. - 3
Clean visible mould
Wipe mouldy areas with a hydrogen peroxide solution or approved cleaner. Let sit for a few minutes, then scrub gently with a soft brush. Wipe dry with a microfiber cloth.
Tip: Never mix cleaners; use one product at a time. - 4
Remove damaged sealant
If mould has penetrated the sealant, carefully trim away contaminated material with a putty knife. Avoid scratching the UPVC surface.
Tip: Work slowly to prevent tearing the sealant bead. - 5
Apply new sealant
Apply a steady bead of neutral-cure silicone along the joint. Smooth it with a finishing tool or damp finger for a neat line.
Tip: Maintain a consistent bead width to prevent gaps. - 6
Cure and recheck
Allow the sealant to cure per manufacturer directions (usually 24 hours in dry conditions). Check for gaps and wipe away any excess.
Tip: Do not expose to water during cure.
FAQ
What causes black mould on UPVC window sealant?
Black mould on UPVC window sealant is usually caused by persistent moisture from condensation, leaks, or poor ventilation. Controlling humidity and fixing any leaks helps reduce recurrence, while cleaning removes existing growth.
It's caused by ongoing moisture near the window seal; fix leaks and improve ventilation to prevent it from coming back.
Can I use bleach on UPVC window sealant?
Bleach can degrade some UPVC sealants and may discolor frames. Use hydrogen peroxide or non-ammonia cleaners as a safer alternative, and test a small area first.
Bleach is often not ideal for UPVC seals; try safer cleaners and test first.
How long does sealant take to cure after resealing?
Most neutral-cure silicone sealants require about 24 hours to cure in typical room conditions. Avoid exposing the area to moisture during this period.
Expect about a day for the sealant to fully cure; keep it dry during that time.
Should I replace the entire window seal if mould returns?
If mould recurs after cleaning and resealing, it may indicate hidden moisture or damaged sealants. A professional assessment can determine if full seal replacement or structural repairs are needed.
Recurring mould means it’s time to get a professional opinion on the seal and possible leaks.
When should I call a professional remediation service?
Call a professional if mould persists after DIY remediation, you suspect hidden leaks, or mould appears beyond the sealant area. Professionals can identify moisture sources and ensure proper sealing.
If mould keeps coming back or you suspect leaks, a pro can help diagnose and fix it.
Can improving ventilation alone stop mould growth?
Ventilation helps reduce moisture but may not fix structural moisture sources. Combine airflow improvements with proper sealing and cleaning for best results.
Better ventilation helps, but you often need sealing and moisture control as well.
Is DIY sealing as effective as professional remediation?
DIY sealing can be effective for minor mould near seals, but persistent problems or large growth require professional assessment to prevent further damage.
DIY can work for small issues, but bigger problems need a professional touch.
What maintenance helps prevent mould on UPVC seals?
Regularly monitor humidity, promptly fix leaks, keep windows dry after rain, and reseal when you notice any cracking or gaps. Routine checks reduce long-term mould risk.
Keep humidity down, fix leaks fast, and inspect seals often to prevent mould.
Watch Video
The Essentials
- Identify moisture sources before remediation
- Use UPVC-safe cleaners and proper PPE
- Sealants should cure fully before exposure to moisture
- Improve ventilation to prevent recurrence
- Call a pro if mould keeps returning