Removing Black Mould: A Practical Guide for Homeowners
Learn practical methods to identify, remove, and prevent black mould in your home with steps suitable for DIY cleanup and safe professional thresholds.

By the end of this guide you will identify black mould, evaluate health risks, and complete a safe remediation plan. You'll learn when DIY cleanup is appropriate, which surfaces you can treat, and when to call a licensed pro. This method prioritizes containment, proper PPE, and thorough drying to prevent regrowth.
What is black mould and why it matters
Black mould, often associated with Stachybotrys chartarum, is a damp-loving fungus that can colonize building materials like drywall, insulation, and wood. It appears as dark patches that deepen with moisture and can release airborne spores. The Mold Removal Lab team notes that even small, hidden growth behind walls or under floors signals a moisture problem that, if ignored, can worsen over time. Identifying the moisture source—leaks, condensation, high humidity, or inadequate ventilation—is the first step toward effective remediation. Because black mould thrives where moisture persists, addressing the indoor climate is as important as removing visible patches. This guide focuses on practical, safe approaches that homeowners and renters can implement while minimizing exposure. Start with containment: isolate the affected area, avoid disturbing the growth, and wear PPE to reduce inhalation of spores. If growth is extensive or connected to HVAC systems, professional remediation is advised. Knowledge, patience, and a clear plan greatly improve outcomes and reduce the chance of regrowth.
Health risks and who is most at risk
Exposure to black mould can trigger allergic reactions, airway irritation, and asthma symptoms in sensitive individuals. Repeated or prolonged exposure may worsen chronic conditions for some people, particularly children, older adults, and those with weakened immune systems. The health impact is highly variable and depends on the level and duration of exposure, the extent of growth, and individual susceptibility. The Mold Removal Lab guidelines emphasize minimizing exposure during cleanup by using appropriate PPE, containing the area, and ensuring good ventilation. If you notice persistent coughing, skin irritation, headaches, or unusual fatigue after being in a mould-affected space, seek medical advice and consider relocation during high-contamination work. Persistent symptoms warrant a professional assessment to rule out deeper indoor air quality concerns.
Common growth sites in homes
Black mould commonly grows where moisture collects or remains unaddressed. Typical sites include bathrooms with poor ventilation, basements with damp walls or crawl spaces, kitchens around sinks and dishwashers, window sills with condensation, laundry rooms, and areas around leaks in roofs or plumbing. Hidden growth behind drywall, under carpeting, or within fiberglass insulation can occur when moisture intrusion is not promptly addressed. Visual signs include dark, patchy spots, a musty odor, or powdery or slimy textures on surfaces. Early detection improves remediation success; hence routine moisture checks in high-risk zones are a wise habit for homeowners and renters alike.
Safe removal: DIY steps for non-porous surfaces
Non-porous surfaces like tile, glass, metal, and sealed countertops are generally easier to clean. Begin with containment and PPE, then remove visible mould using a detergent solution and a scrub brush. Avoid dry brushing, which can release spores into the air; keep the area damp while cleaning. After scrubbing, rinse with clean water and dry the surface completely to deter regrowth. A household cleaner labeled for mould or a simple detergent solution is often sufficient for light to moderate growth. If the patch reappears, or if you have respiratory issues, stop and consider professional assistance. Ventilation and a dehumidifier during cleanup help maintain a safe environment. The key is to keep moisture under control and to verify that the area reaches a dry, stable humidity level before concluding cleanup.
Safe removal: porous materials and larger areas
Porous materials such as drywall, gypsum board, plywood, and insulation pose a greater challenge because mould can penetrate porous substrates. In most cases, affected porous materials should be removed and replaced to prevent regrowth and structural damage. If you must salvage items (like wood furniture with limited mould), treat only if growth is minimal, then monitor closely for signs of regrowth. When removal is necessary, seal contaminated waste in heavy-duty bags to prevent spores from traveling to other parts of the home. After removal, thoroughly dry surrounding areas and address the moisture source with ventilation and dehumidification. If removal involves large areas or structural components, or if moisture persists, professional remediation is advisable to achieve a thorough, lasting result.
Prevention and long-term strategies
Preventing black mould requires a proactive moisture-management plan. Regularly inspect for leaks, repair roofing and plumbing promptly, and ensure adequate ventilation in high-humidity rooms. Use a dehumidifier in damp spaces and run bathroom fans during and after showers. Fix condensation problems by improving insulation and airflow; keep interior relative humidity below 50% where feasible. Clean spills promptly and establish a routine cleaning schedule focused on damp-prone zones. Maintain a clear space around HVAC intakes and ducts to minimize mould spread. By combining moisture control with timely cleaning and material replacement when necessary, you can significantly reduce the risk of black mould returning.
Quick reference: choosing between DIY and pro remediation
DIY remediation is most appropriate for small, clearly defined spots on non-porous surfaces and for situations where moisture is controlled and the affected area is contained. Larger growth, growth on porous materials, or contamination of HVAC systems and insulation warrants professional remediation. If you’re unsure about the extent of the mould or the moisture problem, consult a certified mould remediation specialist to assess and guide the cleanup. Remember, safety first: PPE, containment, and proper disposal are non-negotiable.
Final thoughts on safe, effective remediation
Dealing with black mould requires careful assessment, proper protective gear, and a clear plan focused on moisture control. Take small, deliberate steps, document any moisture sources, and monitor the space after remediation. With vigilance and the right approach, you can restore indoor air quality and protect your home's structure for years to come. The Mold Removal Lab team recommends prioritizing moisture control and professional advice for larger or persistent issues.
Tools & Materials
- N-95 or higher-grade respirator(Fit-tested if possible; replace filters regularly during cleaning)
- Chemical-resistant gloves(Long cuffs to protect forearms; avoid latex if you have sensitivities)
- Eye protection(Goggles or safety glasses with side shields)
- Dish soap or mild detergent(Used for initial cleaning of non-porous surfaces)
- Non-scratch scrub brushes(For scrubbing mould from hard surfaces)
- Spray bottle with water(Keep surfaces damp while cleaning to minimize spores)
- Microfiber cloths or disposable wipes(For wiping and drying; avoid recontaminating clean areas)
- Sealability trash bags (heavy-duty)(For disposing contaminated materials and wipes)
- Plastic sheeting or painter’s tape(Create a containment barrier around the work area)
- Dehumidifier or heater with dehumidification(Helps achieve and maintain low humidity)
- Mould-safe disinfectant or vinegar (optional)(Use as per label; avoid mixing with bleach)
- Thermometer or hygrometer(Monitor humidity levels in the space)
Steps
Estimated time: Total time: 2-6 hours (area- and moisture-dependent)
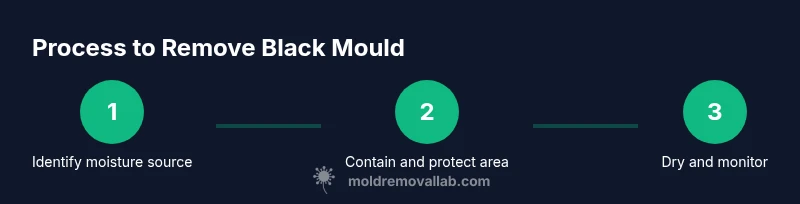
- 1
Assess the scope and protect yourself
Identify the affected area and potential extent of mould growth. Put on the recommended PPE, ensure good ventilation, and seal the area to prevent spore spread.
Tip: If you have respiratory issues, avoid cleaning large patches alone and seek help early. - 2
Contain the area
Use plastic sheeting to seal doors and vents. Keep other occupants out of the space during cleanup to reduce exposure.
Tip: Turn off HVAC in the affected zone to prevent circulation of spores. - 3
Clean non-porous surfaces
Wipe down with detergent solution, scrub gently, rinse, and dry thoroughly. Use damp but not dripping cloths to minimize aerosolized spores.
Tip: Avoid mixing cleaners with ammonia or bleach unless the label permits. - 4
Address porous materials
If mould has penetrated porous materials (drywall, insulation), plan for removal and replacement with proper disposal.
Tip: Do not attempt to salvage severely contaminated porous materials. - 5
Dry and restore moisture control
Run a dehumidifier and ensure area dries completely before reoccupation. Repair any leaks or moisture sources to prevent recurrence.
Tip: Recheck humidity; aim for under 50% relative humidity where feasible. - 6
Verify cleanup and monitor
Inspect after cleaning and drying, monitor for signs of regrowth over weeks and months. Consider professional inspection if growth reappears.
Tip: Keep records of moisture sources and remediation steps for future reference.
FAQ
Is black mould dangerous to health?
Yes, it can trigger allergies and asthma symptoms in sensitive people. Severity varies with exposure and individual susceptibility. If you experience persistent symptoms, consult a healthcare professional and consider a mould remediation specialist for assessment.
Black mould can affect health, especially for sensitive people. If you notice symptoms, seek medical advice and consider a pro assessment for safety.
Can I remove black mould myself?
Small, contained growth on non-porous surfaces is often doable with proper PPE and containment. Large areas, mould on porous materials, or mould linked to HVAC systems should be handled by licensed professionals to ensure complete removal and indoor air quality.
DIY is possible for small, contained spots on hard surfaces, but large or porous growth usually needs a pro.
What surfaces can I clean at home and which require professionals?
Non-porous surfaces (tile, glass, metal) are commonly safe to clean at home. Porous substrates (drywall, insulation) with visible growth, or areas connected to the HVAC system, typically require professional remediation to ensure full removal.
Non-porous surfaces are often DIY-cleanable; porous materials and HVAC-related mould usually need a pro.
Do I need to test for mould after cleaning?
Testing is not always necessary for small, well-contained cleaning. If mould recurs, or you are dealing with persistent moisture, a professional mould inspection can confirm whether the environment is back to typical levels.
Testing isn't always needed after a clean, but consider inspection if mould returns or moisture remains.
How can I prevent mould regrowth after cleanup?
Control moisture with ventilation, dehumidification, and timely repairs. Regularly inspect problem areas and maintain a cleaning routine in damp spaces to reduce recurrence risk.
Keep moisture in check with ventilation and repairs, and clean damp areas regularly.
When should I replace materials like drywall?
If mould penetrates porous materials deeply or growth is extensive, replacement is usually safer and more effective than cleaning. Seek professional advice to determine replacement needs.
Replace heavily contaminated porous materials rather than trying to clean them.
The Essentials
- Identify and fix moisture sources to stop mould growth.
- Contain the area and use proper PPE during cleanup.
- Non-porous surfaces are cleaned, porous materials often require removal.
- Drying and moisture control are essential to prevent regrowth.
- Know when to escalate to professional remediation.