Black Mold Hydrogen Peroxide: A Practical Guide to Safe Remediation
Learn how to safely use hydrogen peroxide to tackle black mold on non-porous surfaces. This Mold Removal Lab guide covers safety, limitations, step-by-step use, and when to call a pro.

Using hydrogen peroxide to address black mold can be effective on non-porous surfaces like tile and glass, but it’s not a universal fix for all materials. On porous items, it’s often insufficient and remediation may require professional help. Ensure good ventilation, test a small area first, and avoid mixing with other cleaners. Handle with care to avoid skin and eye irritation.
What is black mold hydrogen peroxide?
Black mold refers to common indoor mold species that can appear on walls, ceilings, and other surfaces when moisture is present. Hydrogen peroxide (H2O2) is a mild oxidizing agent that can break down mold cells on contact and release oxygen as it reacts. According to Mold Removal Lab, the chemical action of hydrogen peroxide can help disrupt mold growth on certain materials, particularly non-porous or sealed ones. This makes it a practical option for small, contained outbreaks on bathroom tiles, countertops, or glass. However, on porous materials like wood, paper, and drywall, mold colonies may be embedded deeper than the surface, limiting peroxide’s effectiveness. The key is to know when you’re dealing with surface mold versus hidden growth behind paint or drywall. Always remember that mold remediation isn’t just about killing mold—it’s about reducing moisture and removing the source of humidity. Mold Removal Lab Analysis, 2026, emphasizes combining cleaning with moisture control to prevent recurrence.
Safety and PPE when using hydrogen peroxide
Safety is non-negotiable when using hydrogen peroxide for mold cleanup. Use 3% hydrogen peroxide from a reputable brand, store away from heat, and avoid mixing with ammonia or bleach, which can create hazardous fumes. Wear eye protection, chemical-resistant gloves, and a disposable gown to protect skin and clothing. Work in a well-ventilated area, opening windows and using a fan if possible. Keep children and pets out of the space during treatment. Hydrogen peroxide can cause skin and eye irritation in some people, so avoid contact and wash hands after handling. If you have concerns about allergies or asthma, consult a healthcare professional before starting.
Surface suitability: non-porous vs porous materials
Not all surfaces respond the same way to hydrogen peroxide. Non-porous surfaces—tile, glass, metal, and sealed countertops—tend to respond well to a peroxide treatment because the mold is more likely to be on the surface. Porous materials—drywall, wood, fabric—can trap moisture and harbor deeper mold colonies. In these cases, peroxide may fade surface staining but often cannot reach embedded spores or remove moisture sources. For porous materials, consider alternative approaches, such as replacing affected sections, or hiring a professional for a more thorough remediation. Where possible, address the underlying moisture issue to prevent future growth, including fixing leaks and controlling humidity.
Cleaning steps for non-porous surfaces with hydrogen peroxide
On non-porous surfaces, hydrogen peroxide can be applied with a spray bottle to completely cover the area. Let it sit for several minutes to penetrate the mold, then scrub with a non-abrasive brush or cloth. Wipe away residue with a clean microfiber towel and allow the surface to air-dry completely before reuse. For best results, repeat once more if any discoloration remains. Always ventilate and wear PPE during the process. Do not rinse with water aggressively, as residual peroxide can continue to lift stains. If staining persists after multiple passes, do not over-scrub the surface; consider replacement or professional assessment.
Porous materials: risks and alternatives
If mold growth is seeping into porous materials, hydrogen peroxide is unlikely to fully remove the problem. In many cases, porous materials such as drywall, insulation, or untreated wood require removal and replacement to halt mold spread. Before deciding, evaluate the extent of damage, moisture history, and the surrounding structure. In some cases, professionals use specialized tools and treatments to safely remove mold from porous substrates. Prevention is critical: correct humidity levels, prompt water repair, and improved ventilation reduce the chance of future growth.
Common mistakes and why hydrogen peroxide may fail
Common mistakes include using peroxide on large areas, not addressing the moisture source, and assuming one treatment will solve deep-seated growth. Hydrogen peroxide is most effective for light, surface mold on non-porous surfaces; it is less effective for extensive or embedded mold, particularly on porous substrates. Do not mix peroxide with household cleaners unless the product label explicitly allows it, and never use peroxide in conjunction with chlorine bleach. Finally, ensure the area dries completely after treatment; moisture left behind will allow mold to return.
Maintenance, prevention, and when to call professionals
After treatment, establish a moisture-control plan to prevent recurrence. This includes fixing leaks promptly, using exhaust fans, improving ventilation, and maintaining indoor humidity below 60% in most climates. Regularly inspect known problem areas, especially kitchens and bathrooms. If mold returns frequently or covers a large area (more than a square foot in a single room), or if there is visible water intrusion, contact a certified mold remediation professional. The Mold Removal Lab Team emphasizes that professional remediation may be necessary for extensive growth or porous substrates, as it ensures safe removal and proper containment.
Real-world case scenarios and what to watch for
In a small bathroom with condensation and a modest mold patch on ceramic tiles, hydrogen peroxide cleaning can reduce visible mold and are a good starting point. In a living room with painted drywall and hidden moisture behind plaster, the mold may be deeper; peroxide can help surface-clean but may not eliminate the problem. In cases where mold recurs after cleaning or spreads to new areas, reassess moisture control and consider professional assessment to identify hidden leaks or ventilation issues. Always document the affected areas and track changes over time to distinguish temporary staining from true mold growth.
Tools & Materials
- 3% hydrogen peroxide(Store away from heat; apply directly to moldy areas)
- Spray bottle(Mist bottle for even coverage)
- Microfiber cloths(Lint-free for wiping residue)
- Non-abrasive scrub brush(Soft bristles help safety scrub)
- Gloves(Chemical-resistant, long-sleeve)
- Eye protection(Goggles or safety glasses)
- Trash bag for disposal(For contaminated cleaning materials)
- Headache-free mask (optional)(If sensitive to fumes)
Steps
Estimated time: 30-45 minutes (plus additional drying time)
- 1
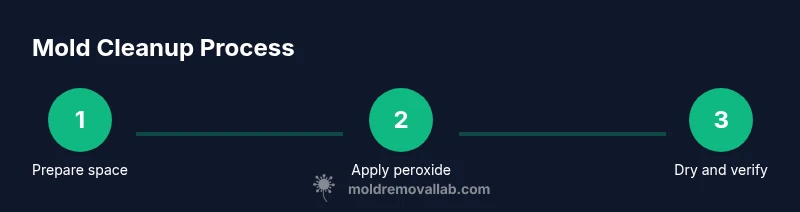
Prepare the area
Clear the space and ventilate. Open windows and turn on a fan to create airflow that carries fumes away from you. Remove nearby foods or fabrics that could absorb moisture or be damaged by peroxide.
Tip: Protect adjacent surfaces with a cloth to catch drips. - 2
Test a small patch
Apply a small amount of hydrogen peroxide to a hidden corner to ensure the surface does not discolor. If there is no adverse reaction after 2-3 minutes, you can proceed with a full application on the moldy area.
Tip: If staining occurs, stop and consider a different approach. - 3
Apply peroxide to moldy area
Spray the affected area until visibly wet. Let the peroxide sit for 5-10 minutes to penetrate fungal cells.
Tip: Avoid over-wetting; use just enough to cover the patch. - 4
Scrub and wipe
Gently scrub with a soft brush or cloth, then wipe away residue with a clean microfiber cloth.
Tip: Use circular motions to lift mold from the surface. - 5
Rinse and dry
Do not flood the area with water; lightly rinse if needed and ensure the surface dries completely within 24 hours. Use a fan to speed drying.
Tip: Drying is critical to prevent regrowth. - 6
Inspect and dispose
Check for remaining staining; if mold returns, reassess moisture sources and consider professional remediation. Seal and dispose of used materials properly.
Tip: Document any recurrent growth for future reference.
FAQ
Can hydrogen peroxide kill black mold?
Hydrogen peroxide can kill surface mold on non-porous surfaces when used correctly, but it may not reach mold embedded in porous materials. For larger or deeper growth, professional remediation is advised.
Hydrogen peroxide can kill surface mold on non-porous surfaces, but it may not reach deep, embedded mold on porous materials.
Is 3% hydrogen peroxide safe to use around homes?
Yes, 3% hydrogen peroxide is generally safe for cleaning when used with proper ventilation and PPE. Avoid mixing with other cleaners and keep away from children and pets.
3% hydrogen peroxide is generally safe for cleaning if you ventilate and wear protection.
Should I mix hydrogen peroxide with bleach?
No. Mixing hydrogen peroxide with bleach can release hazardous gases. Use hydrogen peroxide alone and rinse or wipe after treatment as needed.
Do not mix hydrogen peroxide with bleach—it can create dangerous fumes.
What if mold returns after treatment?
If mold reappears, reassess moisture sources and consider professional remediation, especially if growth is behind walls or in porous materials.
If it comes back, check for leaks and moisture and consider a professional assessment.
Can hydrogen peroxide remove mold from drywall?
Hydrogen peroxide can remove surface mold on drywall but often isn't enough for embedded growth. Replacing affected drywall and addressing moisture may be necessary.
It may remove surface mold but embedded growth on drywall often requires replacement and moisture control.
When should I call a mold remediation professional?
Call a professional when mold is extensive, growing behind walls, or recurs after cleaning. A pro can properly contain the area and address moisture sources.
Call a professional if mold is extensive or keeps returning after cleaning.
Watch Video
The Essentials
- Identify surface type before cleaning
- Ventilate and protect yourself during use
- Hydrogen peroxide works best on non-porous surfaces
- Moisture control is essential to prevent recurrence
- Call a pro for porous materials or extensive growth