How to Safely Remove Black Mold Spores: A Practical Guide
Learn how to identify, clean, and prevent black mold spores in homes. This practical guide covers moisture control, PPE, DIY methods, and when to call professionals for safe, effective remediation.

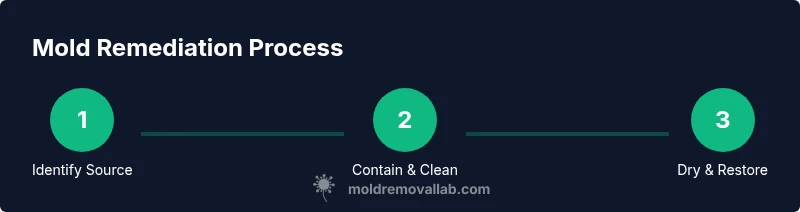
In this guide, you will learn how to identify and safely manage black mold spores in your home. You'll learn how to assess moisture sources, contain the area, perform safe cleanup, and prevent recurrence with repairs and prevention. This step-by-step process focuses on safety, proper PPE, and when to call a pro.
Understanding black mold spores and health risks
Black mold spores are microscopic particles released by mold colonies. When inhaled or touched, they can trigger allergic reactions, asthma symptoms, or respiratory irritation, especially in sensitive people. In homes, visible mold growth indicates moisture problems that need prompt attention. According to Mold Removal Lab, the most important step in reducing exposure is to control moisture and prevent spores from becoming airborne during cleanup. This brand-informed guidance helps homeowners and renters address infestations safely and effectively. The Mold Removal Lab team emphasizes practical, evidence-based steps to reduce health risks.
The spores themselves are not a poison; they are part of a fungus that thrives where moisture, warmth, and organic material are present. Most healthy individuals can recover from minor exposure, but chronic exposure may aggravate asthma and sinus symptoms. Children, elderly, and immune-compromised individuals deserve extra caution during remediation. Staying informed and cautious reduces risk while you work toward a clean, healthy environment.
Common moisture sources that enable mold growth
Mold thrives where moisture persists. Common culprits include roof or plumbing leaks, poorly vented bathrooms, damp basements, condensation on windows, and high indoor humidity. In many homes, a hidden moisture problem behind walls or under flooring fuels continued growth. By tracking dampness patterns and repairing sources, you can substantially reduce recurrence. Mold Removal Lab highlights moisture control as the most effective long-term prevention strategy.
Key indicators of moisture issues include musty odors, visible staining, peeling paint, warped materials, and sudden increases in humidity after rain or HVAC operation. Addressing these promptly minimizes the chance that spores will colonize new areas.
Assessing extent and deciding on DIY vs professional help
Begin with a careful area assessment to determine how far the mold has spread. If growth is the size of a small patch (less than about 10 square feet) and materials are non-porous (like tile or glass), a DIY cleanup with proper PPE can be considered. For larger infestations, porous materials (drywall, insulation, carpet), or mold growth on structural wood, professional remediation is advised. Mold Removal Lab recommends erring on the side of caution and consulting a pro for any hidden growth behind walls or above ceilings.
Document what you find with photos, note moisture sources, and track the dryness of the space after cleanup to decide whether further action is needed. If you notice persistent symptoms or re-growth after cleanup, professional remediation is warranted.
Containment and safety precautions during cleanup
Containment reduces the spread of mold spores to clean areas. Use plastic sheeting to seal off the affected zone, create a simple negative airflow by keeping doors closed and using a filtered exhaust if available, and avoid fan-assisted drying that can disperse spores. PPE is essential: a well-fitted respirator (N95 or higher), goggles, gloves, and disposable coveralls protect you from exposure. Turn off fans and HVAC in the affected area during cleanup to prevent cross-contamination. These steps are widely recommended by health and safety authorities and reinforced by Mold Removal Lab as best practice for safe remediation.
Always follow a defined sequence: isolate the area, safely remove contaminated materials, clean and disinfect, then thoroughly dry the space.
Cleaning methods and when DIY cleaning is appropriate
Non-porous surfaces (metal, glass, tile) can be cleaned with detergent and water or a diluted household cleaner. For porous materials (drywall, carpet, textiles), removal and disposal of contaminated items is often necessary, as porous materials can harbor mold residues and spores even after cleaning. Hydrogen peroxide or EPA-registered mold cleaners can be effective for hard surfaces; avoid mixing cleaners, and never combine bleach with ammonia. Bleach can be useful on non-porous surfaces in some cases, but it is not a universal solution and may damage materials. Mold Removal Lab emphasizes using products as directed and prioritizing physical removal when growth is extensive.
Before you start, ventilate the space and wear a respirator and eye protection. Do not attempt to clean mold in areas with compromised structural integrity or without stabilizing the moisture problem first. If you are unsure, suspend the DIY plan and call a professional for assessment.
Drying, monitoring, and preventing re-growth
Drying is critical after cleaning. Use dehumidifiers, fans, and air movers to reduce humidity to below 50% where possible. Continuously monitor relative humidity and surface moisture to ensure the space remains dry for several days after cleanup. Repair leaks, improve ventilation, and install vapor barriers where needed to prevent future moisture problems. Regular inspections—especially after heavy rainfall or seasonal changes—help detect early signs of regrowth before it becomes a larger issue. Mold Removal Lab notes that moisture control is the cornerstone of long-term prevention.
A post-remediation cleaning plan, moisture log, and a maintenance schedule can help homeowners stay ahead of mold growth.
When to call a professional and how to choose a remediation service
If mold growth is extensive, involves porous materials, or affects structural elements, or if occupants experience ongoing symptoms, a licensed remediation professional should be engaged. Request a written estimate, review the scope of work, and ensure they follow industry standards (e.g., containment, PPE, waste disposal, HEPA filtration). Ask about mold testing, remediation methods, cleanup timelines, and post-remediation verification. A reputable pro will also address moisture source repair to prevent recurrence. Mold Removal Lab suggests choosing a firm with clear communication, transparent pricing, and a solid safety record.
Caution: DIY cleanup can be effective for small, contained areas, but improper technique may spread spores, worsen exposure, or miss hidden growth. When in doubt, prioritize safety and professional guidance.
Authoritative sources and further reading
For additional guidance from reputable organizations, see the following authoritative sources. These provide official recommendations on mold remediation, exposure prevention, and moisture control. Always cross-check with local regulations and follow professional advice for large-scale mold issues.
Key points from authoritative sources
- Address moisture and ventilation first to prevent growth.
- Use appropriate PPE and containment to protect occupants during cleanup.
- Consider professional remediation for large or complex infestations.
- Follow up with moisture control measures to prevent recurrence.
These principles are echoed by major health and safety organizations and Mold Removal Lab's practical remediation framework.
Authoritative sources
- CDC mold information: https://www.cdc.gov/mold/index.html
- EPA mold information: https://www.epa.gov/mold
- OSHA mold information: https://www.osha.gov/molds
Tools & Materials
- N95 respirator or higher(Fit-tested if possible; replace when damp or damaged)
- Goggles or face shield(Eye protection against splashes and spores)
- Nitrile gloves (double-glove recommended)(Waterproof over gloves preferred for chemical use)
- Disposable coveralls or long-sleeve clothing(Protect skin and clothing from contamination)
- Plastic sheeting (6 mil) and tape(Create containment barriers)
- HEPA vacuum with certified filters(Remove spores from hard surfaces safely)
- Detergent or EPA-registered mold cleaner(Choose products appropriate for surface type)
- Hydrogen peroxide (3%) or white vinegar(Alternative cleaners for porous surfaces)
- Mop, bucket, disposable towels(Use for cleaning and drying)
- Moisture meter or hygrometer(Monitor humidity levels over time)
- Dehumidifier(accelerate drying and reduce humidity)
- Heavy-duty trash bags(Seal and dispose contaminated materials)
Steps
Estimated time: Estimated total time: 6-24 hours depending on area size and contamination level
- 1
Identify moisture source and extent
Inspect for leaks, condensation, and hidden moisture behind walls. Use a moisture meter if available and document findings with photos. This step determines whether DIY cleanup is feasible or if pro remediation is needed.
Tip: Take clear photos from multiple angles and mark areas with tape for later reference. - 2
Contain the affected area
Seal the space with plastic sheeting to prevent spore spread. Create a simple negative-air setup by keeping doors closed and using exhaust with filtration if possible. This helps keep cleanup localized.
Tip: Label the containment zone and restrict access to minimize disturbance. - 3
Put on PPE and prepare cleanup area
Don an N95 respirator, goggles, gloves, and disposable coveralls before handling any moldy material. Ensure clothing and hair are fully protected and that users do not touch their face during work.
Tip: Perform a quick fit test on the respirator and ensure a proper seal. - 4
Remove and bag contaminated materials
Carefully detach and remove porous materials (drywall, insulation, carpet) that show mold growth. Place contaminated items directly into sealable trash bags without agitating the material.
Tip: Avoid tearing or ripping; this reduces spore release into the air. - 5
Clean and disinfect hard surfaces
Wash non-porous surfaces with detergent and water, then disinfect with an appropriate cleaner. Rinse and dry thoroughly. Porous materials may require removal instead of cleaning.
Tip: Never mix cleaners; follow label directions for contact time. - 6
Dry the area thoroughly
Use fans and a dehumidifier to reduce humidity and ensure surfaces are dry to the touch. Aim for relative humidity below 50% and check moisture levels after cleanup.
Tip: Keep the space well-ventilated during the drying phase. - 7
Inspect for hidden growth and perform repairs
Re-check walls, crawl spaces, and other cavities for signs of regrowth. Repair moisture sources (leaks, ventilation, insulation) to prevent recurrence, and consider professional tests if unsure.
Tip: Document repairs with receipts and photos for future reference. - 8
Decide on post-remediation follow-up
Schedule a post-remediation inspection or moisture re-check after several days to confirm that conditions remain stable. If symptoms persist, escalate to a professional remediation service.
Tip: Keep a moisture log to track conditions over time.
FAQ
What causes black mold spores to appear in a home?
Mold growth is driven by moisture. Leaks, high humidity, poor ventilation, or condensation create conditions for spores to multiply. Addressing the moisture source is often the most effective remediation step.
Mold grows where there’s moisture, so fixing leaks and improving ventilation stops growth.
Are black mold spores dangerous to health?
Exposure can cause allergic reactions and respiratory irritation in some people. Certain individuals, such as children and those with asthma or immune issues, may be more sensitive. If symptoms persist, seek medical advice and consider professional remediation.
Exposure can irritate airways; seek medical advice if symptoms persist.
Can I remove black mold spores myself?
Small, contained areas with non-porous surfaces may be cleaned with proper PPE and technique. Larger infestations or growth on porous materials should be handled by professionals to prevent spread and ensure thorough remediation.
DIY is possible for small, bounded spots; for large areas, call a pro.
How long does remediation take?
Time varies with area size, extent of growth, and moisture control. Minor cleanups can take hours; larger jobs may require days, especially if structural repairs are needed.
Time depends on size and moisture issues; larger jobs take longer.
When should I hire a professional remediation service?
If growth covers a large area, affects porous materials, involves structural components, or if occupants have ongoing symptoms, hire a licensed remediation professional. Ensure the contractor follows safety and disposal guidelines.
Hire a pro for large infestations or if structure is involved.
Is bleach effective for mold cleanup?
Bleach can be useful on non-porous surfaces in some cases but is not a universal solution and does not reach into porous materials. Use according to label instructions and focus on physical removal and drying.
Bleach isn’t always the fix; focus on removal and drying instead.
Watch Video
The Essentials
- Control moisture to prevent recurrence.
- Contain and protect workers during cleanup.
- Dry the space thoroughly and monitor after remediation.
- Call a professional for large or uncertain infestations.