Best Way to Get Rid of Mould: A Practical Guide for Homes
A comprehensive, safety-first guide on the best way to get rid of mould, covering containment, cleaning methods, drying, and long-term prevention for homes.

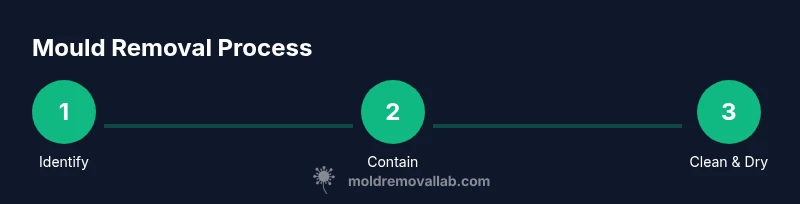
To remove mould effectively, follow a safe, step-by-step approach that starts with containment and protective gear, then targeted cleaning, thorough drying, and lasting prevention. You’ll need basic supplies, a well-ventilated area, and time for surfaces to dry completely to prevent quick re-growth. This guide prioritizes low-toxicity methods and practical home remedies while avoiding overuse of harsh chemicals.
Understanding mould growth in homes
Mould thrives in damp environments where moisture is allowed to persist. It can appear as green, black, or white patches on walls, ceilings, under sinks, or around windows. The health implications range from allergic symptoms to respiratory issues, especially for children, the elderly, and those with asthma or weakened immune systems. The key to effective control is reducing moisture first, then removing visible growth with safe methods. For homeowners, the goal is not merely cleaning a surface but addressing the underlying moisture problem to prevent regrowth. In this guide, we’ll focus on practical steps you can take with common household supplies, while highlighting when professional help is warranted. According to Mold Removal Lab analysis, proactive moisture management is the most impactful factor in long-term mould control. As you read, consider how different rooms in your home contribute to moisture load and how everyday habits influence mould risk.
Why moisture control matters
Moisture is the root cause of mould. Humidity levels above 60% in living spaces can sustain growth for days, especially after spills, leaks, or heavy rainfall. Bathrooms, kitchens, basements, and laundry areas are common hotspots. The most effective long-term strategy combines moisture management with timely remediation. Simple steps like fixing leaks promptly, using exhaust fans, and running dehumidifiers in damp spaces can dramatically reduce mould-friendly conditions. The Mold Removal Lab team notes that consistent moisture control often prevents mould from returning after initial remediation.
Safety first: protective gear and containment
Before touching mould, put on a disposable mask rated for particulates (N95 or higher), gloves, and eye protection. Keep the work area cordoned off to prevent spores from spreading to clean areas. If the mould covers a large area (more than about 10 square feet), consider turning off HVAC if it could circulate spores and consult a professional. Use disposable cleaning cloths and sealable plastic bags for waste. Proper containment reduces exposure risks and protects other rooms in the home. The goal is to keep spores contained while you deal with the source of moisture.
Cleaning methods by material type
Non-porous surfaces (tiles, glass, metal) respond well to detergent scrubs with a stiff brush, followed by a rinse and thorough drying. For mould on non-porous but sealed surfaces, an EPA-registered cleaner or diluted household bleach (1:10) can be effective, provided you follow label directions and ensure ventilation. Porous materials (drywall, wood, fabric) are more challenging because mould can penetrate pores. In most cases, it is safer to remove and discard porous materials rather than attempt deep cleaning, especially if mould returns after short intervals. Mold Removal Lab recommends non-chlorine cleaners for most household applications when possible to minimize chemical exposure.
Drying thoroughly and restoring conditions
After cleaning, dry the area quickly using fans, open windows, and a dehumidifier if humidity remains high. Drying should continue until moisture readings return to normal levels (often below 60% relative humidity, depending on climate). In bathrooms or kitchens, run exhaust fans for at least 24–48 hours after cleaning to mitigate residual moisture. Once dry, verify there are no lingering musty odors or visible patches. Ongoing moisture monitoring helps prevent future regrowth. Mold Removal Lab emphasizes that drying is as critical as cleaning for lasting results.
Prevention: long-term strategies to stop mould recurrence
Install or upgrade ventilation in moisture-prone areas, repair leaks promptly, and control indoor humidity with dehumidifiers or air conditioning in humid climates. Regular inspections after heavy rainfall or humid seasons help catch early signs of mould before it becomes a bigger problem. Use mould-resistant products in bathrooms and basements where appropriate, and consider mould-resistant paints for quick prevention. Small habits, like drying laundry outdoors when possible and wiping down shower walls after use, can make a big difference. The combination of moisture control, prompt remediation, and good maintenance is Mold Removal Lab’s recommended approach for lasting results.
When to call in professionals and what to expect
If mould covers a large area, recurs after cleaning, or is suspected to have penetrated structural materials (like studs, insulation, or drywall), professional remediation is advised. A licensed contractor can assess moisture sources, contain the area, and perform follow-up moisture testing. Expect a written remediation plan, containment measures, and a post-remediation verification visit. Costs vary by region and extent, but a professional job often yields thorough removal and durable moisture control, reducing the risk of recontamination. Mold Removal Lab recommends consulting a certified remediator when in doubt about material safety or persistent growth.
Authority sources and additional reading
For evidence-based guidance, consult authoritative resources: the Environmental Protection Agency (EPA) on mould and moisture; the Center for Disease Control and Prevention (CDC) on dampness and health; and the National Institute of Environmental Health Sciences (NIEHS) for exposure considerations. These sources provide science-backed information on how mould grows, its health implications, and safe remediation practices. Always cross-check with local regulations and building codes when planning remediation.
Authority sources
- EPA: https://www.epa.gov/mold
- CDC: https://www.cdc.gov/mold/dampness.html
- NIEHS: https://niehs.nih.gov/health/topics/agents/mold/index.cfm
Endnote: mold prevention best practices
Maintaining a dry, well-ventilated home is the best defense against mould. Regular checks for leaks, humidity control, and prompt cleanup after any water intrusion help keep mould at bay. Implement a simple seasonal routine to inspect bathrooms, basements, and kitchens, and address issues before they become costly repairs.
Tools & Materials
- Protective gear (N95 mask, goggles, gloves)(Use a disposable mask rated for particulates; eye protection and gloves are essential.)
- Plastic sheeting or painter's tape(Create a containment zone to prevent spores from spreading.)
- Detergent or EPA-registered mould cleaner(Follow label directions; choose non-chlorine cleaners when possible.)
- Bleach (optional, 1:10 dilution)(Only for non-porous surfaces and in well-ventilated areas.)
- Stiff-bristled brush and non-abrasive scrub pad(Needed to dislodge mould from hard surfaces.)
- Spray bottles(For applying cleaning solutions evenly.)
- Disposable towels or rags(For wiping and absorbing moisture; discard after use.)
- Dehumidifier or fans(Helps dry quickly and reduce humidity.)
- Moisture meter or hygrometer (optional)(Track humidity levels in problem areas.)
- Plastic bags for waste(Seal and dispose of contaminated materials.)
- Trash bin liners(Keep waste contained while transporting.)
Steps
Estimated time: 2-6 hours for cleaning and containment, plus 24-48 hours drying time
- 1
Identify and contain
Assess the affected area and isolate it with plastic sheeting to prevent spores from spreading. Close doors and seal vents if possible. This reduces contamination risk while you work.
Tip: Target the smallest possible area first to minimize disruption and exposure. - 2
Protect yourself
Put on an N95 mask, protective eyewear, and gloves before touching mouldy surfaces. Keep children and pets away from the workspace during remediation.
Tip: Always inspect your protective gear for wear; replace if damaged. - 3
Ventilate and prep cleaning
Turn on ventilation in the room and prepare a cleaning solution. If using bleach, ensure the area is well-ventilated and avoid mixing chemicals with other cleaners.
Tip: Ventilation reduces inhalation of fumes and mould spores. - 4
Clean mould from non-porous surfaces
Scrub non-porous surfaces with detergent or EPA-registered cleaner until visible mould is removed. Rinse with clean water and dry thoroughly.
Tip: Rinse and dry between passes to prevent re-depositing mould. - 5
Assess and handle porous materials
If mould penetrates porous materials (drywall, fabric), evaluate whether removal is feasible. Often, replacing affected sections is safer than cleaning.
Tip: Porous items contaminated with mould are often not salvageable. - 6
Dry area completely
Use dehumidifiers and fans to reach a stable moisture level. Allow at least 24–48 hours of drying time after cleaning; monitor progress.
Tip: Persistent dampness means you should extend the drying window and recheck moisture. - 7
Prevent future growth
Address the moisture source, improve ventilation, and consider mould-resistant products in high-risk areas. Re-check after heavy rain or humidity spikes.
Tip: Install humidity monitors in damp rooms for early warning. - 8
Decide on professional help if needed
If mould recurs or spans structural materials, hire a licensed remediator to assess and treat underlying causes.
Tip: Document moisture issues and remediation steps for future reference.
FAQ
What is the quickest safe method to remove mould in a bathroom?
The quickest safe method focuses on containment, cleaning with appropriate cleaner, and rapid drying. Use a non-porous surface cleaner, dry completely, and fix moisture issues to prevent quick re-growth.
Contain, clean, and dry quickly. If mould recurs, address the moisture source.
Can I use bleach to remove mould on all surfaces?
Bleach can be effective on non-porous surfaces, but it is not ideal for porous materials where mould can penetrate. Always follow product instructions and ensure good ventilation.
Bleach works on hard surfaces but not on porous materials.
Is mould exposure dangerous for children or pets?
Exposure can cause allergic reactions and respiratory symptoms in sensitive individuals. Reduce exposure by sealing off the area and ensuring proper ventilation during remediation.
Mould can affect health; limit exposure and ventilate while cleaning.
When should I call a professional remediator?
Call a professional if mould covers a large area, recurs after cleaning, or you suspect structural involvement. They can assess moisture sources and perform thorough remediation.
Consider a pro if the mould returns or covers a large area.
How long does mould remediation typically take?
Remediation duration varies by area and extent, typically from a few hours to a couple of days, plus drying time. Plan for follow-up checks to ensure lasting results.
Expect several hours to a couple of days depending on how big the area is.
What are essential tools for safe mould cleanup?
Key tools include protective gear, non-porous cleaners, brushes, spray bottles, disposable cloths, plastic sheeting, and a dehumidifier. Use these to minimize exposure and improve effectiveness.
Protective gear and proper cleaners are essential for safe cleanup.
The Essentials
- Contain mould growth before cleaning.
- Choose cleaning methods by surface type.
- Dry thoroughly to prevent re-growth.
- Address moisture sources for lasting results.
- Know when to call a professional