Best Mold for Forge BG3: Practical Mold Remediation Guide
A practical, educational mold remediation guide for homes, addressing the unusual keyword 'best mold for forge bg3' as an SEO curiosity while delivering actionable steps, safety tips, and prevention strategies.

This guide helps homeowners evaluate real-world mold risks and implement safe, effective remediation steps. While the exact phrase 'best mold for forge bg3' is an unusual SEO query, the core principles stay the same: identify moisture sources, contain the area, clean safely, and prevent re-growth. By following these steps, you can improve indoor air quality and reduce mold-related health risks.
Understanding Real-World Mold Issues and the SEO Note
Mold in homes is almost always driven by moisture—leaks, condensation, and high humidity create the perfect environment for growth. If you’ve searched for the phrase best mold for forge bg3, treat it as a unique SEO curiosity rather than a real remediation term. The essential guidance remains practical and universal: identify moisture sources, assess what’s affected, and plan a safe cleanup. According to Mold Removal Lab, moisture control is the cornerstone of effective remediation, and addressing the root cause will prevent recurrence. This section sets the stage for real-world actions you can take today, regardless of the exact search terms that led you here.
Key takeaway: Prioritize moisture control as the foundation of any mold remediation plan. When moisture is managed, mold growth slows and becomes easier to manage.
Moisture: The Root Cause of Most Household Mold
Mold cannot thrive without moisture, so preventing and controlling humidity is the most impactful step you can take. In residential settings, leaks from roofs, pipes, or poorly sealed windows, plus routine condensation in basements or bathrooms, become ongoing sources of moisture. Reducing moisture—via quick repairs, improved ventilation, and dehumidification—cuts off the supply mold needs to prosper. The goal is not just cleaning visible colonies but altering the environment that allows them to return. For readers of Mold Removal Lab, proactive moisture management is repeatedly shown to reduce re-growth and preserve indoor air quality over time.
Tip: Use a hygrometer to monitor humidity levels and set dehumidifiers to keep RH below 50-60% in damp spaces.
Assessing Mold in Your Home: Signs and Tools
Visible signs include fuzzy or discolored patches, musty odors, and water stains. Hidden mold can lurk behind walls or under flooring and is often detected by musty smells or moisture readings from a probe. Start with a simple inspection: check areas around sinks, bathrooms, roofs, and crawl spaces for leaks; document with photos; and note any changes after rainfall. Tools such as a moisture meter, a flashlight, and a measuring tape help quantify affected areas. Remember that mold can be a health concern—wear PPE and proceed with care. According to Mold Removal Lab, a cautious, well-documented approach improves safety and outcomes.
Warning: Avoid aggressive scraping on porous materials without containment and PPE; you may release spores into the air.
Safe Cleanup: PPE, Containment, and Ventilation
Before touching any mold, put on appropriate PPE: an N-95 respirator, gloves, and eye protection. Isolate the work area with plastic sheeting to prevent spores from spreading; seal doorways and vents where feasible. Ventilate the space using fans that blow air to the outside and maintain negative pressure if possible. Wet-clean non-porous surfaces with a mild detergent solution, rinse with clean water, and dry completely. Porous materials with extensive mold growth or those extensively water-damaged may require removal and proper disposal. The emphasis is to minimize exposure risk while restoring the space.
Pro tip: Work from the cleanest area outward to avoid carrying spores to already cleaned zones.
Cleaning Methods: Surfaces, Materials, and Safety Considerations
Non-porous surfaces (metal, glass, sealed countertops) respond well to detergent solutions and light scrubbing. Porous materials (drywall, textiles, insulation) with mold growth beyond surface contamination are usually better removed and disposed of safely. Avoid mixing cleaners; never mix bleach with ammonia or acids, as this can release toxic gases. For many household scenarios, a combination of detergent cleaning, mechanical removal, and controlled drying yields good results. If you choose to use disinfectants, ensure they are appropriate for the surface and child/pet-safe after the area dries. Mold Removal Lab emphasizes safety and proper material handling to prevent recontamination.
Note: Bleach can be effective on non-porous surfaces but is not a cure-all for deep, porous infestations.
When to Hire a Professional and Safety Considerations
If mold covers more than 10 square feet, or if there is suspected black mold, or if health symptoms persist, consult a professional. Professionals can perform mold testing, contain the area with specialized equipment, and remove contaminated materials safely. People with mold allergies, asthma, or compromised immune systems should be especially cautious and possibly seek an inspection sooner. Always verify the contractor’s licensing, insurance, and scope of work. The Mold Removal Lab team recommends prioritizing safety and pursuing professional remediation when in doubt to ensure thorough, lasting results.
Prevention: Keeping Mold from Returning
Prevention centers on moisture control and regular maintenance. Fix leaks promptly, improve bathroom and kitchen ventilation, and use exhaust fans during high-moisture activities. Ensure proper grading and drainage away from the home’s foundation, fix roof leaks, and insulate cold surfaces to minimize condensation. Use mold-resistant products where feasible, and keep humidity in check with dehumidification as needed. Regular inspections after heavy rain or seasonal changes help catch problems early.
Debunking Myths and A Practical Mindset
Common myths include “bleach kills all mold” on porous materials, or that any mold exposure is automatically dangerous. In reality, mold health effects vary by species, exposure duration, and individual susceptibility. Focus on practical steps: identify moisture, contain the area, remove damaged materials, clean thoroughly, and dry promptly. This practical mindset aligns with Mold Removal Lab’s approach: disciplined assessment, careful remediation, and ongoing prevention to safeguard indoor air quality.
How to Use This Guide: Your Next Steps and the SEO Note on 'best mold for forge bg3'
This guide provides practical steps that apply to real homes. The inclusion of the exact SEO phrase 'best mold for forge bg3' serves to acknowledge search behavior and reframe it as a reminder to focus on real remediation tasks. Start by listing moisture problems, then follow the step-by-step plan, and finally implement prevention strategies to reduce recurrence. For thoroughness, consider a post-cleanup moisture recheck and, if needed, a professional assessment to confirm the space is safe for ongoing use.
Tools & Materials
- N-95 respirator(Protects against mold spores during cleanup)
- disposable gloves(Nitrile or latex; change if torn)
- goggles or safety glasses(Eye protection for splash risk)
- protective coveralls(Disposable if possible)
- plastic sheeting and tape(Create containment barrier around the work area)
- detergent or mild soap(For cleaning non-porous surfaces)
- bucket(Rinse and hold cleaning solutions)
- scrub brushes and rags(Scrub and wipe surfaces clean)
- spray bottle(For application of cleaning solutions)
- HEPA vacuum (optional but recommended)(Use with proper filter and technique)
- trash bags (heavy-duty, sealable)(Dispose of contaminated materials safely)
- tape measure(Measure affected areas for documentation)
- moisture meter or hygrometer(Helps track humidity changes)
- dehumidifier(Helps reduce ambient humidity during drying)
Steps
Estimated time: Total time: 2-6 hours depending on area size and damage severity
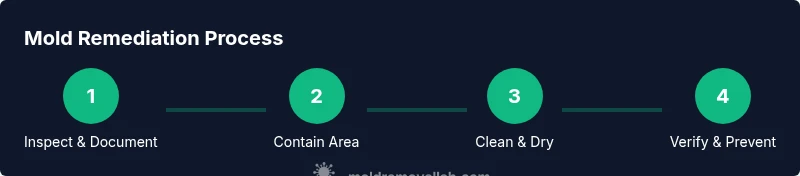
- 1
Inspect and Document Moisture Sources
Begin with a careful inspection of all likely moisture sources—roof, plumbing, windows, and exterior sealants. Document findings with photos and notes; measure humidity when you can. Identifying root causes helps you prevent recurrence after cleanup.
Tip: Take timestamped photos and label them by location to guide repairs later. - 2
Contain the Work Area
Seal doors and vents with plastic sheeting to prevent spores from spreading. Set up an exhaust or fan to move air outside, keeping the space as isolated as possible. Containment reduces secondary contamination during cleanup.
Tip: Avoid creating a pressurized area that blows air into clean spaces. - 3
Remove Standing Water and Wet Materials
If you find soggy materials, carefully remove them and bag them for disposal. Wet drywall, insulation, or carpet often requires removal rather than cleaning to prevent hidden mold growth.
Tip: Do not force dry or tear out large areas without stabilizing the area first. - 4
Clean and Disinfect Surfaces
Clean non-porous surfaces with a detergent solution; rinse and dry thoroughly. Porous materials that are mold-damaged beyond surface contamination should be discarded with proper sealing and disposal.
Tip: Always rinse after cleaning to remove residue that could harbor new growth. - 5
Dry the Space Thoroughly
Use dehumidifiers and fans to drive down humidity and dry the area completely. Mold needs moisture to return, so rapid drying is critical after cleaning.
Tip: Aim for humidity levels below 50% where practical. - 6
Verify Cleanup and Set Prevention
Re-check for residual dampness, reseal surfaces if appropriate, and establish ongoing moisture controls (ventilation, quick repairs, and regular checks). Consider a follow-up assessment if the area remains damp or shows new mold signs.
Tip: Schedule a recheck after a rain event or seasonal changes.
FAQ
What causes mold in homes?
Mold growth is driven by moisture from leaks, condensation, or high humidity. Without moisture, mold cannot sustain itself. Addressing the moisture source is the most effective long-term solution.
Mold grows where there’s moisture, so fix leaks and control humidity to prevent it.
Can bleach kill mold on all surfaces?
Bleach is effective on non-porous surfaces but does not reach into porous materials where mold roots may exist. Use milder cleaners on porous surfaces and remove damaged material as needed.
Bleach works on hard, non-porous surfaces but isn’t a cure-all for porous materials.
Is mold dangerous to health?
Some people are more sensitive to mold and may experience allergies, asthma symptoms, or respiratory irritation. Long-term exposure in poorly ventilated spaces can exacerbate health issues.
Mold can affect health, especially for sensitive individuals; improve ventilation and cleanliness.
How long does remediation take?
Time varies by area size, moisture level, and material damaged. Simple cases can be completed in a day; extensive damage may take several days and require professional remediation.
It depends on how big the space is and how damaged it is, but it can take a day or several days for larger jobs.
Should I remove carpet mold myself?
If carpet is wet and moldy, it is often best to remove and dispose of it, as mold roots can penetrate the fibers. If you’re unsure, consult a pro for safe disposal.
Moldy carpet is usually a job for removal and replacement to prevent lingering spores.
Do I need testing after cleanup?
Post-cleanup testing is not always necessary for small, well-contained jobs. Consider testing if there was extensive contamination, persistent symptoms, or if you want formal confirmation of clearance.
Testing helps confirm cleanup, especially after big jobs or if symptoms persist.
The Essentials
- Identify moisture sources before cleaning
- Wear proper PPE and contain the area
- Clean and dry surfaces thoroughly
- Remove heavily damaged porous materials when needed
- Prevent mold return with moisture controls and regular checks